The following are recaptured posts from Google cache after our site was “lost” on or about June 1, 2011. I apologize if I did not fully restore them into original appearance, but I’m cursed with limited computer knowledge and didn’t want to spend multiple hours trying to make this picture perfect. However, all content is here. I also did not check all “links” since they may also be missing if they were NJRC posts that were posted during the past year. I’m also going to guess at the ”break” points for the original nine pages that were in this thread, and repost nine pages of original posts.
Title: Inherited 90
Post by: redfishbluefish on November 29, 2010, 02:51:48 PM
I’m actually picking up this “Tale” that I inherited at the end of last year. I felt it needed its own tale and here it is. Without getting into details, over the past 11 months I stabilizing the parameters, upgraded the lights, added new equipment, and added more rock, corals and fish. The short list of what still needs to be done are:
1. Build cabinet for left side of tank.
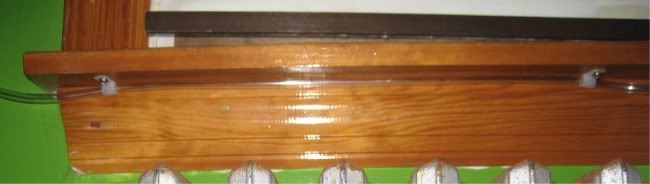
2. Build canopy.
3. Finish base cabinet with molding
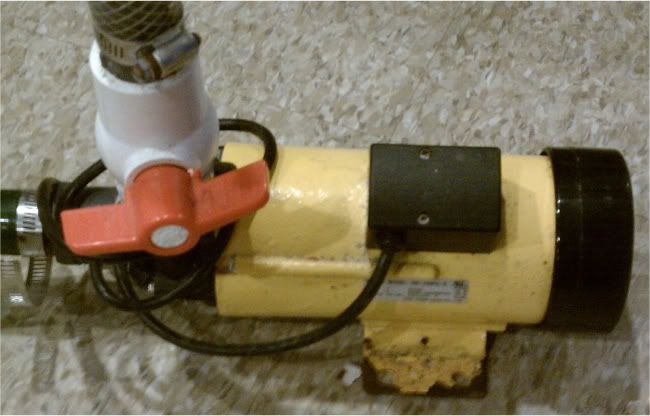
4. Install external pump for skimmer
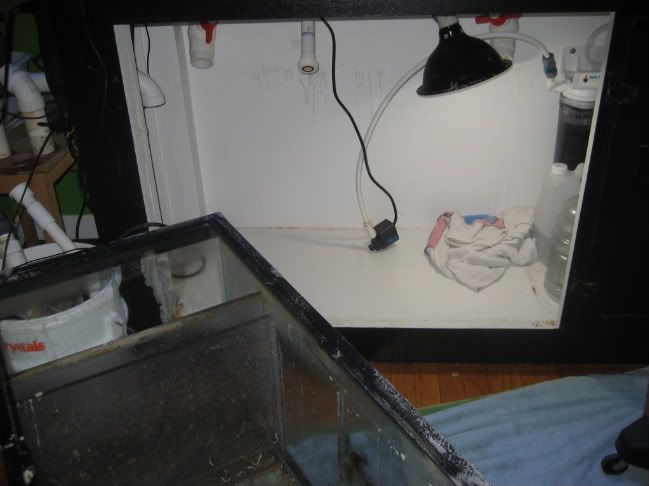
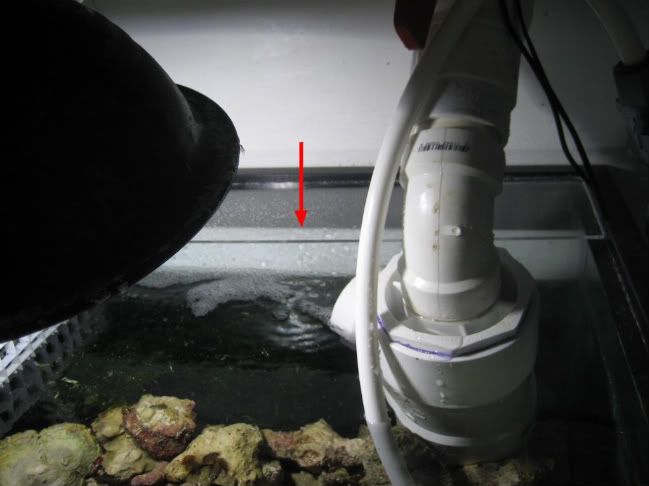
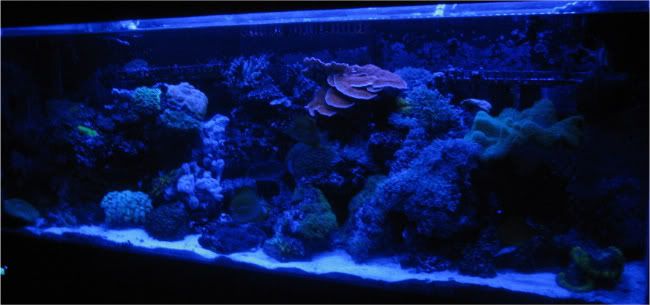
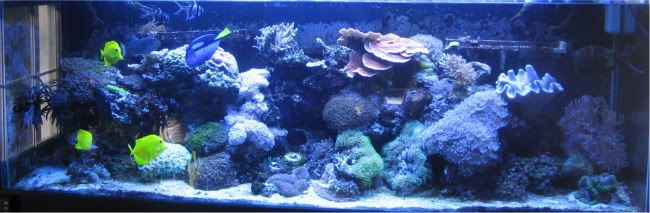
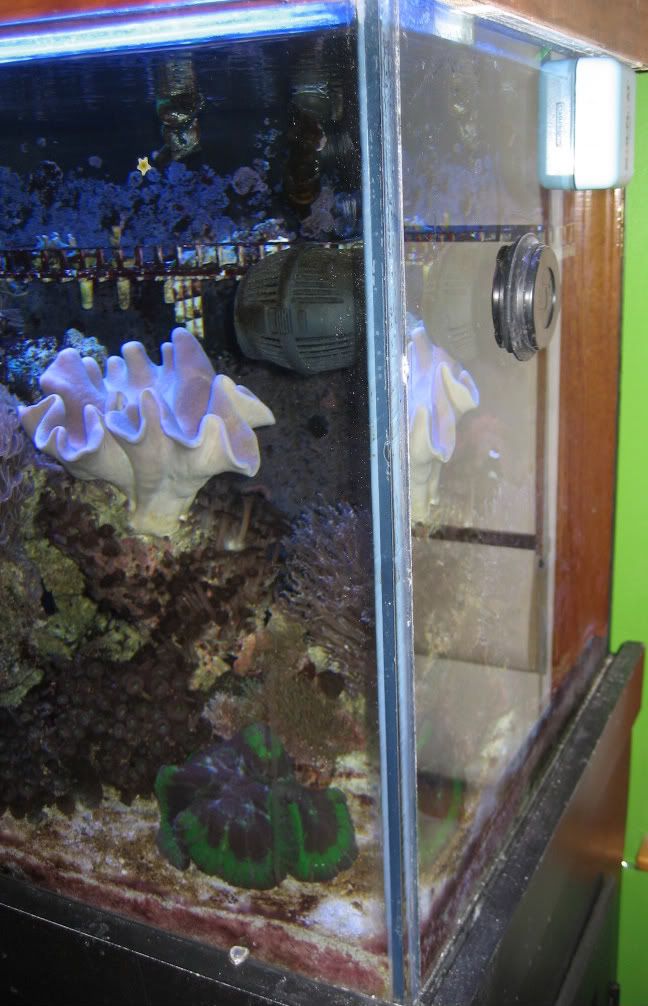
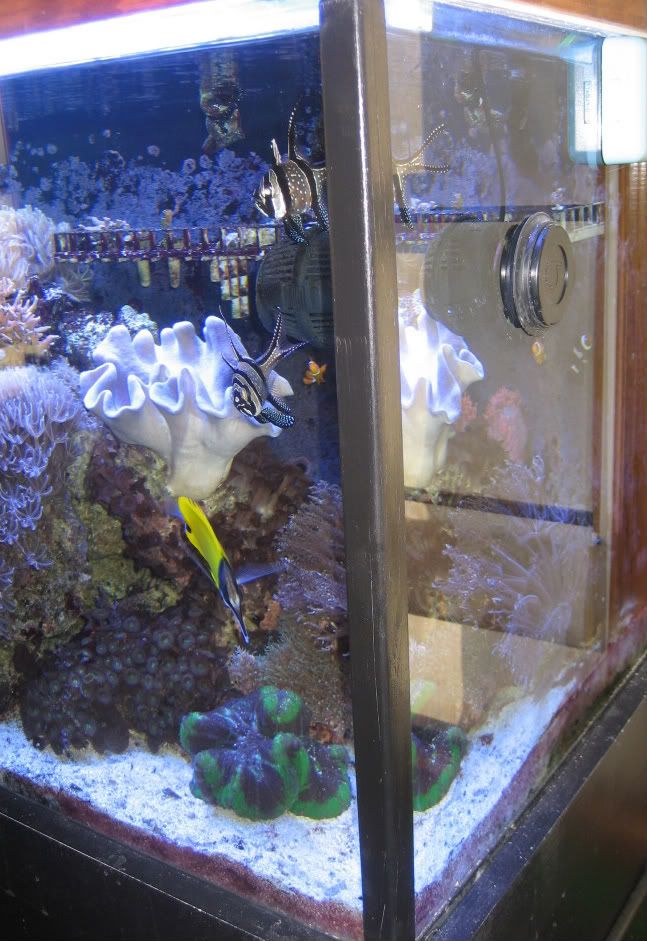
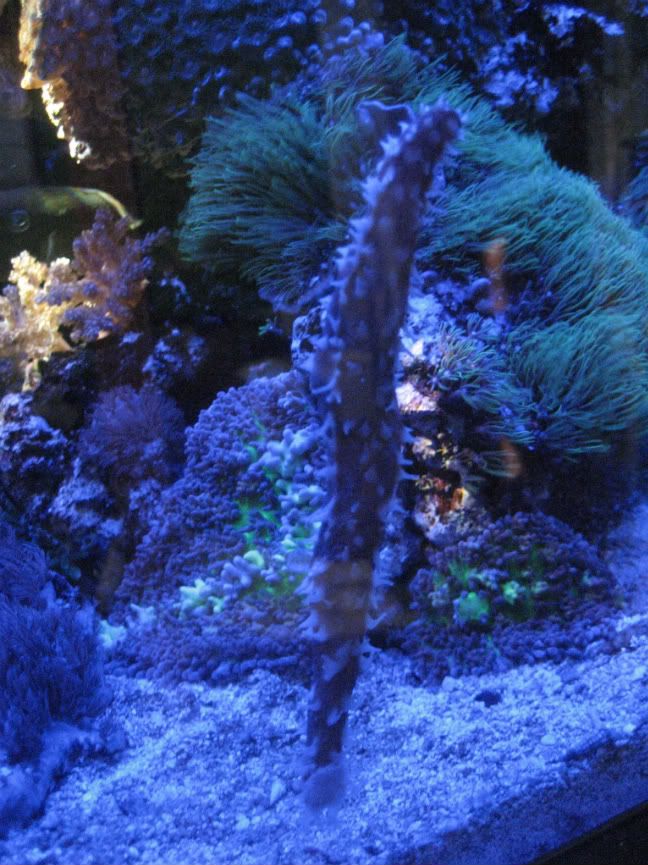
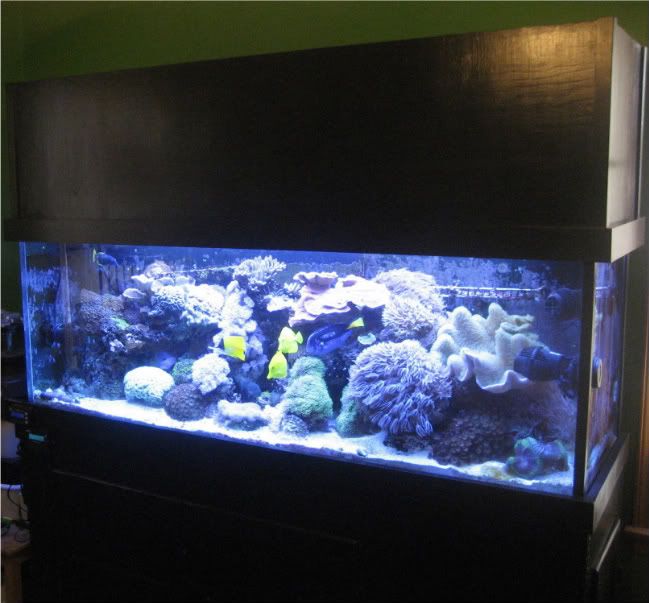
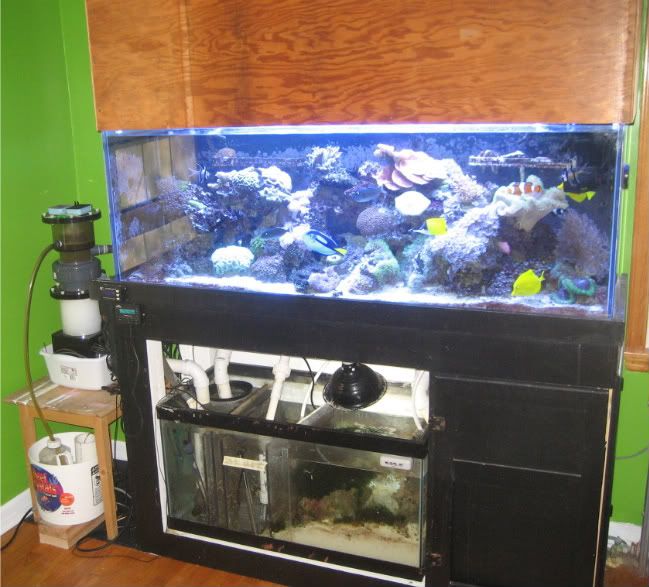
Here is a current picture showing the temporary canopy to keep the fish from carpet surfing. Oh, and it is a five foot, 90 gallon tank, with a 40 breeder sump. Six T5 ATI lamps driven by IceCap 660 and 430 ballasts, with two IceCap blue LED moonlights. Skimmer is an MRC 3 with a MAG 24 pump and the return pump is a MAG 9.5. Two 300 watt heaters and a BRS duel reactor for carbon and gfo. Glass holes overflow with a filter sock in the left drain only, to keep crap out of the skimmer beckett. All is controlled with a ReefKeeper 2 and ReefKeeper Lite.
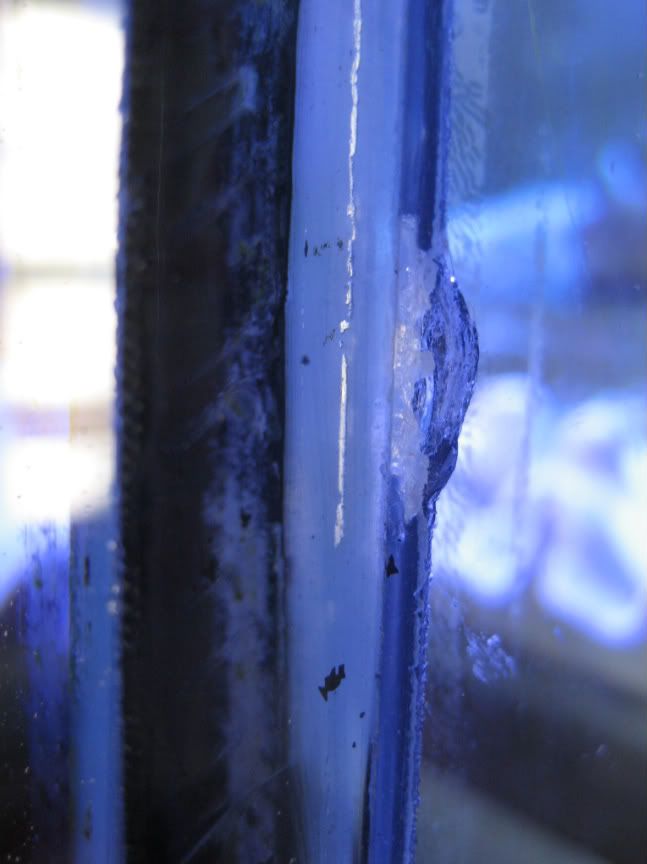
Before I can get to the above to-do list, the sump developed a problem that I posted HERE . Simply put, the baffle walls were failing because of a poor silicone job.
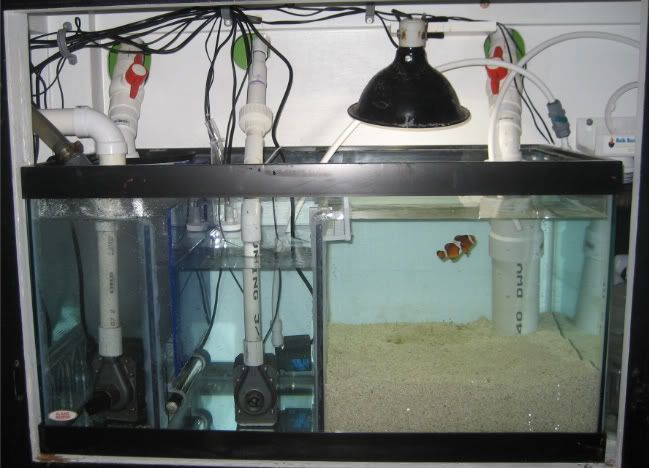
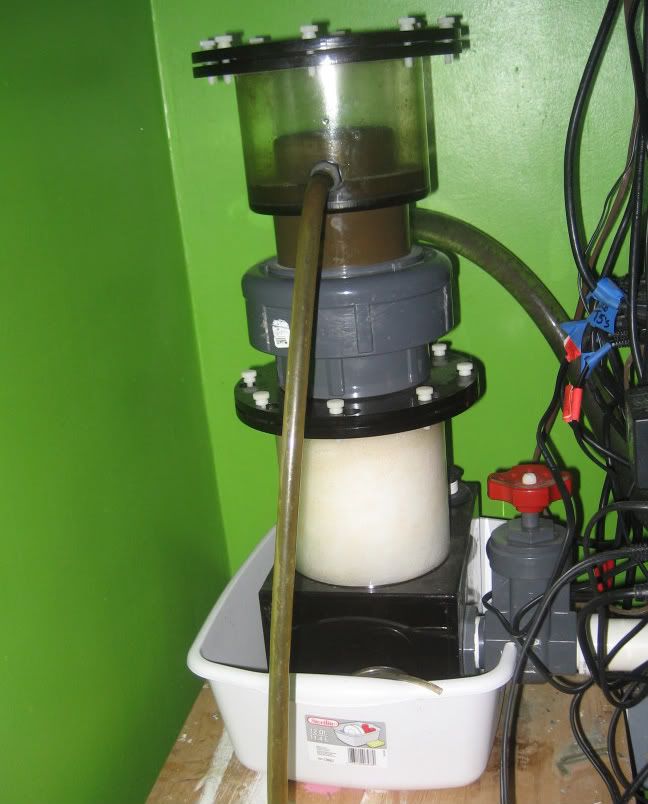
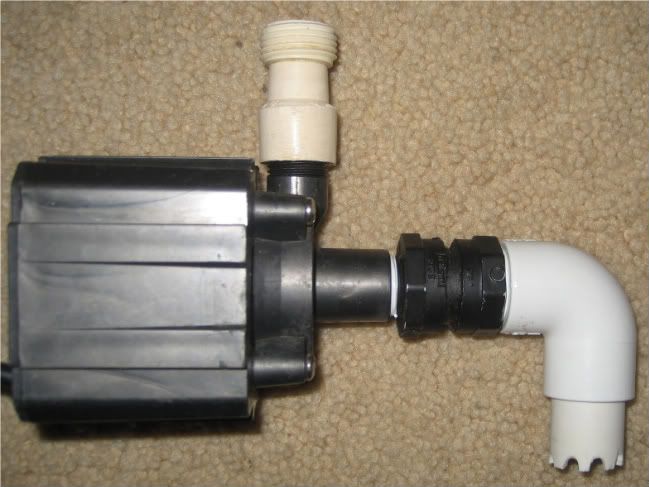
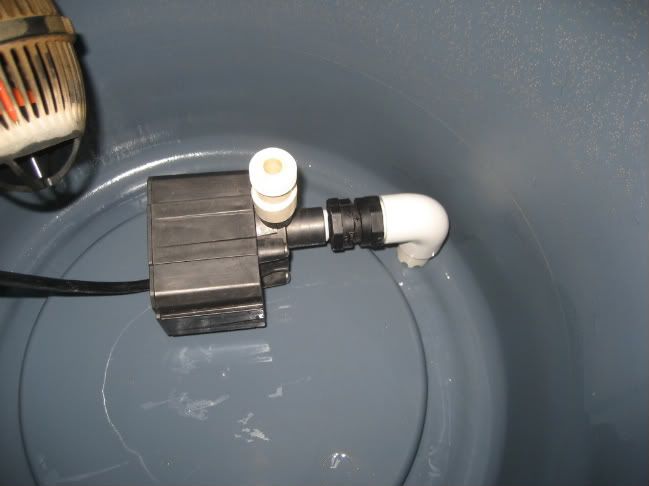
So the beginning of this tale will be the building of a new sump....a new 40 breeder with improvements. I’m going to break here to get the pictures together, but here is a current mug-shoot of the sump:
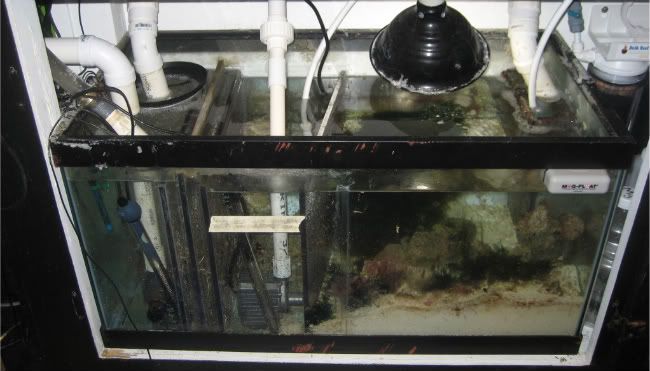
LEFT SIDE – Filter sock (just resting on a baffle), skimmer pump and return line.
MIDDLE – Return section with MAG 9.5
RIGHT SIDE – Refugium with deep sand bed, some rock and cheato.
Title: Re: Inherited 90
Reply # 1 Post by: JRWOHLER on November 29, 2010, 03:55:02 PM
Is the tank still sharing the room with John?
Looks good, but sounds like you have a lot of work ahead, I am sure you will plan things because it sounds a bit tricky unless you break it down and then build it back up.
Title: Re: Inherited 90
Reply # 2 Post by: redfishbluefish on November 29, 2010, 04:04:18 PM
Quote from: JRWOHLER on November 29, 2010, 03:55:02 PM
Jon is in Rhode Island playing house.
Title: Re: Inherited 90
Reply # 3 Post by: MadReefer on November 29, 2010, 04:40:52 PM
Paul,
What about that nice tall tank you showed me sitting empty.... :") ;D
;D
Title: Re: Inherited 90
Reply # 4 Post by: redfishbluefish on November 29, 2010, 08:26:42 PM
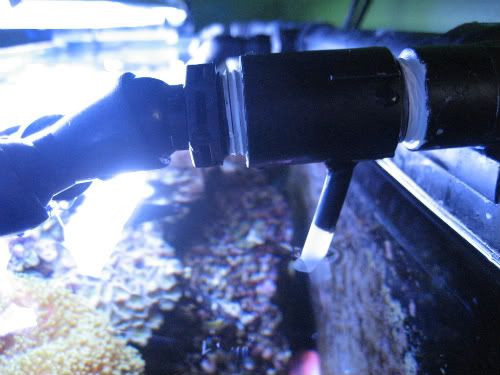
First on the list was drilling a hole for the bulkhead for the skimmer pump. A drill bit and bulkhead were ordered from glass-holes.com…..and of course a little candy came along with the order….love that company. Second was to determine if the glass was tempered. This was especially true since I found a label in the bottom of the tank that read, “WARNING: Do Not Drill Glass Enclosure.” Luckily Sid (The Codfather) had posted a method of checking if the tank was tempered HERE. However, I was still bothered by this method since I was not able to see a “positive” result for tempered glass. All five sides of the tank showed them to be non-tempered. I was under the assumption that the bottom glass was typically tempered. But again, the Sid test showed it wasn’t.
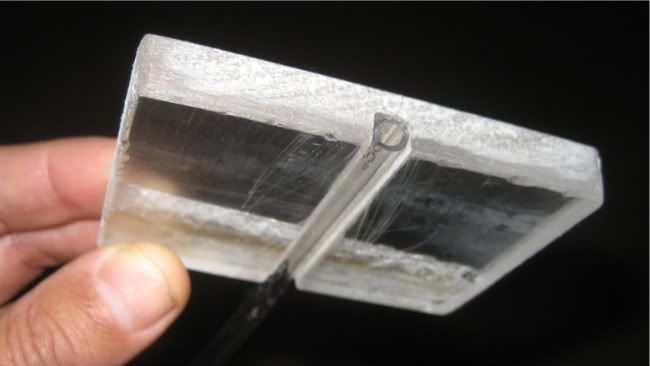
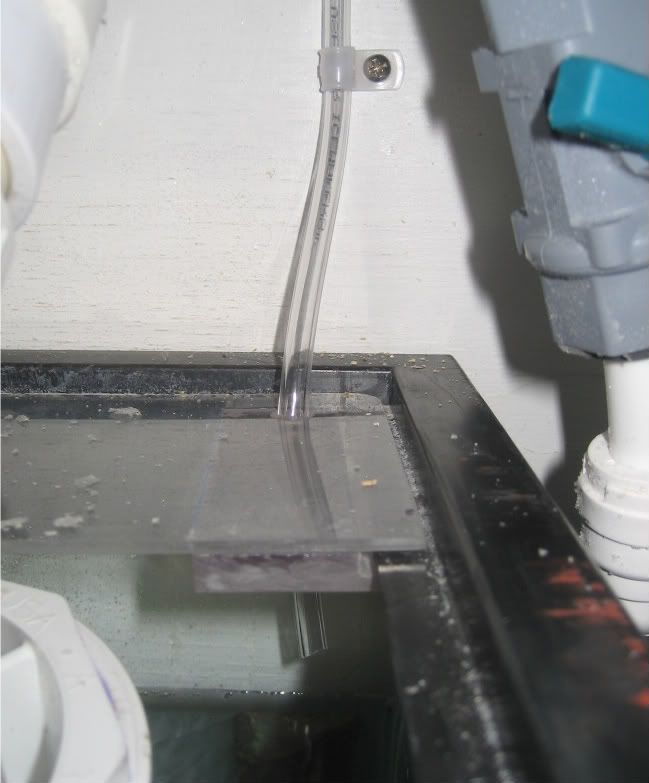
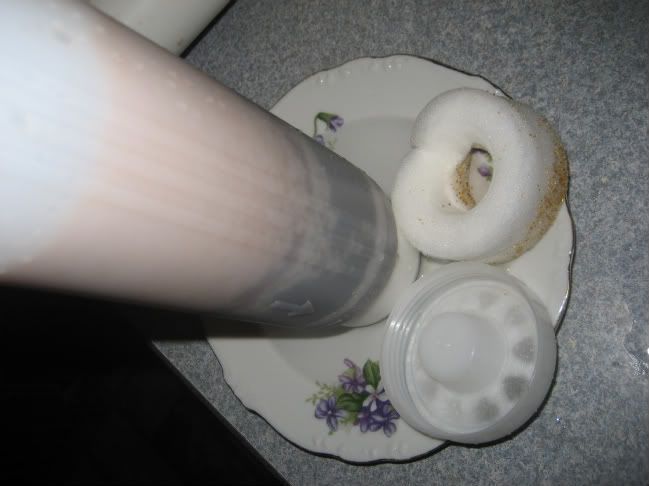
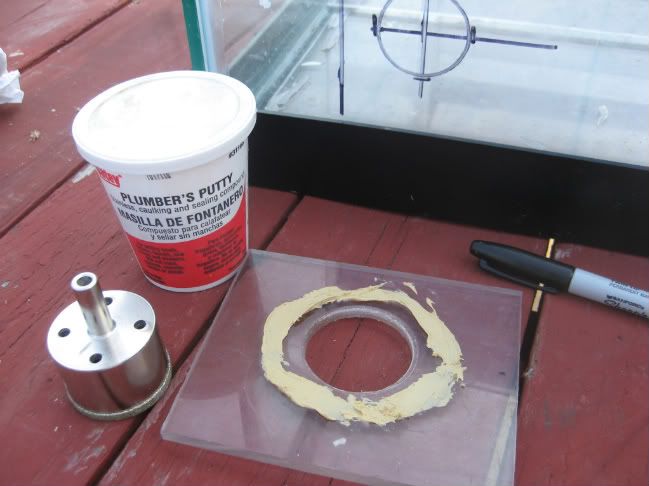
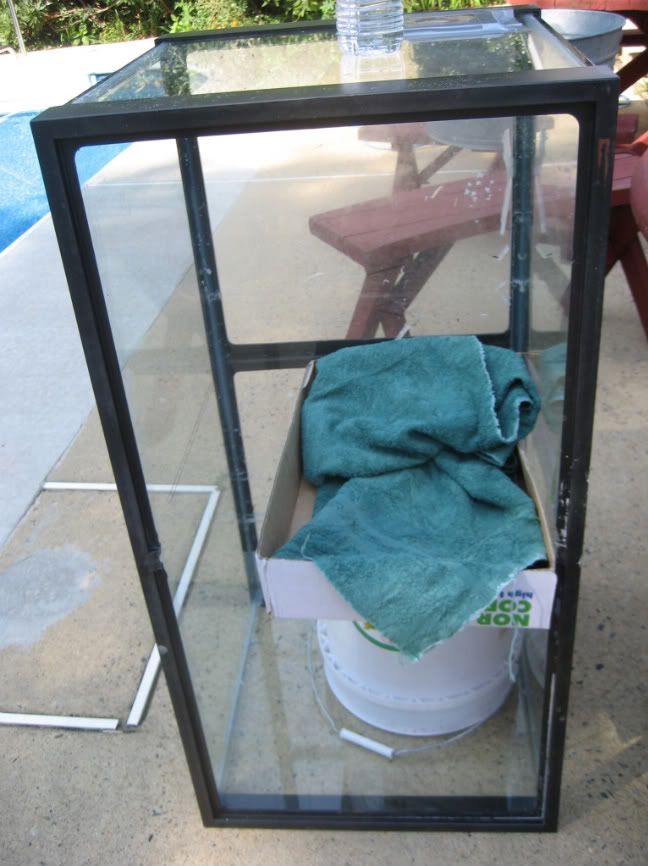
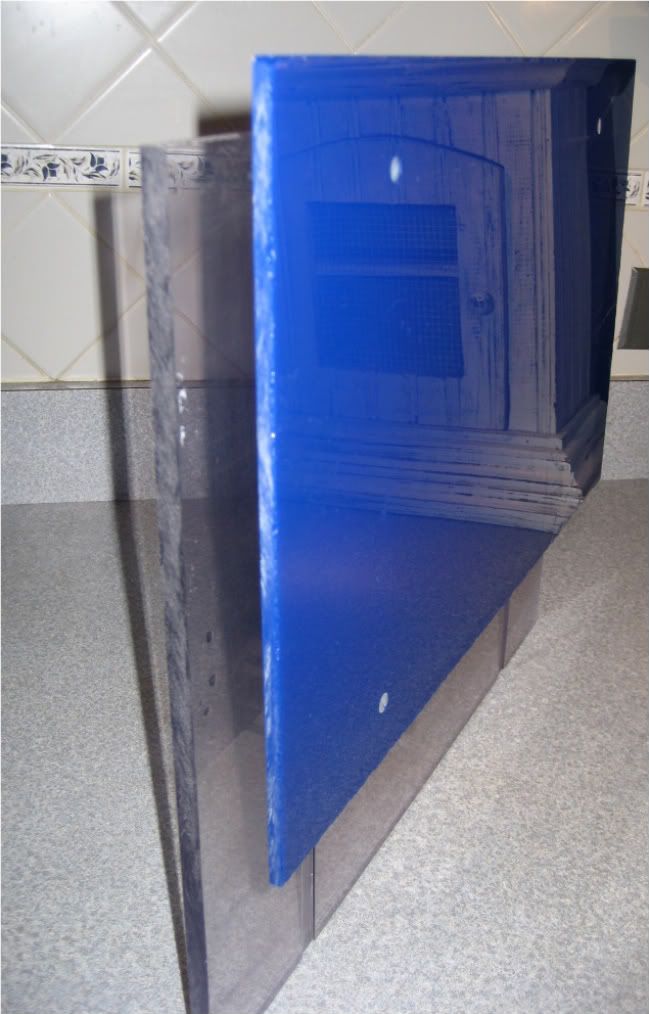
The package from glass-holes arrived and my wife enjoyed the candy while I proceeded to drill the tank. But, before I drilled, I made a jig out of Plexiglas that was the size of the drill bit to help stabilize the drilling operation as well as act as a reservoir for the water to keep the bit cool. Here’s a picture of the jig with a little plumber’s putty on it to help make a water seal.
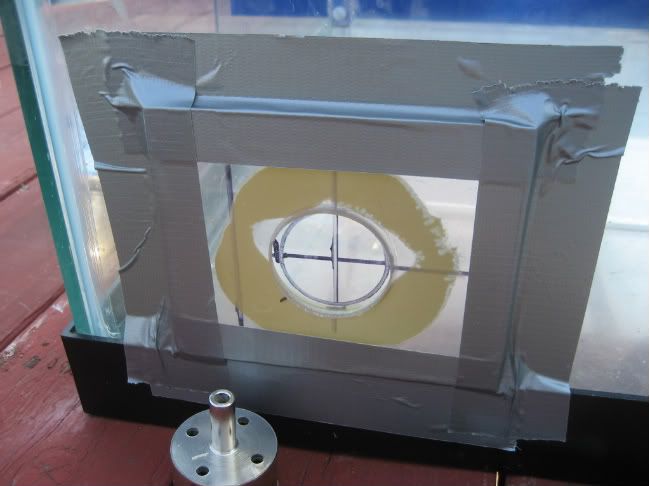
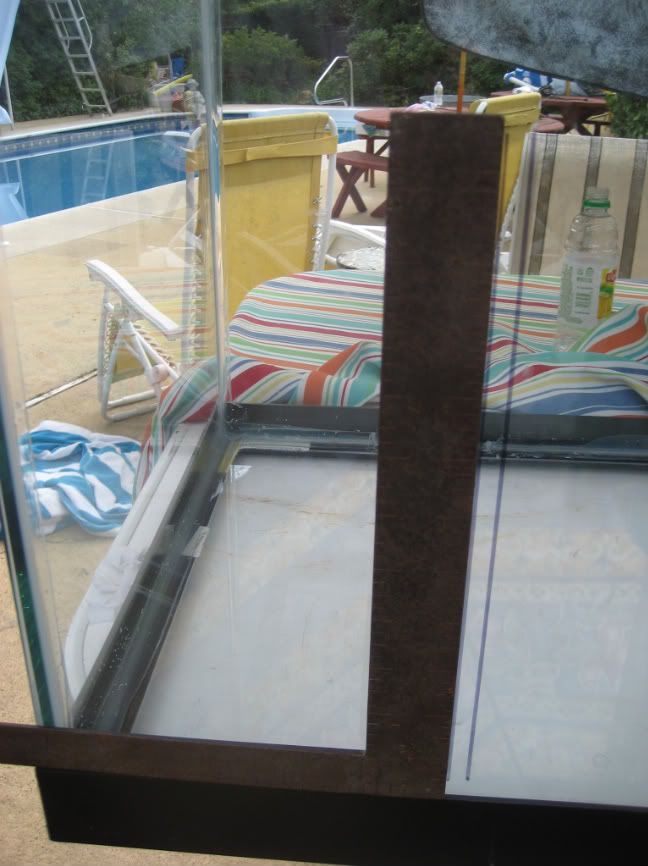
The jig was positioned and taped to the tank.
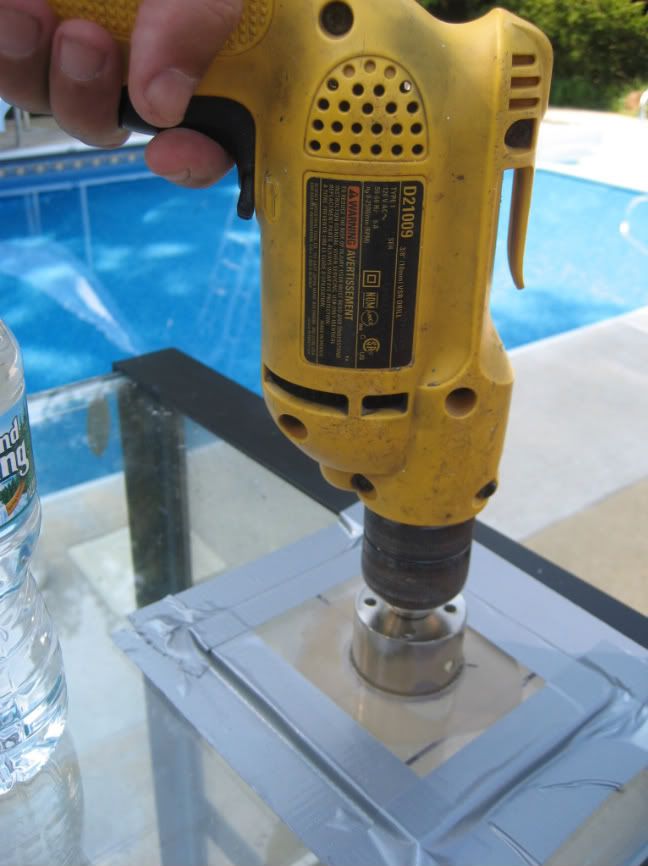
The tank was put up on end and the drilling began….slow and easy…with water in the jig to keep things cool.
And eventually you get a hole.
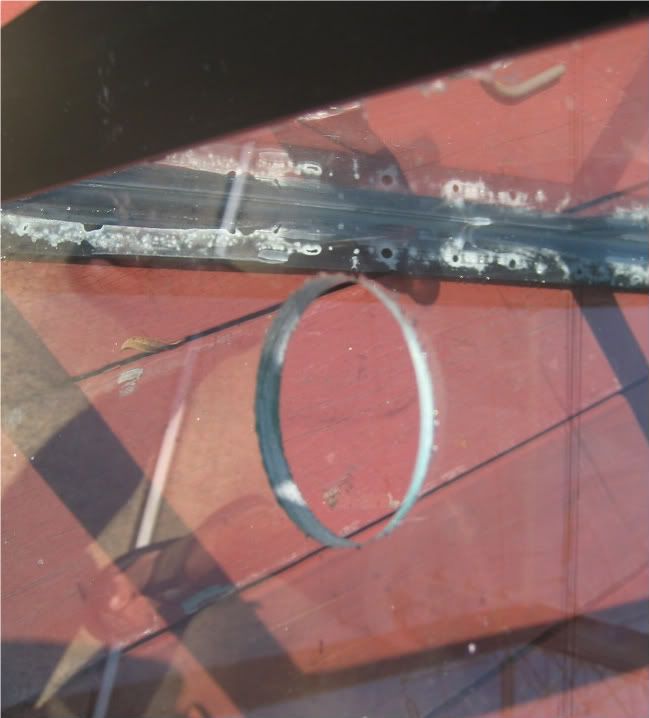
Don’t forget to put something down to catch the glass hole. Hate to cut the hole and have it fall and break the glass on the opposing wall.
Title: Re: Inherited 90
Reply # 5 Post by: JRWOHLER on November 30, 2010, 10:16:40 AM
I cannot believe you did this recently your pool is too clean.
Title: Re: Inherited 90
Reply # 6 Post by: redfishbluefish on November 30, 2010, 10:53:50 AM
Quote from: JRWOHLER on November 30, 2010, 10:16:40 AM
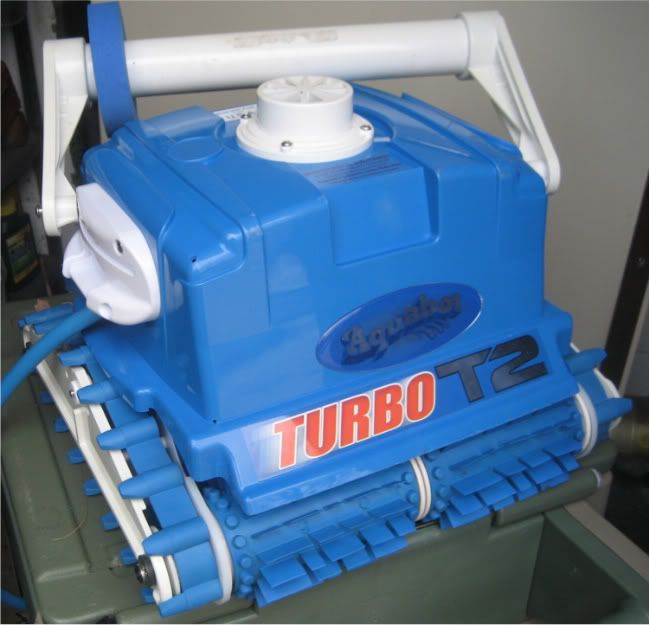
James, you can thank my pool boy……….….his name is Aqua Bot. ;D
Actually this was started a couple months ago, but LIFE kept on getting in the way. I’m just finishing it up, and I'm actually in the process of heating the 50 gallons of water.....another day maybe.
I’m hoping starting this Tale will give me the impetus to finally finishing this thing.
Title: Re: Inherited 90
Reply # 7 Post by: redfishbluefish on November 30, 2010, 11:19:20 AM
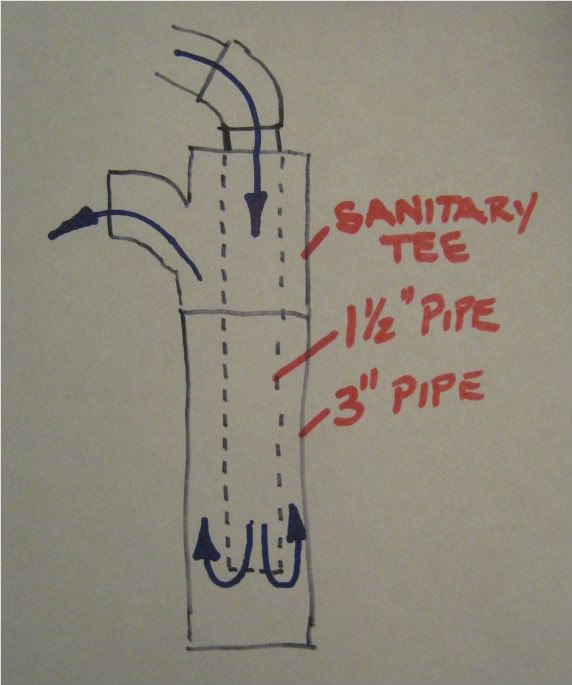
BAFFLES
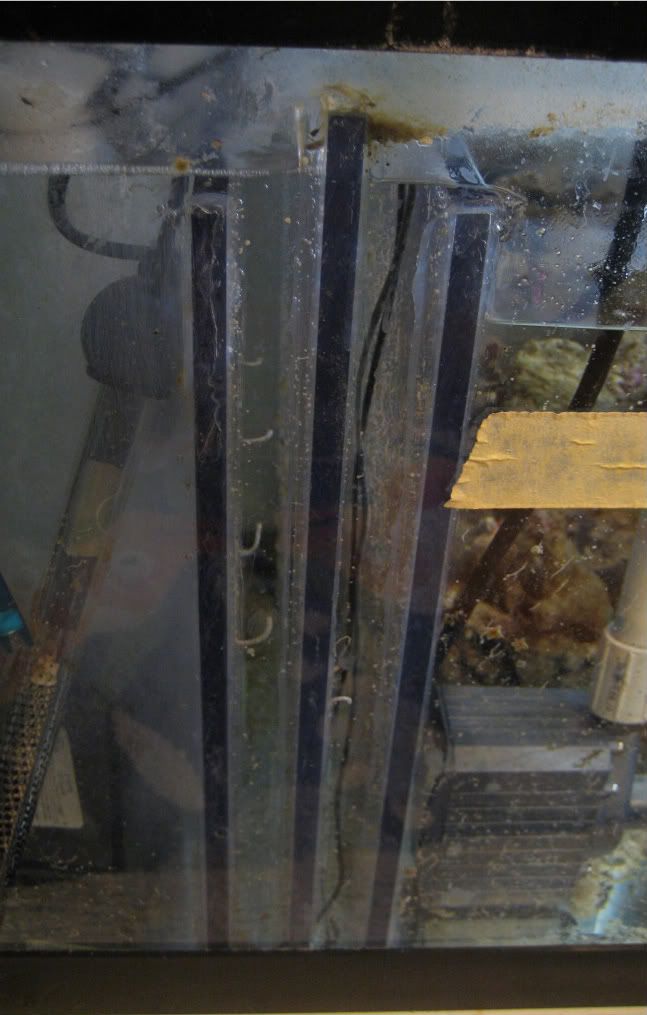
size=11pt]Next came the baffles. The original sump was “textbook,” with the three-baffle bubble trap. WHAT A JOKE. I never saw a bubble go more than an inch or so down into the trap…on just one side. This is engineering over-design to the nth degree. Here’s the current three-baffle bubble trap:
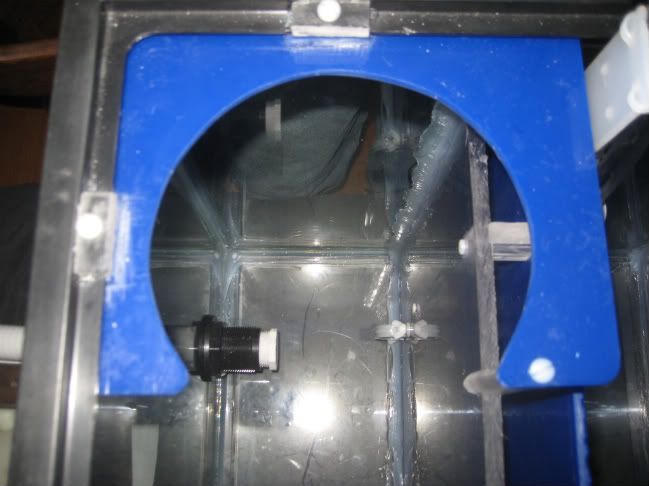
I went with a two baffle bubble trap with the second baffle made of ¼ inch (blue) acrylic and tapped and screwed with nylon machine bolts to the supporting 3/8 inch baffle. It did require making little stand-off blocks out of ½ inch acrylic.
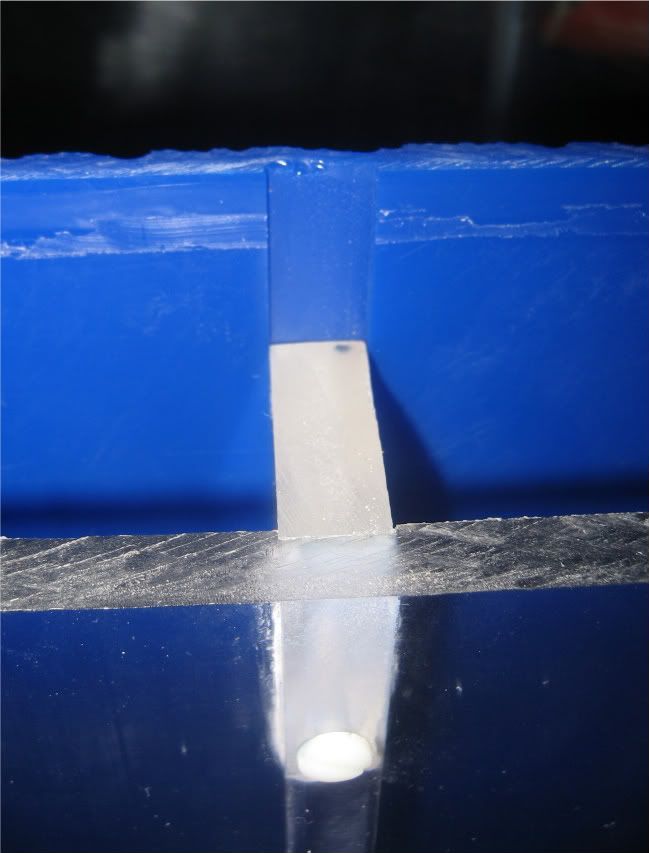
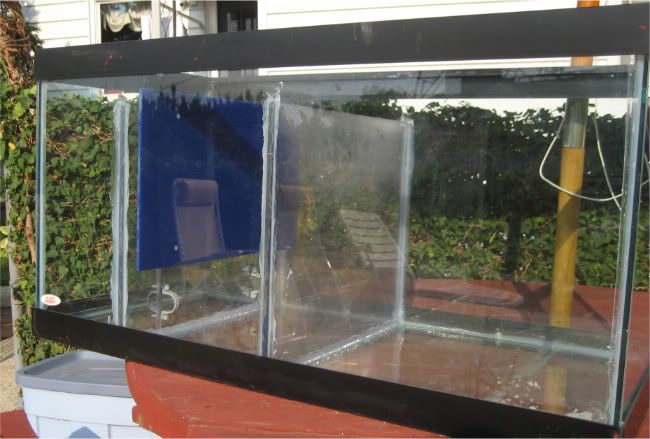
And here is the bubble trap baffle set-up. The intent is to silicone the 3/8 baffle only….the clear one. The bubble trap baffle (blue one) will just be screwed to the clear baffle.
Lay-out lines were drawn on the outside of the tank using a builder’s square and black sharpie. By putting these on the outside, they are easily removed by wiping with a little isopropyl alcohol.
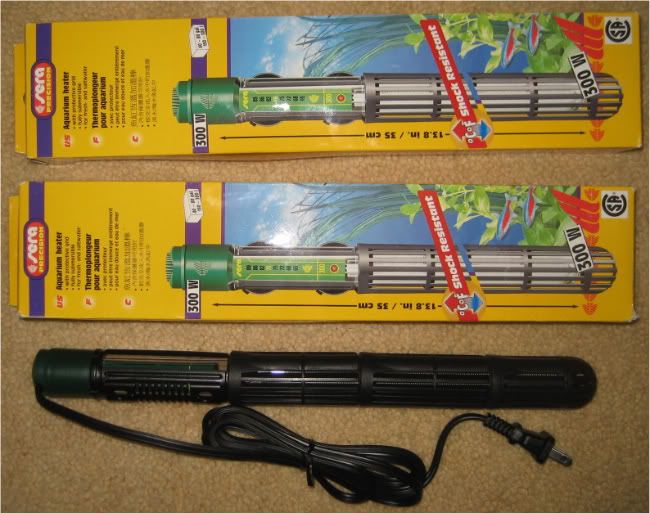
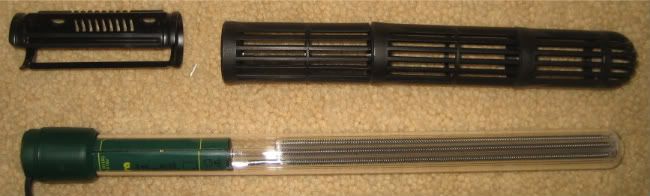
Before installing the baffles, holes were drilled in the one baffle to accept conduit clamps that will be used to hold the 300 watt heaters. The current setup just has the heater thrown into the two sections of the sump. One heater will be in the left section, the other in the middle section.
Baffles were installed in the tank. This time a lot of silicone was used to make sure these stay in place.
 [/size]
Title: Re: Inherited 90
Reply # 8 Post by: redfishbluefish on November 30, 2010, 12:02:51 PM
ADD – ONS
With the basic sump done, now time for the add-ons that the other tank did not have.
FILTER SOCK
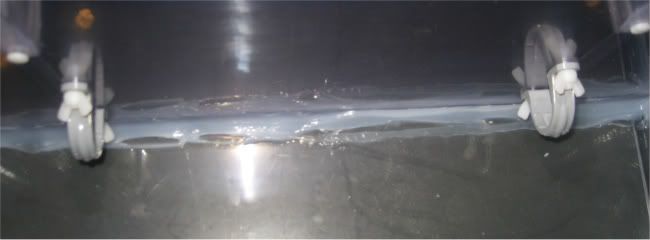
The filter sock in the original tank simply rested on the one baffle. A holder was made that was attached to the upper frame of the tank with nylon machine bolts. A spacer was installed between the holder and the frame to allow water to flow back into the tank if and when the sock overflowed.
BUBBLE GUARD
If you look at the above picture, it was cause for a potential problem that was unforeseen in the original planning. Water entering the sock from the DT was directly above the pick-up for the skimmer. Skimmers with becketts do not work if they are sucking in bubbles. So a bubble guard was made to keep bubbles from entering the skimmer pick-up. When I finished the one supporting bracket, I brought it upstairs and asked my wife, who grow up in northwest Pennsylvania, what she thought it was. Without hesitation she said the Nicholson Bridge. Now I know I lost everyone with this one, so let me show you what I’m talking about using pictures.
The support bracket:
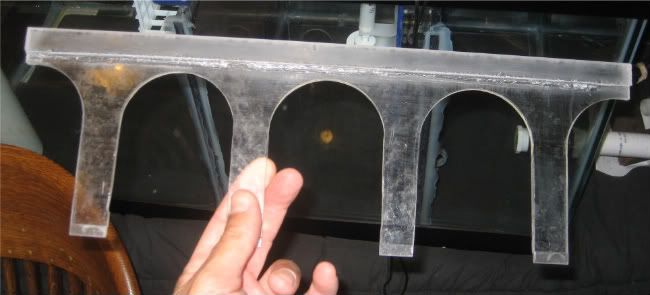
The Nicholson Bridge:

The skimmer bubble guard was installed by using cyanoacrylate glue to glue the bracket to the side of the tank. The other side is simply a piece of ½ acrylic that uses the screws from the baffle connections. The top “guard” just rests on the two supports so that it can easily be removed for maintenance.
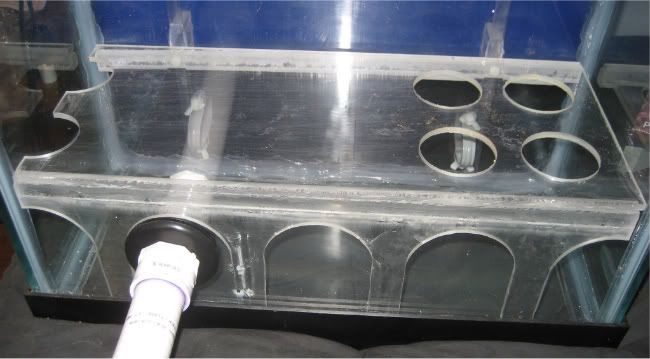
FISH GUARD and PH PROBE HOLDER
To the baffle for the refugium, a fish guard was made by first making small brackets. The brackets would hold egg crate and keep the fish in the refugium has well as any rouge cheato.
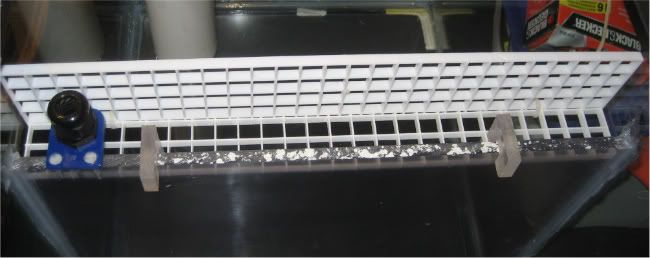
From the above picture, you can see a probe bulkhead to the left. This was installed to securely hold the pH probe. I already lost one probe by it falling below the waterline. With this bulkhead, it wasn’t going anywhere.
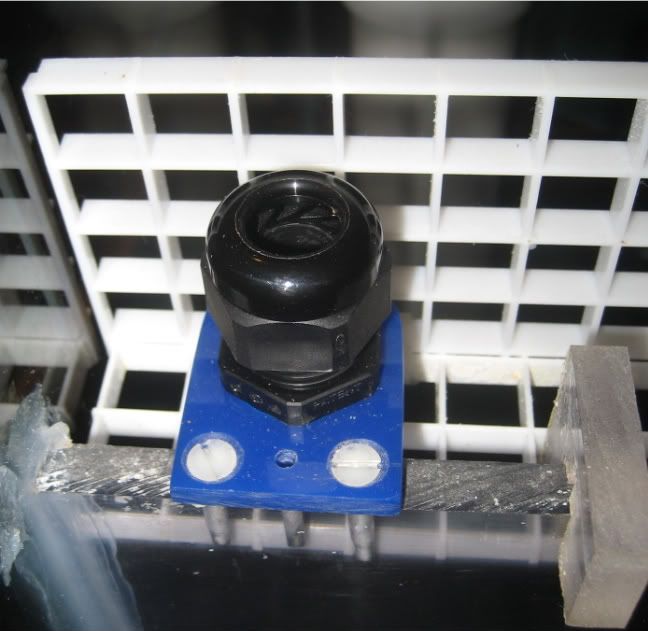
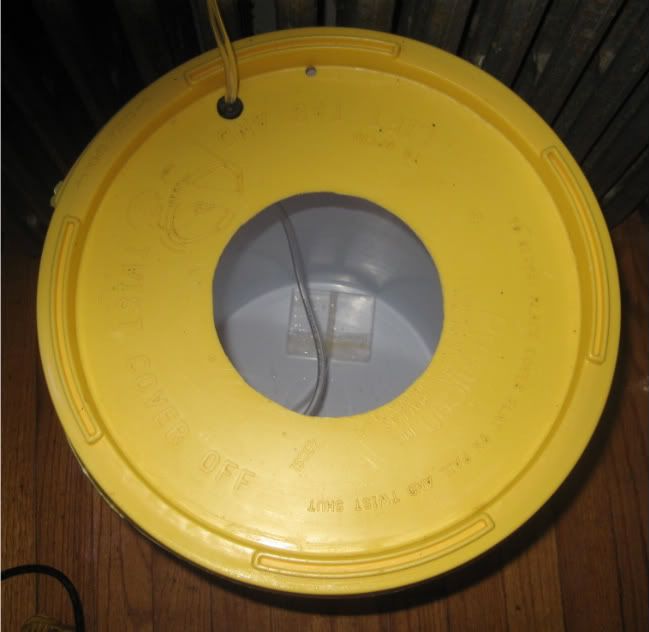
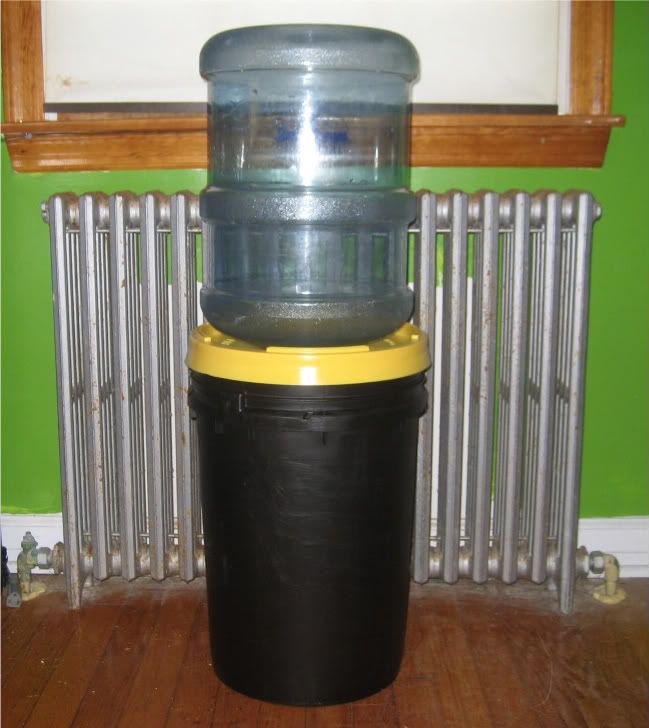
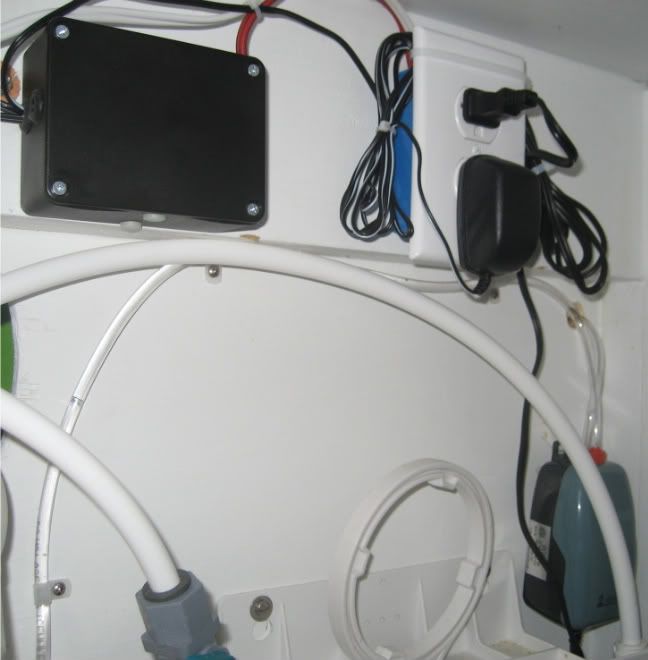
AUTOMATIC TOP OFF
And finally, an Aquahub ATO was installed by tapping and screwing it to the bubble trap baffle. I did a DIY post that can be found HERE if you wish to see the detail.
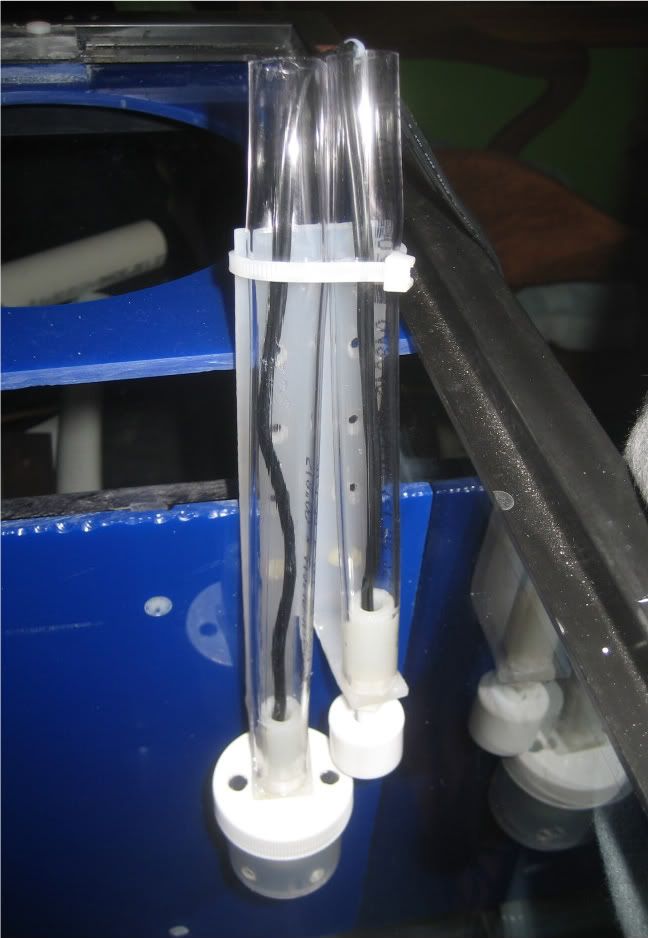
And that’s it…one finished sump. Now waiting for the 50 gallons of fresh saltwater to get up to temperature and then I’m popping this puppy in.
Title: Re: Inherited 90
Reply # 9 Post by: Jcurry on November 30, 2010, 12:44:03 PM
The sump looks good Paul. I've always refered to the "Nicolson Bridge" as the DL&W's Tunkhannock Viaduct. Some day I'll actually get up there and walk it.
Title: Inherited 90
Post by: redfishbluefish on November 29, 2010, 02:51:48 PM
I’m actually picking up this “Tale” that I inherited at the end of last year. I felt it needed its own tale and here it is. Without getting into details, over the past 11 months I stabilizing the parameters, upgraded the lights, added new equipment, and added more rock, corals and fish. The short list of what still needs to be done are:
1. Build cabinet for left side of tank.
2. Build canopy.
3. Finish base cabinet with molding
4. Install external pump for skimmer
Here is a current picture showing the temporary canopy to keep the fish from carpet surfing. Oh, and it is a five foot, 90 gallon tank, with a 40 breeder sump. Six T5 ATI lamps driven by IceCap 660 and 430 ballasts, with two IceCap blue LED moonlights. Skimmer is an MRC 3 with a MAG 24 pump and the return pump is a MAG 9.5. Two 300 watt heaters and a BRS duel reactor for carbon and gfo. Glass holes overflow with a filter sock in the left drain only, to keep crap out of the skimmer beckett. All is controlled with a ReefKeeper 2 and ReefKeeper Lite.
Before I can get to the above to-do list, the sump developed a problem that I posted HERE . Simply put, the baffle walls were failing because of a poor silicone job.
So the beginning of this tale will be the building of a new sump....a new 40 breeder with improvements. I’m going to break here to get the pictures together, but here is a current mug-shoot of the sump:
LEFT SIDE – Filter sock (just resting on a baffle), skimmer pump and return line.
MIDDLE – Return section with MAG 9.5
RIGHT SIDE – Refugium with deep sand bed, some rock and cheato.
Title: Re: Inherited 90
Reply # 1 Post by: JRWOHLER on November 29, 2010, 03:55:02 PM
Is the tank still sharing the room with John?
Looks good, but sounds like you have a lot of work ahead, I am sure you will plan things because it sounds a bit tricky unless you break it down and then build it back up.
Title: Re: Inherited 90
Reply # 2 Post by: redfishbluefish on November 29, 2010, 04:04:18 PM
Quote from: JRWOHLER on November 29, 2010, 03:55:02 PM
Is the tank still sharing the room with John?
Jon is in Rhode Island playing house.
Title: Re: Inherited 90
Reply # 3 Post by: MadReefer on November 29, 2010, 04:40:52 PM
Paul,
What about that nice tall tank you showed me sitting empty.... :
;DTitle: Re: Inherited 90
Reply # 4 Post by: redfishbluefish on November 29, 2010, 08:26:42 PM
First on the list was drilling a hole for the bulkhead for the skimmer pump. A drill bit and bulkhead were ordered from glass-holes.com…..and of course a little candy came along with the order….love that company. Second was to determine if the glass was tempered. This was especially true since I found a label in the bottom of the tank that read, “WARNING: Do Not Drill Glass Enclosure.” Luckily Sid (The Codfather) had posted a method of checking if the tank was tempered HERE. However, I was still bothered by this method since I was not able to see a “positive” result for tempered glass. All five sides of the tank showed them to be non-tempered. I was under the assumption that the bottom glass was typically tempered. But again, the Sid test showed it wasn’t.
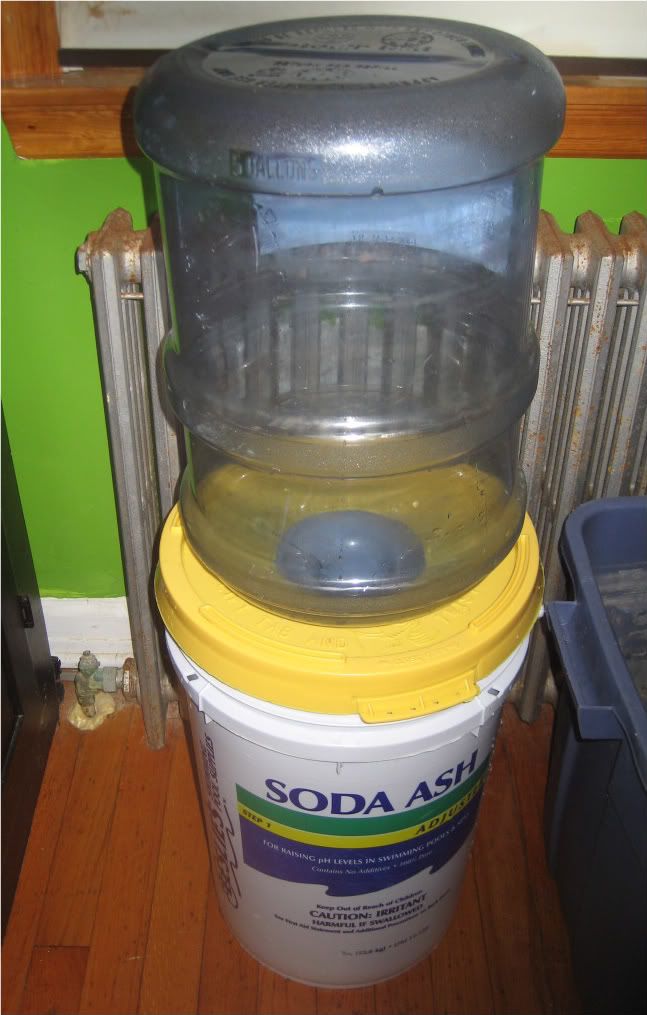
The package from glass-holes arrived and my wife enjoyed the candy while I proceeded to drill the tank. But, before I drilled, I made a jig out of Plexiglas that was the size of the drill bit to help stabilize the drilling operation as well as act as a reservoir for the water to keep the bit cool. Here’s a picture of the jig with a little plumber’s putty on it to help make a water seal.
The jig was positioned and taped to the tank.
The tank was put up on end and the drilling began….slow and easy…with water in the jig to keep things cool.
And eventually you get a hole.
Don’t forget to put something down to catch the glass hole. Hate to cut the hole and have it fall and break the glass on the opposing wall.
Title: Re: Inherited 90
Reply # 5 Post by: JRWOHLER on November 30, 2010, 10:16:40 AM
I cannot believe you did this recently your pool is too clean.
Title: Re: Inherited 90
Reply # 6 Post by: redfishbluefish on November 30, 2010, 10:53:50 AM
Quote from: JRWOHLER on November 30, 2010, 10:16:40 AM
I cannot believe you did this recently your pool is too clean.
James, you can thank my pool boy……….….his name is Aqua Bot. ;D
Actually this was started a couple months ago, but LIFE kept on getting in the way. I’m just finishing it up, and I'm actually in the process of heating the 50 gallons of water.....another day maybe.
I’m hoping starting this Tale will give me the impetus to finally finishing this thing.
Title: Re: Inherited 90
Reply # 7 Post by: redfishbluefish on November 30, 2010, 11:19:20 AM
BAFFLES
size=11pt]Next came the baffles. The original sump was “textbook,” with the three-baffle bubble trap. WHAT A JOKE. I never saw a bubble go more than an inch or so down into the trap…on just one side. This is engineering over-design to the nth degree. Here’s the current three-baffle bubble trap:
I went with a two baffle bubble trap with the second baffle made of ¼ inch (blue) acrylic and tapped and screwed with nylon machine bolts to the supporting 3/8 inch baffle. It did require making little stand-off blocks out of ½ inch acrylic.
And here is the bubble trap baffle set-up. The intent is to silicone the 3/8 baffle only….the clear one. The bubble trap baffle (blue one) will just be screwed to the clear baffle.
Lay-out lines were drawn on the outside of the tank using a builder’s square and black sharpie. By putting these on the outside, they are easily removed by wiping with a little isopropyl alcohol.
Before installing the baffles, holes were drilled in the one baffle to accept conduit clamps that will be used to hold the 300 watt heaters. The current setup just has the heater thrown into the two sections of the sump. One heater will be in the left section, the other in the middle section.
Baffles were installed in the tank. This time a lot of silicone was used to make sure these stay in place.
Title: Re: Inherited 90
Reply # 8 Post by: redfishbluefish on November 30, 2010, 12:02:51 PM
ADD – ONS
With the basic sump done, now time for the add-ons that the other tank did not have.
FILTER SOCK
The filter sock in the original tank simply rested on the one baffle. A holder was made that was attached to the upper frame of the tank with nylon machine bolts. A spacer was installed between the holder and the frame to allow water to flow back into the tank if and when the sock overflowed.
BUBBLE GUARD
If you look at the above picture, it was cause for a potential problem that was unforeseen in the original planning. Water entering the sock from the DT was directly above the pick-up for the skimmer. Skimmers with becketts do not work if they are sucking in bubbles. So a bubble guard was made to keep bubbles from entering the skimmer pick-up. When I finished the one supporting bracket, I brought it upstairs and asked my wife, who grow up in northwest Pennsylvania, what she thought it was. Without hesitation she said the Nicholson Bridge. Now I know I lost everyone with this one, so let me show you what I’m talking about using pictures.
The support bracket:
The Nicholson Bridge:
The skimmer bubble guard was installed by using cyanoacrylate glue to glue the bracket to the side of the tank. The other side is simply a piece of ½ acrylic that uses the screws from the baffle connections. The top “guard” just rests on the two supports so that it can easily be removed for maintenance.
FISH GUARD and PH PROBE HOLDER
To the baffle for the refugium, a fish guard was made by first making small brackets. The brackets would hold egg crate and keep the fish in the refugium has well as any rouge cheato.
From the above picture, you can see a probe bulkhead to the left. This was installed to securely hold the pH probe. I already lost one probe by it falling below the waterline. With this bulkhead, it wasn’t going anywhere.
AUTOMATIC TOP OFF
And finally, an Aquahub ATO was installed by tapping and screwing it to the bubble trap baffle. I did a DIY post that can be found HERE if you wish to see the detail.
And that’s it…one finished sump. Now waiting for the 50 gallons of fresh saltwater to get up to temperature and then I’m popping this puppy in.
Title: Re: Inherited 90
Reply # 9 Post by: Jcurry on November 30, 2010, 12:44:03 PM
The sump looks good Paul. I've always refered to the "Nicolson Bridge" as the DL&W's Tunkhannock Viaduct. Some day I'll actually get up there and walk it.