• Folks, if you've recently upgraded or renewed your annual club membership but it's still not active, please reach out to the BOD or a moderator. The PayPal system has a slight bug which it doesn't allow it to activate the account on it's own.

DIY Nano Cube Stand

redfishbluefish

Officer Emeritus
Officer Emeritus
DIY Nano Stand


I am very happy the way the DIY Nano Cube Canopy came out, I’ve decided to now build a similarly designed stand for the JBJ 28.


There are other reasons I want a new stand as well.

1.) I’m not real happy with the stability, or lack of stability, of the stand. When I use the MAG float to clean the front glass, the whole tank and stand sway back and forth while I push the cleaner back and forth.

2.) When I got this setup a while back, the stand never had the door installed, and therefore I did not get the door hardware. (The door wasn’t installed because the prior owner had the chiller below, and it need air flow to stay cool.)

3.) I don’t like standard height stands….they are too low…..32 inches. I have to bend down to look into the tank. This new build will be approximately 38 ½ inches high.

4.) More storage. They built that current stand to have “style,” with the narrow sides, and floating top…but it grossly limits storage.


The General Plan

First I will cut the top out of ¾ inch plywood. Then frames will be made out of ¾ inch plywood and will be assembled to make the rectangular skeleton. Arced pieces will be cut to form the bellied front, with the doors in both sides. It will be skinned with ¼ inch plywood.

Still up in the air is how the doors will be attached. Similar to the canopy, I’m struggling on how to do this.


Now the Build

First thing was to cut the top. A piece of ¾ inch ply was placed on the top of the tank, and the outline of the tank was traced onto the plywood. This was cut slightly fat, with particular attention to the front arc. This arc will be the template for the other arced ribs on the front of the stand.
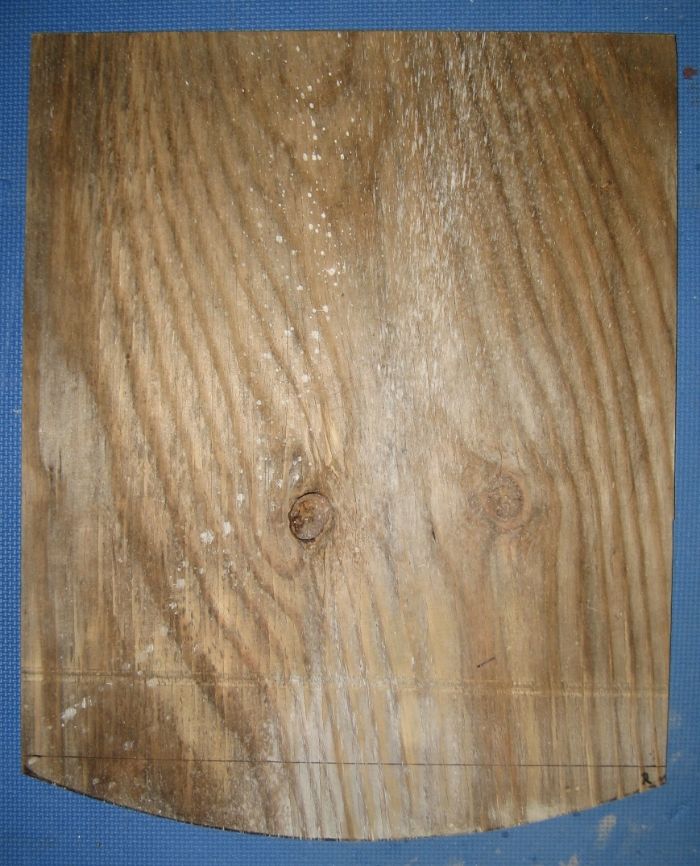

c3a4cba9-475b-4848-8a05-62449dd8bee7_zpsf8cbd33d.jpg


Next the arced ribs where cut to length and then rough cut with the band saw. Three were cut….but a potential fourth might be available. These pieces were individually screwed to the top piece of plywood.
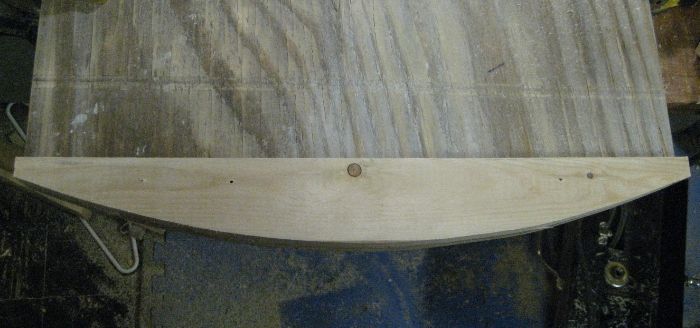

5972ffd7-32b4-46af-a8db-24266d3224c8_zps125df372.jpg


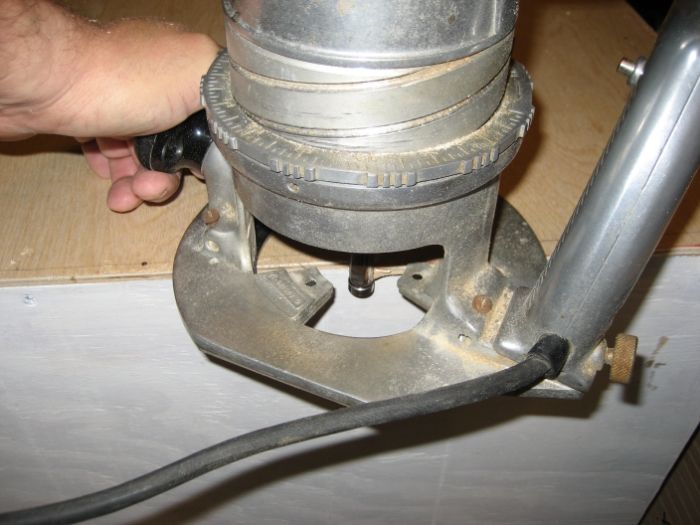
A router was then used with a trim bit (a bit with a roller bearing), to cut each rib to the exact arch of the top. Now the reason for potentially having four of these ribs is that one splintered while routing. I then made another while I glued up the splinted piece, hoping I could finish trimming it tomorrow.
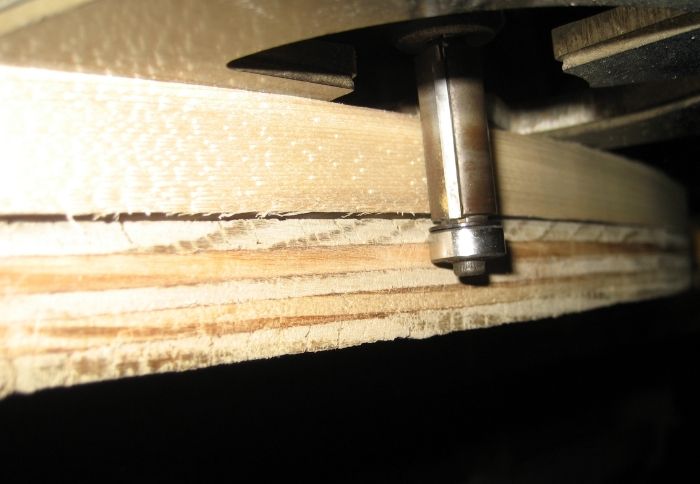

80b6de02-bec4-4fce-8391-45ab6a60136f_zps72efa5ba.jpg


Time for bed…..more tomorrow…..the ¾ ply skeleton.
 

redfishbluefish

Officer Emeritus
Officer Emeritus
Side and Front Frames

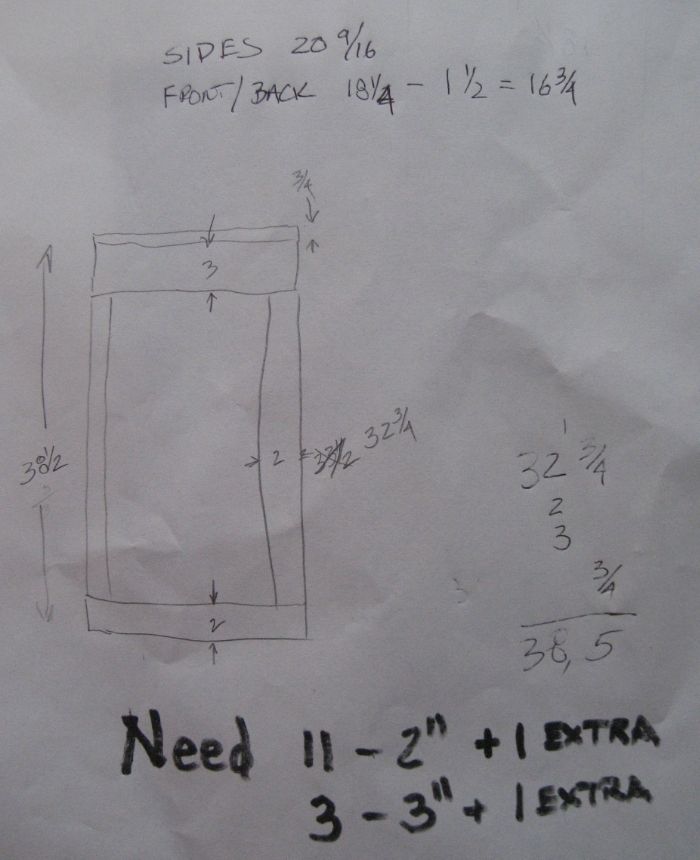
Here’s the rough design and cut diagram for the side and front frames:


b55fc586-629d-4ab9-b543-bce7eb034ee6_zps41593f26.jpg


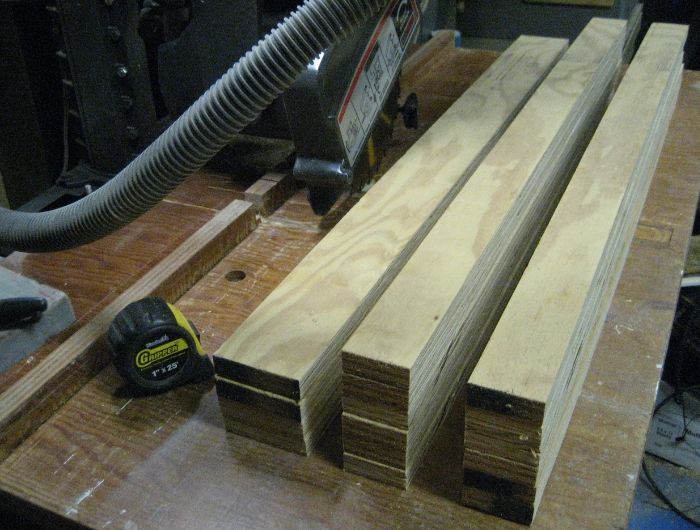
And here are those pieces ripped to proper width:


c723e8a0-09c2-4cc8-8dba-63792a2aebaf_zpscbd2899a.jpg


I also noticed that it’s not truly ¾ ply…..it’s 23/32. So I’ll have to fit the front and back frames….no big deal, I would have done this anyway.


Now for final cuts and assembly for the four frames….but first need to find the pocket hole jig.


I also went to Lowe’s to purchase a sheet of ¼ inch exterior ply, and I wasn’t happy with the apparent quality (the look.) In retrospect, I’m guessing it was C/D grade….looked terrible. However, I did walk down a little further in that isle and found ¼ inch underlayment. It’s also a three ply sheet with a thin veneer on both sides. It’s pretty!
 

redfishbluefish

Officer Emeritus
Officer Emeritus
Assembly of the Skeleton


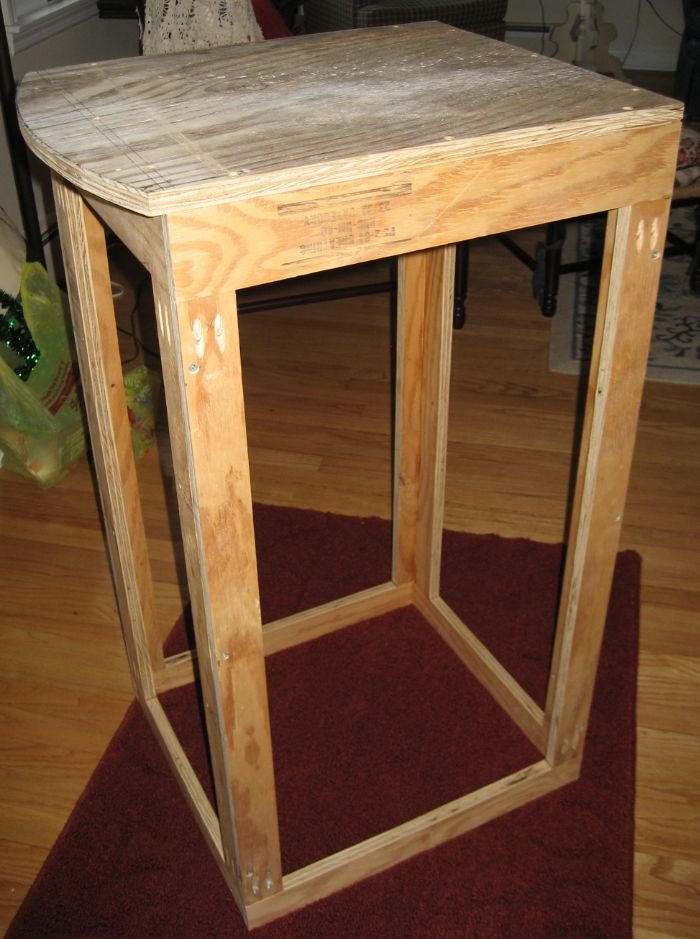
The 2 inch uprights were cut to length and pocket holes were drilled into each end. Top and bottom braces were cut to length and the four frames assembled. The frames were then glued and screwed to the top, and glued and screwed to each other:


8629f08a-b9bb-49c1-9a10-febd7dba64b6_zps39aaebdc.jpg


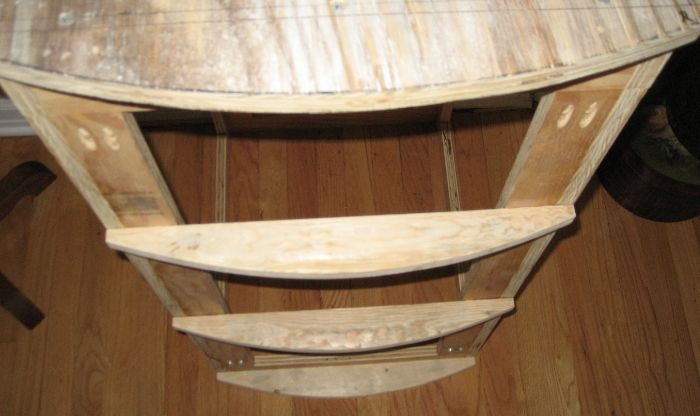
The arced front ribs were then glued and screwed to the front of the stand:


c7482da1-4811-4461-8d5c-76776e5126c9_zps70a493b5.jpg


I’m ready to start skinning with ¼ ply as soon as I get my circular saw straight edge back from a friend who borrowed it. In the mean time I’ll put in the lower shelf and decide on the middle shelf location.
 

redfishbluefish

Officer Emeritus
Officer Emeritus
Finally got back to cutting wood.


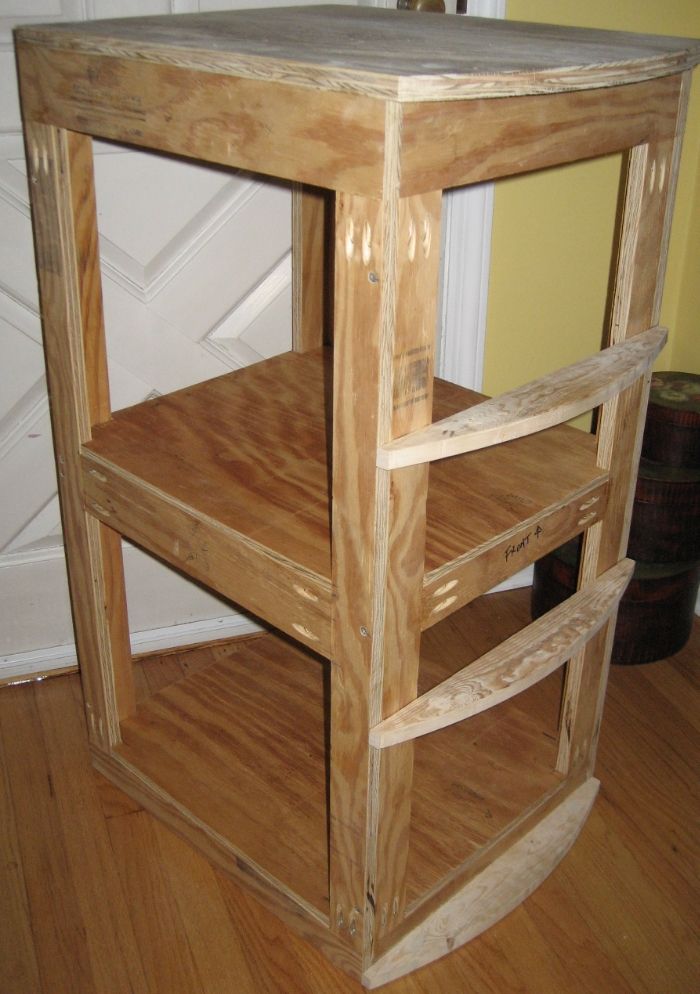
Added two shelves to the carcass…..1/2 inch plywood with the middle shelf supported by pocket screwed braces…..3 inches wide on the side pieces.


a8b36dcd-1b3a-47b1-927d-c858042e571b_zpsa0366151.jpg


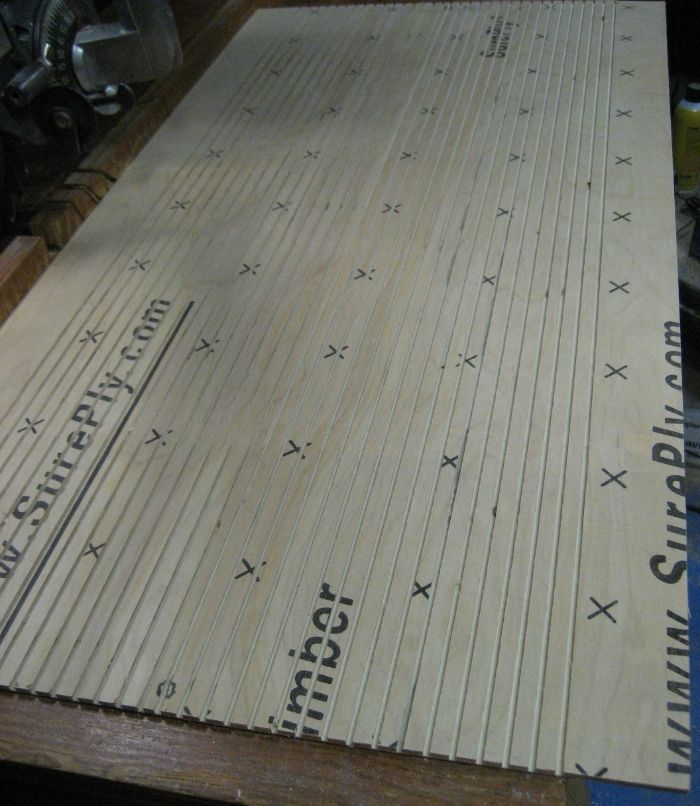
For those that followed along with my canopy build, you’ve seen this before….cutting kerfs in the front piece of plywood to allow easy bending over the arch of the front. The cuts were approximately 2/3 of the way through the plywood, ½ inch apart.


e43d5618-ca38-4839-bd8f-dd80924410d1_zps81b086f6.jpg


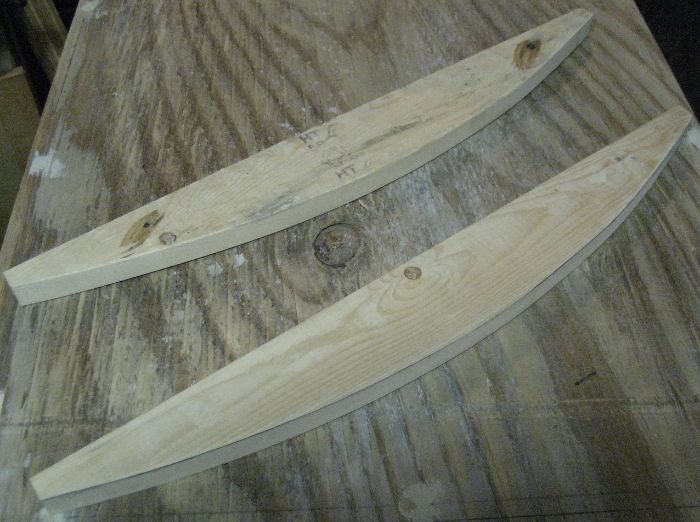
I’ve also made two more arched ribs. I’m going to have a cut-out in the front of the stand that has the face of the controller. This way I can access the buttons without having to open the stand, and also see temperature, pH, etc.


8da7056a-f442-4d2a-a544-045c9d94a6a2_zpsfd5b4d2f.jpg
 
Last edited:

redfishbluefish

Officer Emeritus
Officer Emeritus
Picked up another used Reefkeeper 2 last night (Thanks Rudy), so I now have three of these controllers. These are my favorite controller….easy to use and just the right amount of connectivity to the internet. :grin:


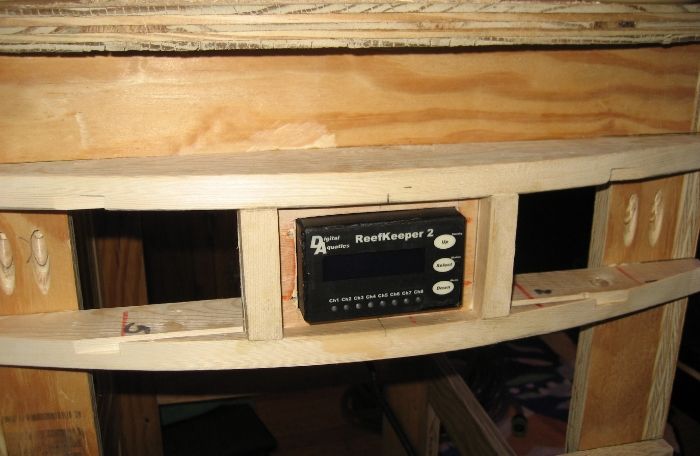
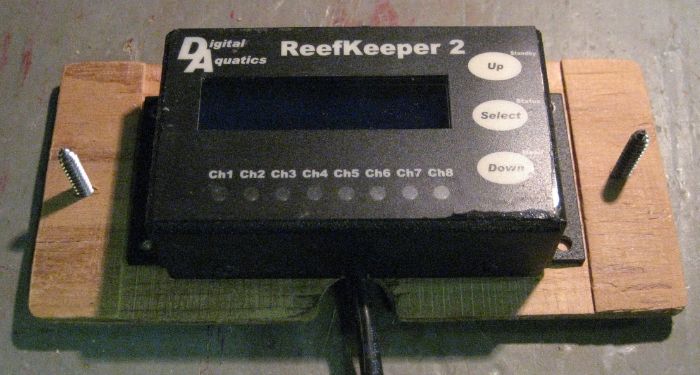
This controller will be mounted in the front of the stand through a little cut-out. To make this cut-out I took the two ribs mentioned in the above post and cut a slot to fit a small piece of ¼ plywood. This plywood was cut to just fit the Reefkeeper controller fitting through. Two vertical pieces were added to frame out the controller and this piece was glued and screwed to the front of the stand. Once the plywood skin is applied, that little window will be cut out to expose the Reefkeeper.


e6e7cfb3-cbea-4acf-9122-1c98ad33e0ea_zpsdee52ee9.jpg
 

TanksNStuff

Officer Emeritus
Officer Emeritus
Looking great so far as usual Paul!

Quick question, what's your plan on holding the controller in that spot? Is it to just make it tight enough that it stays put or will you secure it from behind somehow? I'm just thinking that when you push on the buttons, you may pop it through the hole.
 

redfishbluefish

Officer Emeritus
Officer Emeritus
Thanks George.

To answer your question; not sure if you are familiar with ReefKeepers, but they have a flange on either side of the controller display were each flange has two holes:


9b6b84be-b49d-4e64-ab46-471ab580812e_zps919d6afa.jpg


Each of those holes will have a #6 – ½ stainless steel machine screw with nut. If you look closely in the picture in the above post you can see these holes in the plywood. Everything will be flat black.


DESIGN COMMENT

So I’m doing a little sanding on the carcass and looking at the controller holder I just finished and I realized I designed a complex Rube Goldberg. In retrospect I think a much simpler design, but still effective, would have been a rectangular cutout of the front skin to just fit the controller, and then just use wood spacers to bring the face of the controller even with the plywood skin. Done!
 

TanksNStuff

Officer Emeritus
Officer Emeritus
Ahh, I saw the pics on my phone so I didn't notice the 4 drilled holes since the pic was small. If the controller has a mounting plate built in, then yea, it probably would have been just as easy to mount that right to the skin. But then we would have been robbed of your craftmanship! ;)
 

redfishbluefish

Officer Emeritus
Officer Emeritus
OK, so this is George’s fault. He questioned how I was holding the ReefKeeper to the stand and I commented that four stainless steel machine bolts would hold it on. I had already drilled the holes and purchased over seven dollars in stainless steel hardware.

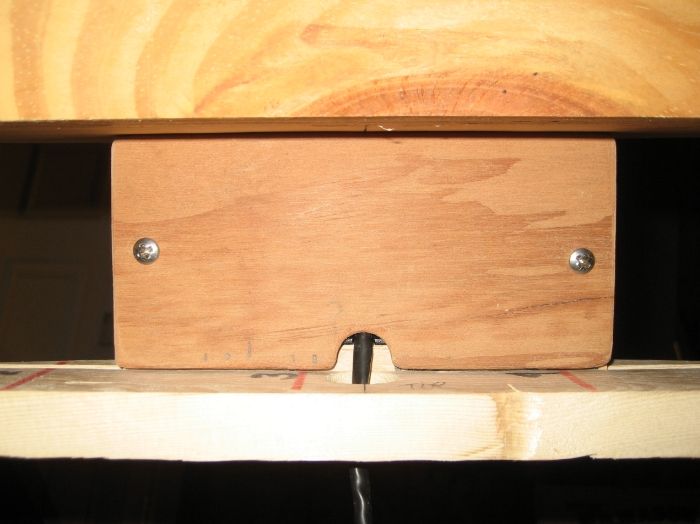
So with further thought I decided to “trap” the ReefKeeper in place with a small piece of plywood on the entire back of the unit. I figured this would give it a cleaner look without having the bolt heads showing from the front. A piece of plywood was dadoed (notched) to the depth of the flange, and two holes were drilled for screws.


968d8d99-d1a1-435c-871a-b6466cd98159_zps9b68829c.jpg


With the ReefKeeper installed in the stand, here’s a picture of the back side of the bracket that will now hold the ReefKeeper in place….no machine bolts protruding from the front of the stand.


4ea3d4e9-0359-4f8b-9110-199e7a999bdb_zpsea248cd7.jpg


Now I just have to fill the original holes with wood filler.
 

TanksNStuff

Officer Emeritus
Officer Emeritus
Glad I could talk you into doing it the right way Paul. :p At least my questions are making you teach me new things I would never have thought of on my own, haha.

Since you're being my wood shop teacher, I'd like to ask your opinion on something about my new stand & side cabinet build I'm working on...

The picture below is not my work, nor is it my exact plan, but it was my inspiration. I'm showing it to give you an idea of basically what I'm building... A new stand, tank on top, then canopy, then a side cabinet to the left that almost looks like it's connected to the rest of it.

100_6511.jpg

Now, instead of the typical cabinet doors, I plan to use 3/4" plywood to make a long front panel for the stand. I'm hoping to find a nice quality "furniture grade" oak that will look nice when stained. I may add trim pieces to make it appear to be cabinet doors, but not positive on that yet. More likely, I'll just give the plywood a nice stain finish and add a couple decorative handles to remove the front panel.

The side cabinet will probably have 3 doors, hinged on the left (top one may swing up instead, not decided on that yet). Again, the door trim is a possibility, but more likely it will just be stained plywood with a handle. I'll have cutouts in the side cabinet and stand to allow passage of wires and tubing, etc. betwen all the equipment stored in the cabinet and the sump in the stand. I also plan to have a rolling bottom drawer in the cabinet to easily access the ATO container and my 2-part dosing containers which will be housed on that bottom shelf.

Anyway, given all of that information, my question is regarding the side cabinet construction. - Since it won't need to be as strong as the tank stand, would it be better to use 1/2" or 1/4" plywood to skin the side cabinet? It would make it lighter (to carry) and also cheaper... but I'm not sure I'll be able to find the smaller thickness ply with the same quality as the stand. I really want it to match and look like it's part of the set. What do you think? Any suggestions?
 

redfishbluefish

Officer Emeritus
Officer Emeritus
George, I’d definitely go with face-frame construction…for the stand and the side cabinet. The side cabinet walls could be a ½ ply by itself or ¼ ply with a fir stir at the corners to support the back piece.....both are available as furniture grade with oak veneer. Look at your kitchen cabinets….they are face frame constructed boxes.

Face frames are typically solid wood because of exposed side edges, but you could just as easily use ¾ oak veneer plywood, with either molding or veneer tape to cover up the exposed edges. I would also recommend pocket screws to assemble the face frames. If you go the pocket screw route, you’ll need 1 ¼ inch course screws for the plywood, and 1 ¼ fine if you use solid oak (hardwood). If you don’t have a pocket hole jig, I’d highly recommend Kreg. They have all types of kits, with the least inexpensive mini kit costing about 20 clams….HERE’s a link, or if you want to spend a little more, HERE’s a nice starter kit.


You’ll also need a locking C clamp, and Kreg’s is 22 bucks, and it’s not worth it. Go to Harbor Freight and buy their locking C clamp for less than 5 bucks…..HERE.
 

redfishbluefish

Officer Emeritus
Officer Emeritus
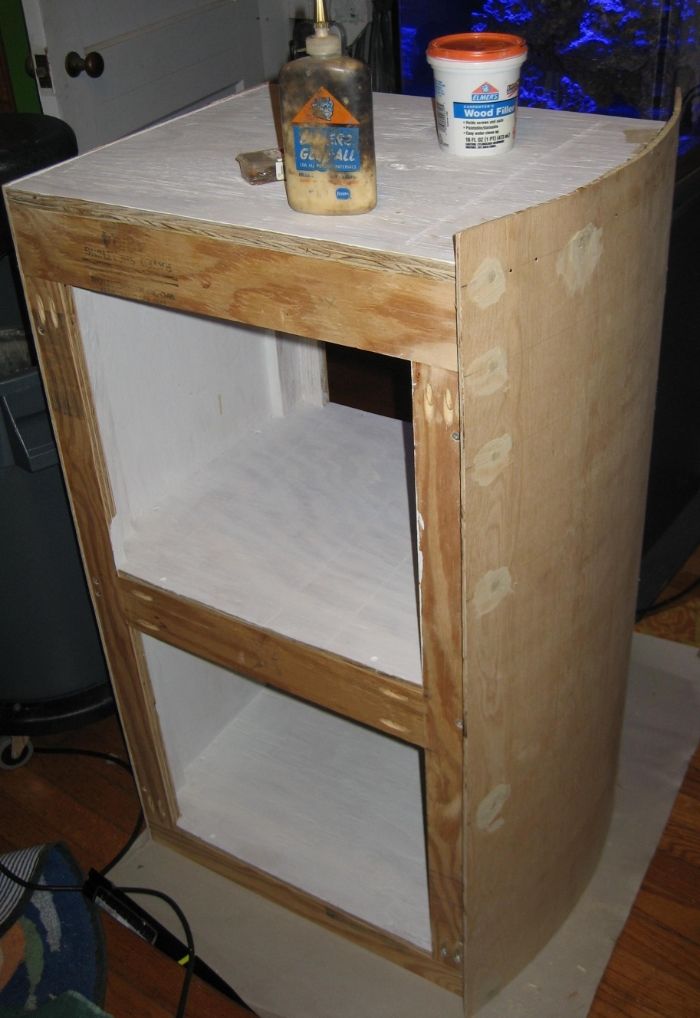
Skinned the back and front with ¼ inch ply and primed the inside with Kilz.

The back ¼ ply was glued and nailed with 1 inch wire brads while the front was glued and screwed in place. The screws were puttied with wood filler.


a40db9f9-c767-4796-8c57-0941902e99b5_zpsc4f2addc.jpg
 

TanksNStuff

Officer Emeritus
Officer Emeritus
Ok, thanks Paul. I was considering getting one of those pocket hole jigs before I built my stand (frame is already done) but I got along without it. I see how easy and clean they make it look though, so I may just grab one. Their just opening up a Harbor Freight near me and I've been looking for an excuse to go in there, so I'll check them out soon.

I'm also going to have to do some research on the face-frame construction you suggested. Not quite sure I know what that means... but I have an idea of what I think it is. :confused:

Nice progress by the way. All I got done today was figure out a list of materials I need to buy still, lol.
 

redfishbluefish

Officer Emeritus
Officer Emeritus
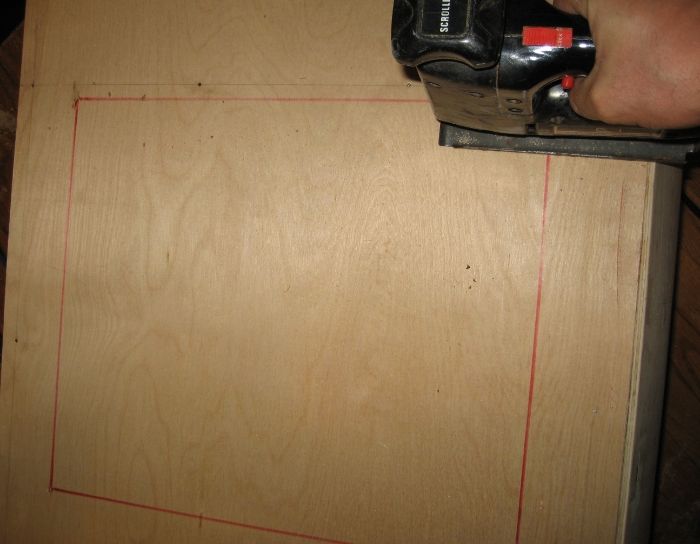
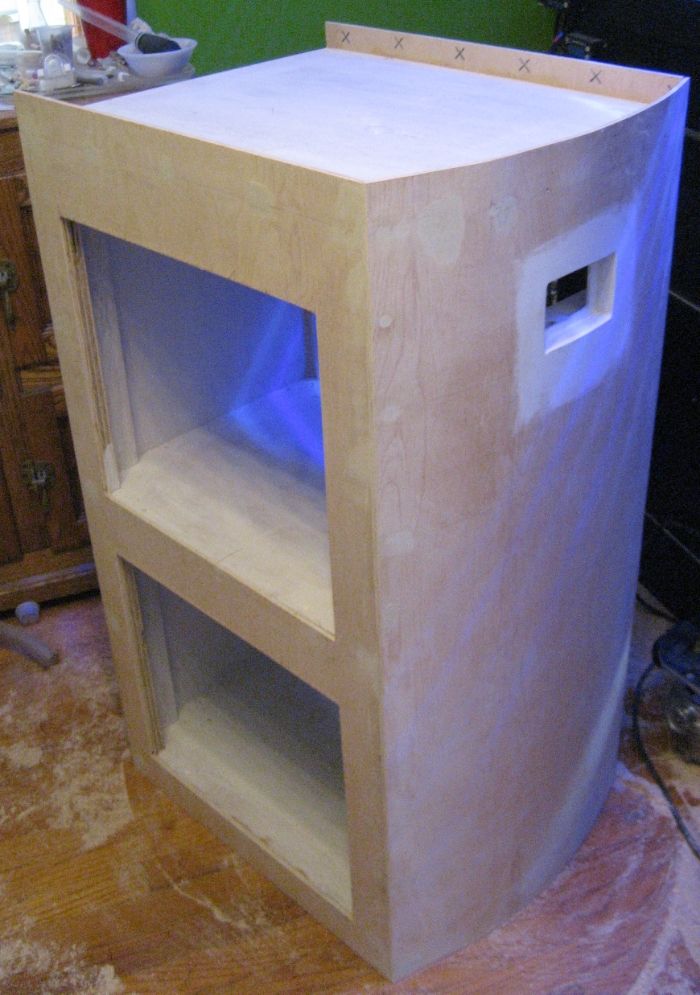
I finally got back to doing a little more work on the stand. Attached the sides and cut out the excess plywood. The way I did this was to first glue and nail (1” wire brads) one side to the carcass. From the inside, I then drilled four holes, one hole in each corner of the opening. This was repeated on the low shelf area as well. From the outside, I connected the holes with a marker and cut a little fat using a saber saw.

394f70ad-1cd7-4031-bc39-6e978a781648_zpsb6e37108.jpg


The rough opening was cut back to the frame using a router with a ball bearing straight blade bit.

557e583f-abd9-467b-aad2-ae5a7a1eaa8c_zpsf8354e7c.jpg


This process was repeated to the other side, so now the stand looks like this:

056728b5-75b6-40ee-ac3c-be1a176affcb_zps80114adf.jpg
 
Wife, shmife! If I could have one positive statement from my wife, for even one achievement I've done around the house. Then I know it's the end of the world! Lol
 

TanksNStuff

Officer Emeritus
Officer Emeritus
Paul, just tell her that's why you bought her a vacuum for her birthday. :p (Then duck to avoid the projectile coming at your head.)

Seriously though, looking great!

Since I know you can't make any more progress without my curious questions... what's the plan for the doors on the stand? Or are you just leaving them open?
 

redfishbluefish

Officer Emeritus
Officer Emeritus
Paul, just tell her that's why you bought her a vacuum for her birthday. :p (Then duck to avoid the projectile coming at your head.)

Seriously though, looking great!

Since I know you can't make any more progress without my curious questions... what's the plan for the doors on the stand? Or are you just leaving them open?


Thanks for the comment.

However, you’ve brought up another sore point. I was using the house vacuum and that was not appreciated. I had to go downstairs and get the shop vac.

As far as doors, I originally was just going to use standard offset hinges, but now don’t believe I will. I’ve been looking at other designs and one guy showed his finished stand with other furniture close by. If the doors are hinged I wouldn’t be able to open them if other stuff was close by. So now I’m thinking about lift-out doors. They’ll still be built the same way…framed panel door, but no hinges. I’m thinking dowel pins on the bottom with a magnet of the top of each door. Still thinking about this one. I’m open to suggestions.
 
Top