• Folks, if you've recently upgraded or renewed your annual club membership but it's still not active, please reach out to the BOD or a moderator. The PayPal system has a slight bug which it doesn't allow it to activate the account on it's own.

DIY Nano Cube Stand

TanksNStuff

Officer Emeritus
Officer Emeritus
Ouch, can't even clean up your own mess right, huh? If your wife ever reads my comments, I hope she knows I'm just kidding around. :cower:

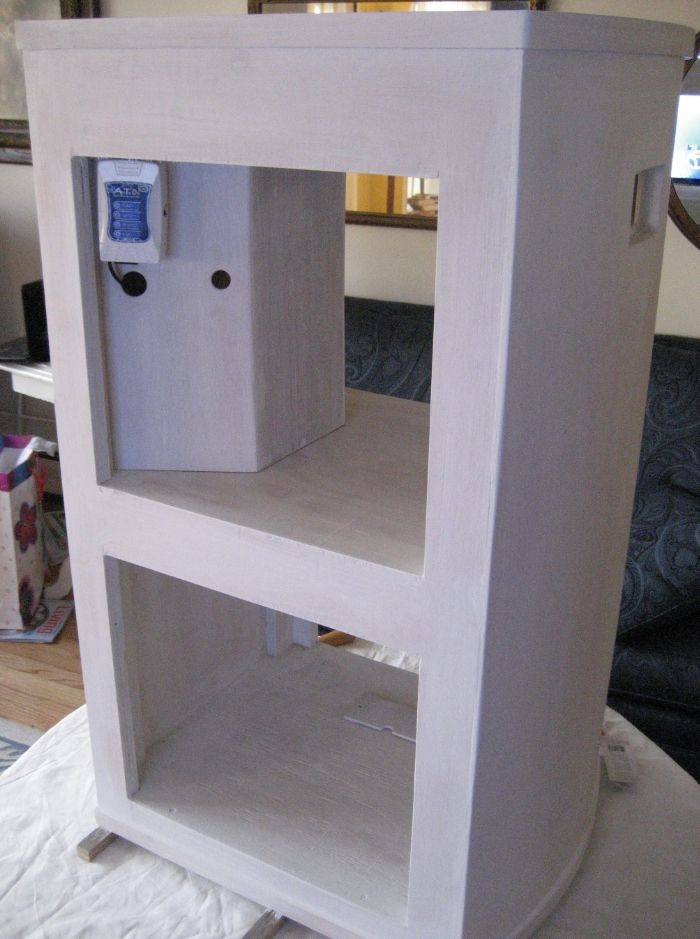
Will anything be close to the front of the stand? Maybe you can make some sort of track to slide the doors straight out the front? You could put a stopper along the back vertical so it has a finite closed point (so you don't over shoot the opening) and maybe even some sort of catch to hold it closed?

If you really wanted to get fancy, you could make it so it opens all the way but doesn't come all the way out. Or you can make it come completely off if you prefer that too.

I don't know. Surprised I even had that much of an idea pop out this late at night. I'm tired and heading to bed. Good luck Paul!
 

redfishbluefish

Officer Emeritus
Officer Emeritus
If you followed along with my canopy build, you’ve seen this before……molding. The molding will be very simple lattice, cut to 1 1/16” x 1/4”. This will only be applied to the top and bottom edges of the stand.


First is the front “belly,” where I cut groves every half inch about 2/3 to ¾ of the way through. I first taped the two pieces together and as I started cutting I’m thinking, “Oh crap, I now have to take off all those individual little pieces of tape.”


13a94ae6-2455-4fba-8df1-a5a3d25a1737_zpsa2ef609a.jpg


However, removing the tape wasn’t bad at all. As I separated the two pieces of lattice I carefully pull off the one board leaving all the little pieces of tape on the other piece. I now had the tails of the tape to quickly pull off.

The top piece was applied first with glue and plenty of clamps. With only so many clamps, I’ll have to wait until tomorrow to do the lower edge…..and then the side pieces.


75ef42d4-b3f6-456c-b7c1-31db2eacded4_zpsb4cce9a5.jpg
 
Last edited:

redfishbluefish

Officer Emeritus
Officer Emeritus
So I finished putting the molding on the stand and plenty of wood filler. After a good sanding, I started priming. I had the stand lying on its back. My wife walks in and says, “When I die I want you to make a little window in my coffin, just like this coffin, so I can look out.” So now my new stand looks like a coffin!


0c089217-de68-405b-b073-15edbe01ff46_zps9dcc31ce.jpg


I started making my wife’s coffin! :eek:
 

TanksNStuff

Officer Emeritus
Officer Emeritus
Hey, you said she said "when she dies" she wants you to make it... you don't have to start on it just yet. ;)

Looking great Paul. Can't wait to see the finished product with tank and canopy all together.
 

redfishbluefish

Officer Emeritus
Officer Emeritus
Wire closet

Made a wire closet for all the electronic stuff. A trapezoidal box was made with ½ inch ply top and bottom….1/4 ply all sides. Here’s a front/top view:


a2979777-7854-4d86-aa48-21a391025886_zps7827819f.jpg


And back/top view:


dc9d5273-5dc5-46ff-92b1-23c90715e250_zps18126111.jpg


Trapezoid angle was 30 degrees.

This box fits into the back side of the stand by one side fitting into a 30 degree piece of molding (not painted yet):


67087033-e70e-4615-bd7b-4209d58e43b4_zpsa8d3c2a0.jpg


The other side will simply slide back into place and be held by a single thumb screw.

When the box is installed, one side of the angled portion will hold the PC8 of the reefkeeper:


96ed9141-cf4b-42c2-aa09-3f65f26513be_zpse9f6c0f1.jpg


While the other side has the controller for the JBJ ATO and the MP10 powerhead:


10097d73-5ee7-48e2-9d9a-4deb94db20f8_zps577c7766.jpg


All wires will be hidden behind the box. The 30 degree angled portions will allow easy viewing and access of those components. Hopefully nice and clean looking.
 

kschweer

Administrator
Staff member
Officer Emeritus
Moderator
Everything looks great Paul! Can't wait to see it finished. A cabinet for all the electronics will definitely be in my next build.
 

redfishbluefish

Officer Emeritus
Officer Emeritus
Kevin, you're too kind.


A fellow reefer stopped by today and commented that he didn’t understand the scale of the wire closet in the above pictures. There was an “ah-ha” moment when he saw the stand. Here’s a picture of the entire stand, where you can see the location of the wire closet with the ATO installed. The MP10 controller will be going just to the right of the ATO. Hope this helps.


c79d0076-cbf3-4d92-9555-35d08d28f3f2_zps553c6d80.jpg
 

TanksNStuff

Officer Emeritus
Officer Emeritus
I was wondering about the scaling myself and where it was going in the stand itself. Looking good Paul.
 

redfishbluefish

Officer Emeritus
Officer Emeritus
Wire Closet Closing Mechanism

Below are the details on how the wire closet will be kept closed. With the wire closet in place, a hole was drilled to fit a ¼ - 20 thumb screw (slightly larger than a ¼” hole). This hole went through the closet cover flange and the stand leg…..located about 2/3 the way up the closet cover…..all the way out the back of the stand.

From the back of the stand, a spade bit was used to slightly relieve the hole (ca 1/32”), so that the t-nut would be flush with the back of the stand. Here is the t-nut installed, while I hold a second one (for those who aren’t familiar with t-nuts……it is threaded to fit a bolt.)


bf38837a-0e17-4721-8bed-e57f57185d4d_zpsd1184332.jpg


The hole on the cover flange was also relieved with a spade bit to fit a flat washer. This washer was epoxy glued in place. This isn’t very pretty right now because after the epoxy cured, it was sanded. I plan on mixing a touch more epoxy to make it all flush, sand smooth, and paint.


c4c97f9c-4a31-4858-986f-7ee167e32981_zps51f51fec.jpg


A ¼-20 thumbscrew was purposely purchased too long…..2 inches. The reason was to put a nut on it so that the “thumb” wasn’t flush with the washer. I was concerned I wouldn’t be able to get my fat fingers on the “thumb” if it was flush with the washer. I originally was going to use one nut that would be glued in the right location, but decided to go with a two nut “lock” setup so that if needed, I could do adjustments.


7a7a7cb4-6ab6-4863-b0df-17bece589efe_zps2df99f5b.jpg


Here is the thumbscrew in place on the cover:


702eac43-ad31-4a6f-9bb4-9d7746713eb7_zps54001c73.jpg


And here’s a long view for perspective:

e59ab663-035e-4aa0-9d08-17b5141a9fc2_zps33857681.jpg


Now wasn’t that an exciting read! :p
 

redfishbluefish

Officer Emeritus
Officer Emeritus
I was able to pick up two BRS dosing pumps (thanks Olivier), and install them on a bracket in the front of the stand. In addition, because of the ATO and dosing pumps, I needed to make room in the ReefKeeper PC8, so for any piece of equipment that simply needed to be plugged in, I added a four outlet plug setup to the wirebox (lower left corner of the picture below).


de453857-523a-4f0e-a5b8-5c07c36cceb6_zps664d21d5.jpg


I also made a trip to WallyWorld and picked up a two gallon container for the ATO reservoir:


865a181b-9e94-46f8-8995-f4e0403ffe27_zpseb821755.jpg


I also picked up two, one gallon containers for the alk and calc:


85f6ae9e-a75c-4f2e-bba7-7b9d919cf1b5_zps90b48c94.jpg
 

TanksNStuff

Officer Emeritus
Officer Emeritus
Nice additions Paul. Wish I would have known you were adding the dosing pumps. I have a couple extra 1g storage jugs from BRS for the alk / cal you could have had for free.

Those look like they'll do the trick though.
 

redfishbluefish

Officer Emeritus
Officer Emeritus
George, thanks for the offer, but I have plenty of jugs. I’m currently using OceanSpray gallon juice jugs for the pumps on my big tank. I also store my alk and calc in these same jugs. When I originally started dosing, the intent was to simply switch out a jug when it got low. However, what I’m actually doing, the anal-retentive person I am, is re-filling these jugs when they get down to about ¾ full. The issue is the opening isn’t that big, making the refilling a pain in the butt. These new containers have big, wide openings making refilling a snap. After I try these out on the JBJ, if I like them, I’ll replace the jugs with these gallon containers…..only $3.88 at WallyWorld.
 

TanksNStuff

Officer Emeritus
Officer Emeritus
You plan to refill at 3/4 full, or at 3/4 empty? Filling after only using 1/4 of your jug seems like a full time job.
 

redfishbluefish

Officer Emeritus
Officer Emeritus
Someone on another board asked the question on how I was going to fit the MP10 controller through that small hole. I can’t remember who (maybe Fish Brain), told me about MP40’s, and how you could simply open up the controller and unplug the wires so that you could pass them through a hole. I just assumed I could do this with the MP10. To reassure myself, I opened the MP10 controller and I was delighted to see a similar plug to the MP40 (large opaque plug in the lower left of the controller.)


133c7b34-8ab5-40fc-804f-ff12b49880fd_zps649db45e.jpg


I’m glad I did this because I had forgotten how large this plug was. I had only drilled a 7/8 inch hole, and this plug just missed fitting. Instead of trying to re-drill, which is very difficult, I simply squared the hole using a file. You can now see the odd hole in the upper right corner. Plug easily fits this hole.


c5bbc8ac-9e10-448a-a200-1c4b7c78251a_zpsdc7838e8.jpg
 

redfishbluefish

Officer Emeritus
Officer Emeritus
I know it's been a while, but I'm finally getting around to finishing up this stand. Cut and assembled the four doors....simple framed, flat paneled doors. Got to love that Kreg pocket hole jig, makes assembly a snap.


After rounding off the outside edge and cutting the dado (a grove), here they are for their first fitting:


Slapped a coat of Kilz on them while I wait for the Neo magnets (neodymium) to arrive on the slow boat from China....towards the end of the month. Planning on holding the doors in place with maybe dowel pins and these neo magnets. Got to wait until I get them to make that determination not knowing gauss strength.

 
Top