

First, I would like to say, This was one helluva a lot more work than I planned on!!! Maybe it would go faster for others, but I know I've got at least 40 hours in it.
Second, the sizes I used work for me on MY tank. I can't guarantee your tank is just like mine, though it likely is. PLEASE don't just build from my numbers, double check for yourself.
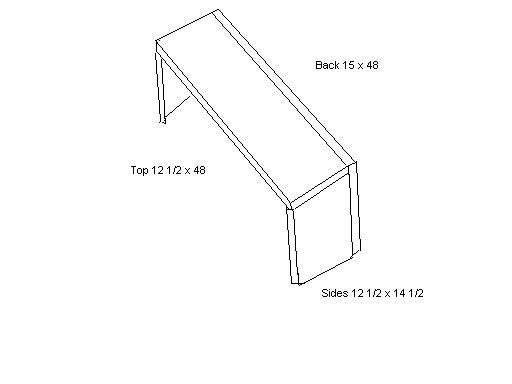
I didn't have anything to start from on this. You see people talking about building hoods for bowfronts, but you never see them actually posting any schematics or how-to's. I decided that I would build my hood in essentially 2 parts. One part would be the main structure, a long 4 sided box, the other part would be the shaped front face. Eventually I would mate the 2 with a long piano hinge running along the top. I didn't full out design this thing, if I had it might have saved me from making some mistakes along the way that cost me time and effort. I worked out the sizes with a tape measure. One of the biggest things I wrestled with was, "How Tall to make it?" The best rule of thumb I could come up with for halide lighting was "12 inches above the water". So, I designed around that. My mogul socket mount was 2 1/2 inches tall. I needed to leave a 1/2 - 1 inch space between the reflector and the top wood surface. The water level in my tank is 1 inch below the top frame. All this added up to I needed 14 1/2 of internal height to make my bulbs sit 12" above the water surface. My rough sketch looks like this:
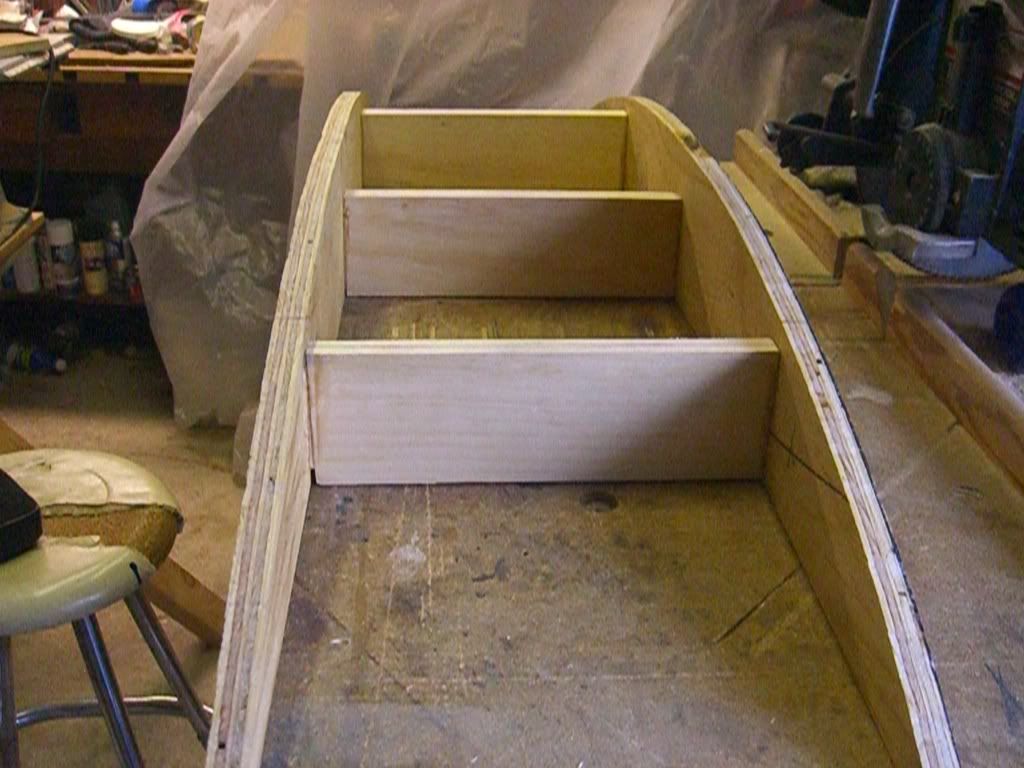
This finished item looked like this:
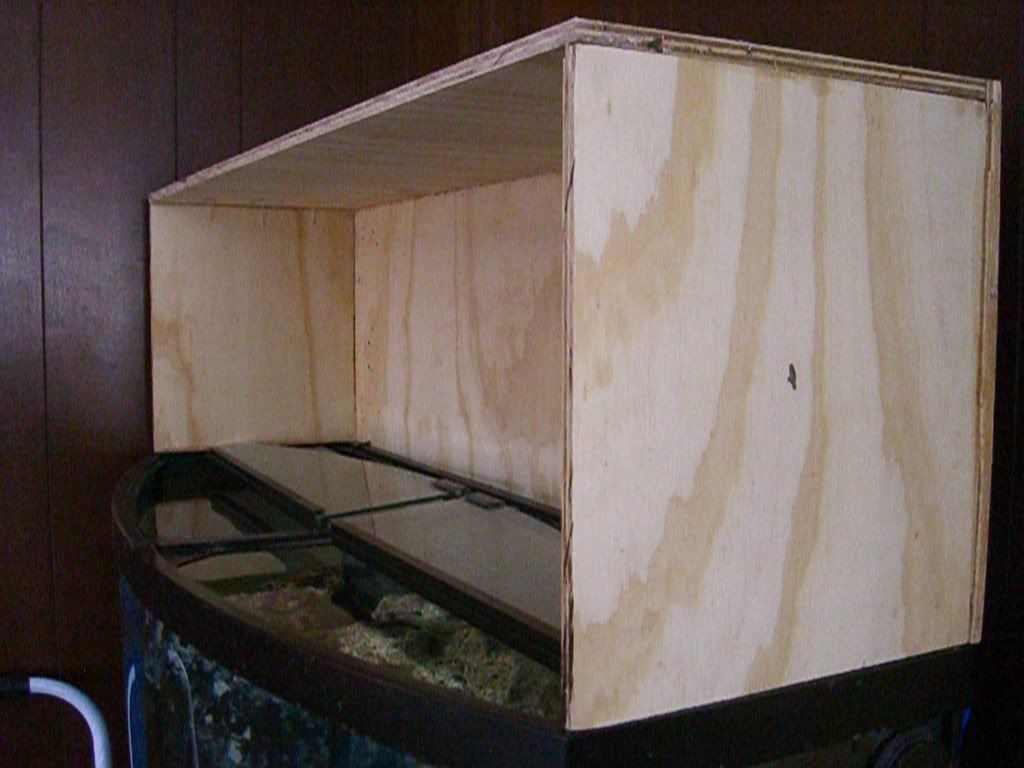
It was made out of standard 1/2 plywood. Screwed and glued together, then I came back and filled in the gaps with with filler.
Now for the rough part, making the front face.
First I cut 2 48" long stringers out of 3/4 plywood. They had to be about 6 1/2 inches wide to start with so that the profile would fit. I then laid these long rectangles on the tank and marked the curve with a sharpie.
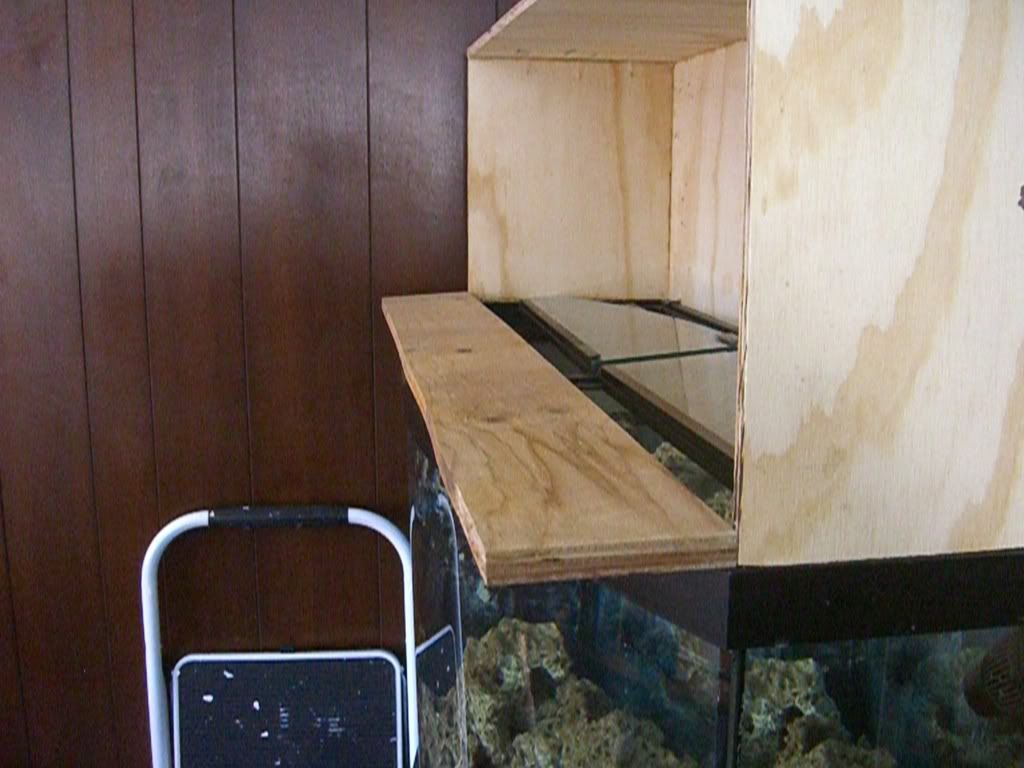
I rough cut them with a Jigsaw and then hand finished the curve to the line I drew with a plane and wood rasp.
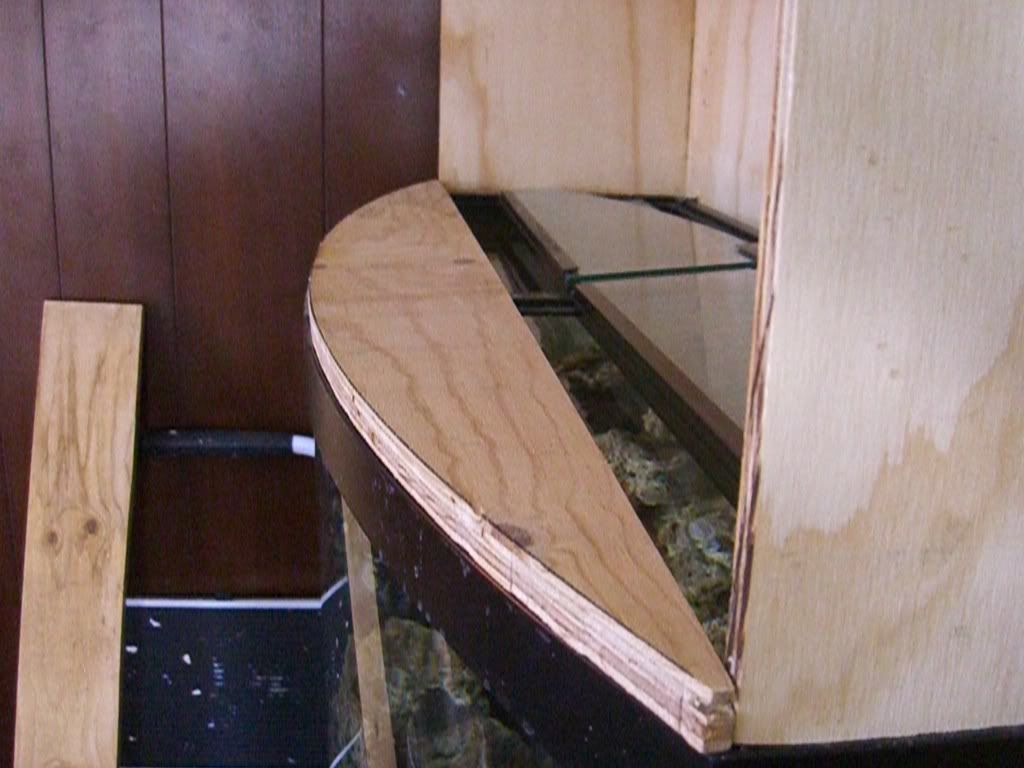
I pushed the box part of my canopy back about 1/2 inch from the front corner when I marked this, so that the ends of the stringers would not become paper thin. You can see the thickness this left me with on the ends. I figured I would fill this gap later with molding. I used the first stringer I made as a pattern, then cut a second one. Joining the 2 together like this:
The skin for the front face was a major pain. I bought a 1/4" 2'x4' sheet of birch sheathing from Home Depot. I knew it would be short, but I didn't want the expense of buying a full sheet for the extra 1 1/2 I needed. I thought I would just use some decorative molding on the ends to cover the gaps and maybe add an interesting feature to the front. BIG MISTAKE. In the end, I would have been MUCH better off just to buy a big enough piece of sheathing that I could cut a 49 1/2 piece out of it. The way this stuff warps and buckles, there was no way to do what I wanted. It wouldn't look right. I would have needed probably 2 more stringers to make this stuff conform (adding a lot of weight I didn't need) I ended up using molding and wood filler like Bondo making this come out.
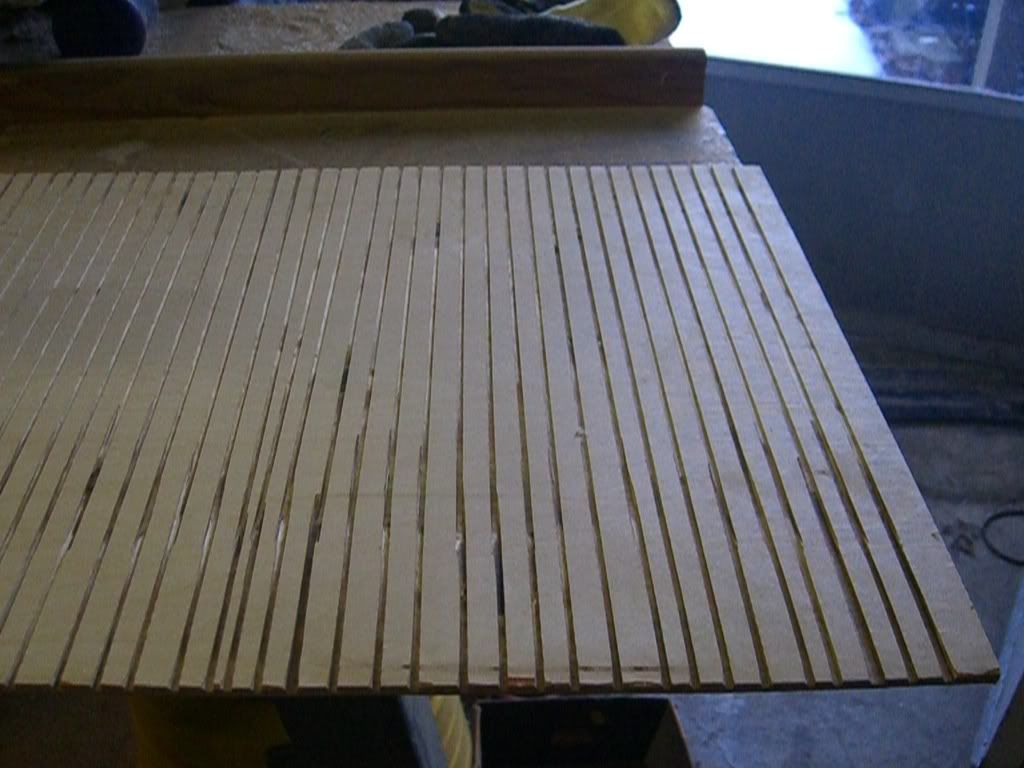
Anyway, using my too short 48" long piece of sheathing, I cut grooves in the back side about halfway through, about 1/2" apart using my radial arm saw. This was to make the material easier to bend.
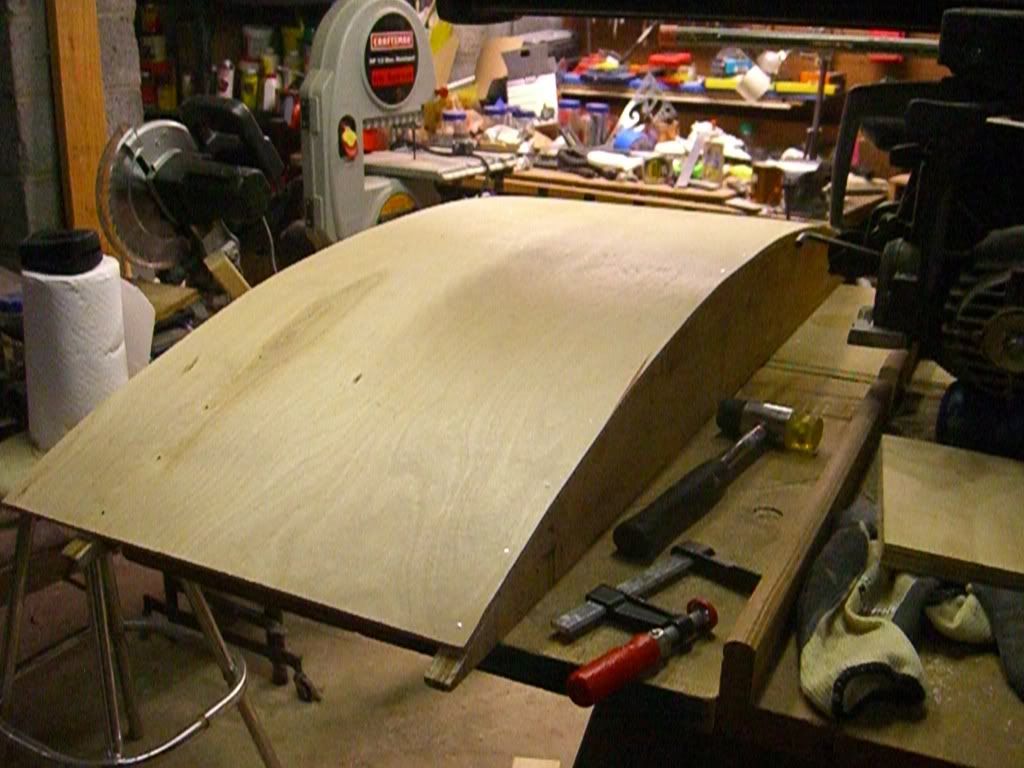
I then nailed and glued the sheathing to the stringers. I had to clamp it down on all 4 corners to bend the sheet to the stringers so I could do this. You can see the gaps I was left with on the ends.
I didn't take any pictures of how I fixed that. Basically it was a piece of molding butted up to the sheathing, glued and nailed to the stringers. Then I had to come back with wood filler in the crease and try to sand it flat. This was a bear because the sheathing buckled and warped on the end.
I cut holes at 2 corners in the back for my fans, then went back over everything with wood filler, filling in gaps and holes. After sanding all that down, now it was painting time.
I painted everything, inside and out, with a white acrylic latex primer. I later came to regret using the white primer on the outside, because it took 3 coats of black paint to cover it up. I put 2 coats of primer on. Then I used an outdoor grade of polyurethane all over the inside called Spar Urethane. I used 2 coats of this. Then painted the outside black...3 times.
Now the fun part, trying to attach these 2 parts with a long piano hinge. As careful as I was when I put things together, I was using lower grade plywood for much of it - so the top edge of the front piece juuust didn't line up so good with the top edge of the back. Fortunately, there were a LOT of screws for the hinge and they were able to pull everything together and the hings itself masks any misalignment. I installed the hinge completely to the back half, then laid it on it's back, placed the front half on it and installed all the screws for that. It works. It does make some creaking noises, but it moves easily.
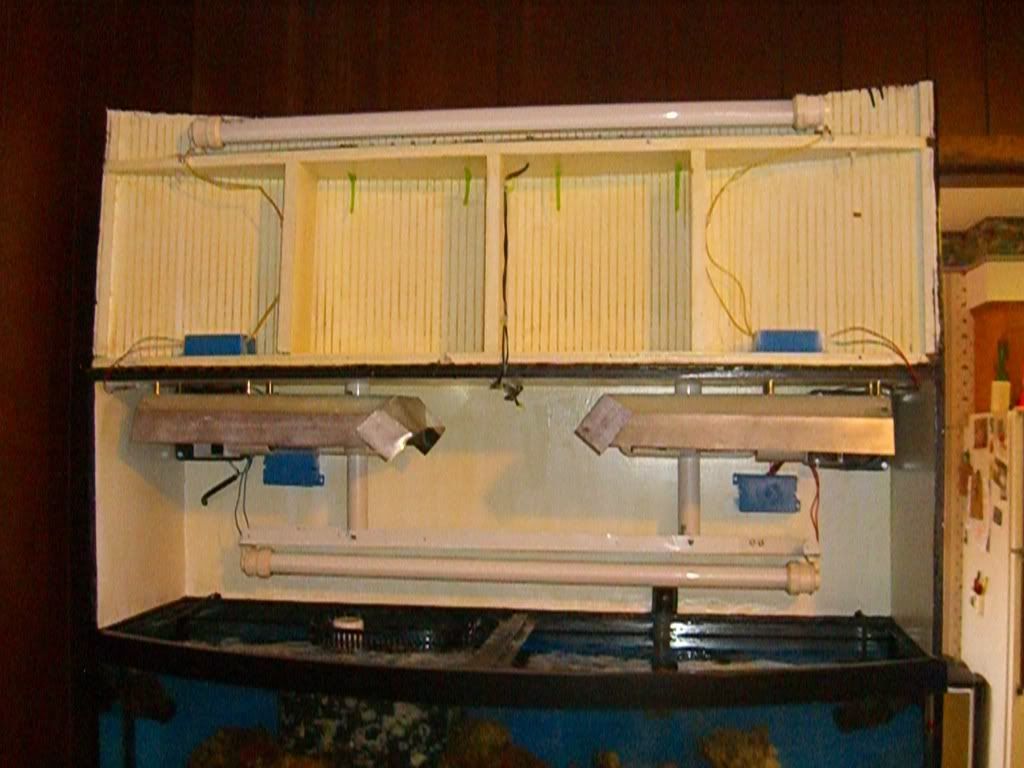
I installed the 2 fans in the back corners, then started in on the lighting. For lighting, I had an old fixture I bought from Mark, MAVL666, back during the summer. I had intended to use that on a frag tank, but why put better lighting on a frag tank than on my main tank? This fixture was one big flat reflector with two 95 watt VHO fluorescent bulbs and two 175 Mogul halides mounted on the surface. I detached the 2 VHO's and mounted them by themselves. I cut the reflector in half and then cut/folded/bent the material around the 2 halides to make reflectors. I really didn't have any choice here. There just is no standard Mogul socket reflector that is made small enough to fit into the space I had available. (I tell that has been one of the challenges with the bowfront all along. The tanks may be beautiful, but standard light fixtures just don't fit on them.)
I'm not going to go into all the details of mounting and wiring this mess...some things I'd just like to forget.
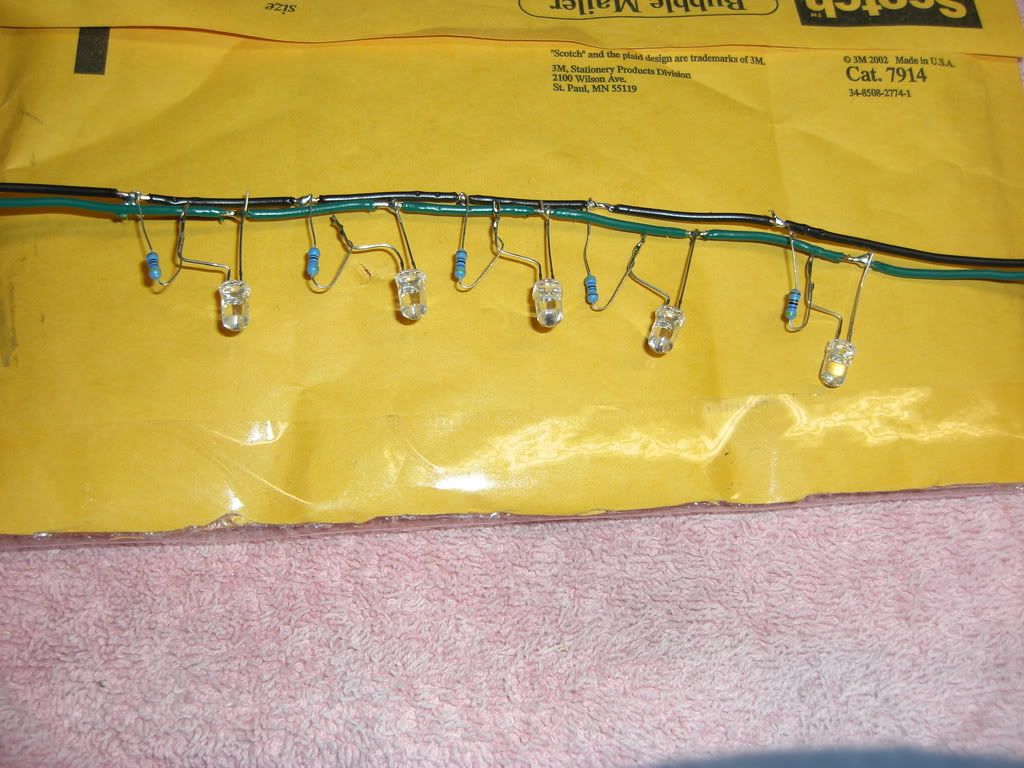
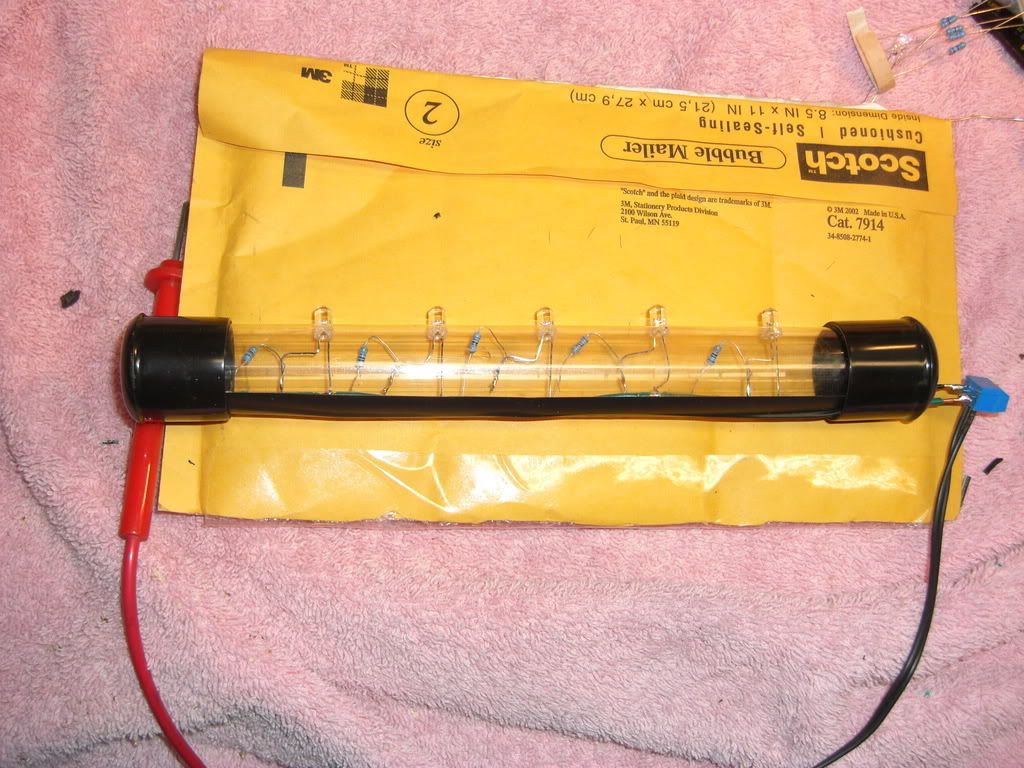
Now, to finish, I wanted to install LED night lights. I made these up myself from some LED resistor/bulb kits I bought from a guy on ebay quite awhile back. Strangely enough, old cell phone chargers make great power supplies for 5 LED sets, as many of them appear to be 6 volt. I used some plastic tubing with end caps I scarfed up from work to build the lights into, but you could easily use 1 inch clear riser tubing and just close up the ends with electrical tape. I highly recommend soldering all the LED's to the resistors and testing them first. I had a number of failures and it's MUCH easier to find this out BEFORE you solder them into your circuit. I made up 5 resistor/LED assemblies and then soldered them to 2 wire busses I made out of 18 gage solid core wires. I just took a razor blade and scraped off the insulation at 5 points along each wire. One wire was my negative bus and one was the positive bus. When soldered together they looked like this:
It's best to go back and cover up the soldered connections with electrical tape, as things can ground out if things shift around.
I then drilled 5 holes in one side of the 1 inch tubing and slit the other side open all the entire length. (you really have no choice, you just can't push those LED's thru the holes without the ability to push from the back. Once the wired assembly is installed in the tube, you can seal up the back with electrical tape. The finished assemblies looked like this:
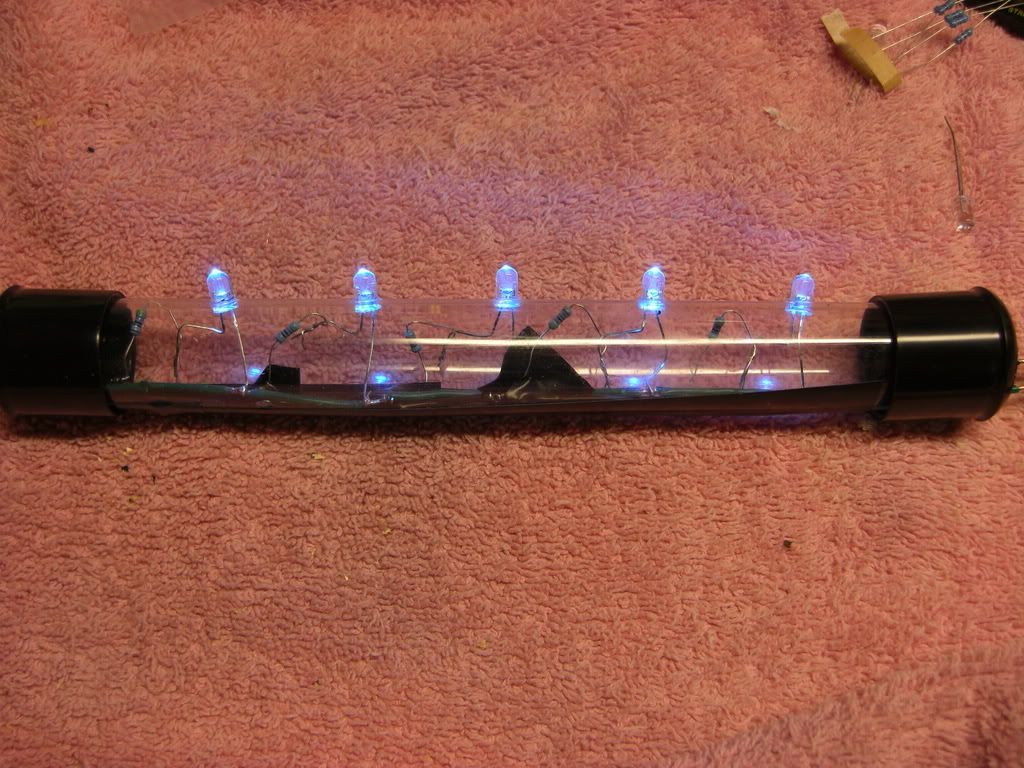
Not lovely, I know, but who's gonna see them inside the hood.
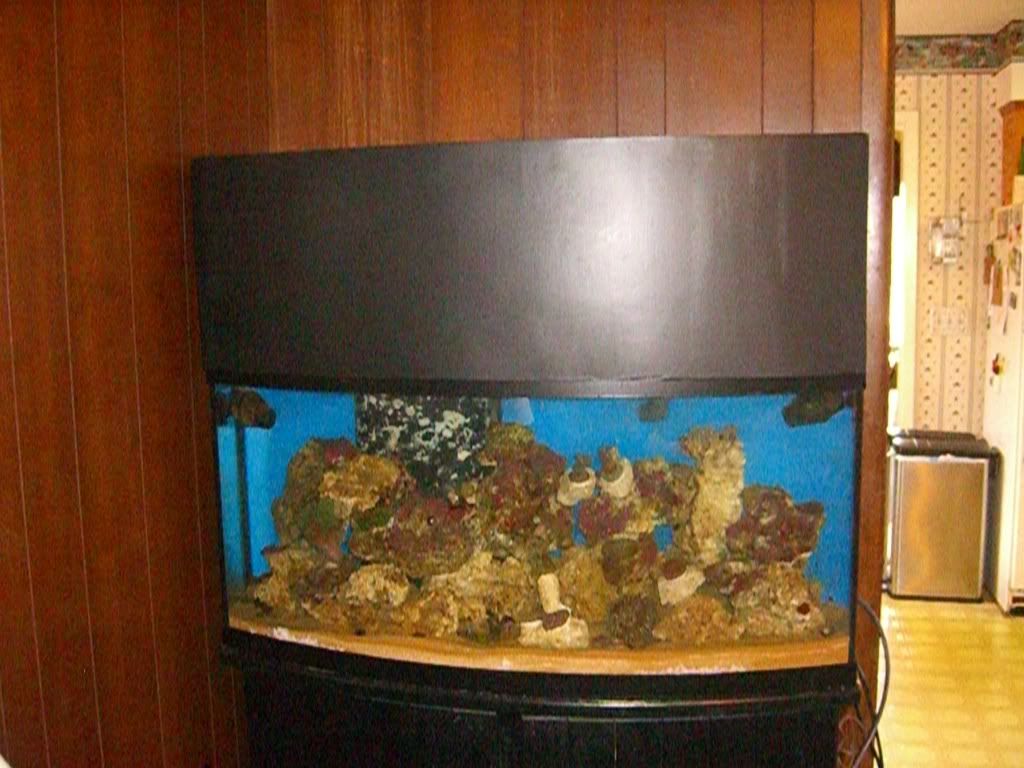
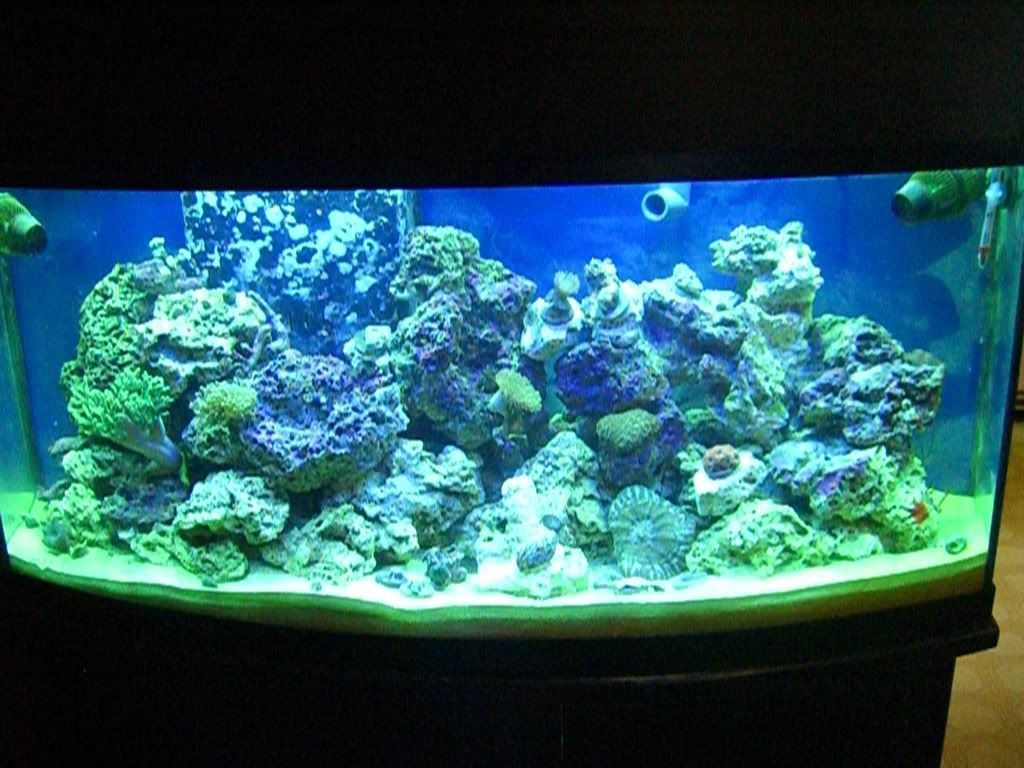
Anyway, here's what I ended up with as a final product.
Second, the sizes I used work for me on MY tank. I can't guarantee your tank is just like mine, though it likely is. PLEASE don't just build from my numbers, double check for yourself.
I didn't have anything to start from on this. You see people talking about building hoods for bowfronts, but you never see them actually posting any schematics or how-to's. I decided that I would build my hood in essentially 2 parts. One part would be the main structure, a long 4 sided box, the other part would be the shaped front face. Eventually I would mate the 2 with a long piano hinge running along the top. I didn't full out design this thing, if I had it might have saved me from making some mistakes along the way that cost me time and effort. I worked out the sizes with a tape measure. One of the biggest things I wrestled with was, "How Tall to make it?" The best rule of thumb I could come up with for halide lighting was "12 inches above the water". So, I designed around that. My mogul socket mount was 2 1/2 inches tall. I needed to leave a 1/2 - 1 inch space between the reflector and the top wood surface. The water level in my tank is 1 inch below the top frame. All this added up to I needed 14 1/2 of internal height to make my bulbs sit 12" above the water surface. My rough sketch looks like this:
This finished item looked like this:
It was made out of standard 1/2 plywood. Screwed and glued together, then I came back and filled in the gaps with with filler.
Now for the rough part, making the front face.
First I cut 2 48" long stringers out of 3/4 plywood. They had to be about 6 1/2 inches wide to start with so that the profile would fit. I then laid these long rectangles on the tank and marked the curve with a sharpie.
I rough cut them with a Jigsaw and then hand finished the curve to the line I drew with a plane and wood rasp.
I pushed the box part of my canopy back about 1/2 inch from the front corner when I marked this, so that the ends of the stringers would not become paper thin. You can see the thickness this left me with on the ends. I figured I would fill this gap later with molding. I used the first stringer I made as a pattern, then cut a second one. Joining the 2 together like this:
The skin for the front face was a major pain. I bought a 1/4" 2'x4' sheet of birch sheathing from Home Depot. I knew it would be short, but I didn't want the expense of buying a full sheet for the extra 1 1/2 I needed. I thought I would just use some decorative molding on the ends to cover the gaps and maybe add an interesting feature to the front. BIG MISTAKE. In the end, I would have been MUCH better off just to buy a big enough piece of sheathing that I could cut a 49 1/2 piece out of it. The way this stuff warps and buckles, there was no way to do what I wanted. It wouldn't look right. I would have needed probably 2 more stringers to make this stuff conform (adding a lot of weight I didn't need) I ended up using molding and wood filler like Bondo making this come out.
Anyway, using my too short 48" long piece of sheathing, I cut grooves in the back side about halfway through, about 1/2" apart using my radial arm saw. This was to make the material easier to bend.
I then nailed and glued the sheathing to the stringers. I had to clamp it down on all 4 corners to bend the sheet to the stringers so I could do this. You can see the gaps I was left with on the ends.
I didn't take any pictures of how I fixed that. Basically it was a piece of molding butted up to the sheathing, glued and nailed to the stringers. Then I had to come back with wood filler in the crease and try to sand it flat. This was a bear because the sheathing buckled and warped on the end.
I cut holes at 2 corners in the back for my fans, then went back over everything with wood filler, filling in gaps and holes. After sanding all that down, now it was painting time.
I painted everything, inside and out, with a white acrylic latex primer. I later came to regret using the white primer on the outside, because it took 3 coats of black paint to cover it up. I put 2 coats of primer on. Then I used an outdoor grade of polyurethane all over the inside called Spar Urethane. I used 2 coats of this. Then painted the outside black...3 times.
Now the fun part, trying to attach these 2 parts with a long piano hinge. As careful as I was when I put things together, I was using lower grade plywood for much of it - so the top edge of the front piece juuust didn't line up so good with the top edge of the back. Fortunately, there were a LOT of screws for the hinge and they were able to pull everything together and the hings itself masks any misalignment. I installed the hinge completely to the back half, then laid it on it's back, placed the front half on it and installed all the screws for that. It works. It does make some creaking noises, but it moves easily.
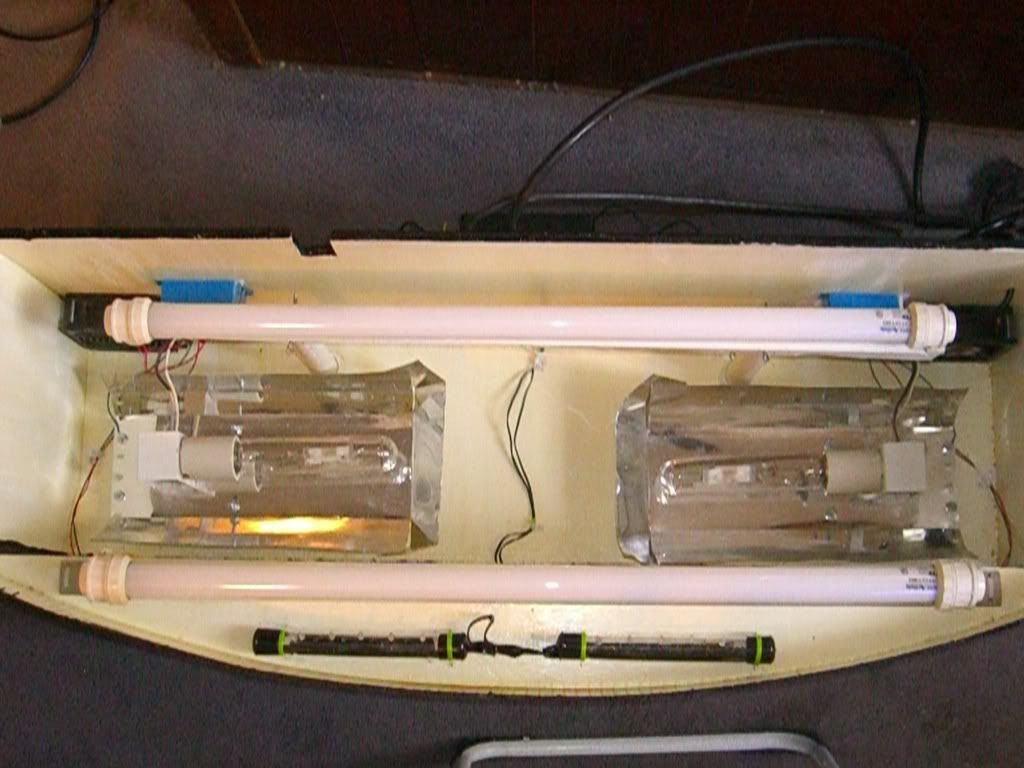
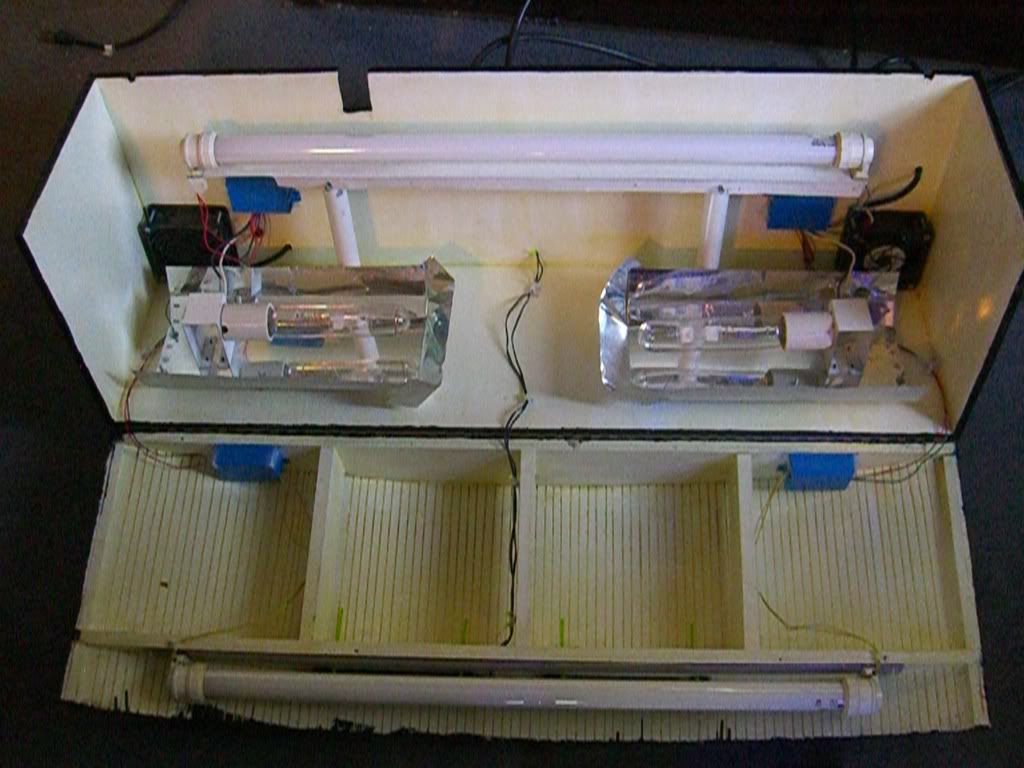
I installed the 2 fans in the back corners, then started in on the lighting. For lighting, I had an old fixture I bought from Mark, MAVL666, back during the summer. I had intended to use that on a frag tank, but why put better lighting on a frag tank than on my main tank? This fixture was one big flat reflector with two 95 watt VHO fluorescent bulbs and two 175 Mogul halides mounted on the surface. I detached the 2 VHO's and mounted them by themselves. I cut the reflector in half and then cut/folded/bent the material around the 2 halides to make reflectors. I really didn't have any choice here. There just is no standard Mogul socket reflector that is made small enough to fit into the space I had available. (I tell that has been one of the challenges with the bowfront all along. The tanks may be beautiful, but standard light fixtures just don't fit on them.)
I'm not going to go into all the details of mounting and wiring this mess...some things I'd just like to forget.
Now, to finish, I wanted to install LED night lights. I made these up myself from some LED resistor/bulb kits I bought from a guy on ebay quite awhile back. Strangely enough, old cell phone chargers make great power supplies for 5 LED sets, as many of them appear to be 6 volt. I used some plastic tubing with end caps I scarfed up from work to build the lights into, but you could easily use 1 inch clear riser tubing and just close up the ends with electrical tape. I highly recommend soldering all the LED's to the resistors and testing them first. I had a number of failures and it's MUCH easier to find this out BEFORE you solder them into your circuit. I made up 5 resistor/LED assemblies and then soldered them to 2 wire busses I made out of 18 gage solid core wires. I just took a razor blade and scraped off the insulation at 5 points along each wire. One wire was my negative bus and one was the positive bus. When soldered together they looked like this:
It's best to go back and cover up the soldered connections with electrical tape, as things can ground out if things shift around.
I then drilled 5 holes in one side of the 1 inch tubing and slit the other side open all the entire length. (you really have no choice, you just can't push those LED's thru the holes without the ability to push from the back. Once the wired assembly is installed in the tube, you can seal up the back with electrical tape. The finished assemblies looked like this:
Not lovely, I know, but who's gonna see them inside the hood.
Anyway, here's what I ended up with as a final product.
")