Hello Everyone,
I figured I would start this here and see if it gets moved or not, but this seemed the place to start this. I am gong to do a complete diary of start to finish Aquapod and all mods including the addition of corals to my AquaPod 12. If you are interested in costs, time and the addressing of issues as they arise for the AP12 you might want to take a look back here from time to time.
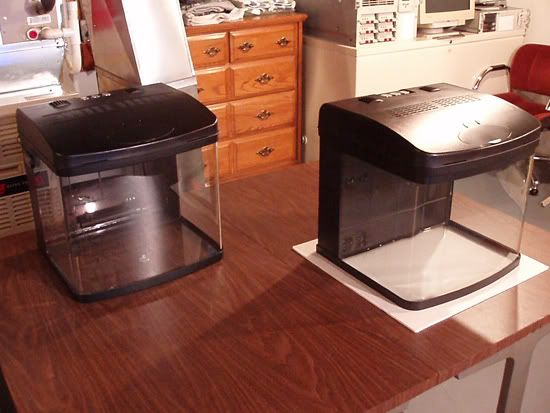
I guess I will start off with the purchase of it from Dr. Foster and Smith. Ordered it on a Monday and received it on a Thursday. Very nice if I may say so myself. The tank lighting did not seem correct so I contacted them and guess what. They sent me another tank. So now I have two for the time being. It was a great opportunity to check things out and do a comparison.
If you purchase a AP12 and turn on the lights it is a common mistake to think that the leds are not working if you have not plugged in the additional adapter for them. Along with that I strongly suggest that you remove everything that is in the tank including the sponge and consider some changes right from the very start.
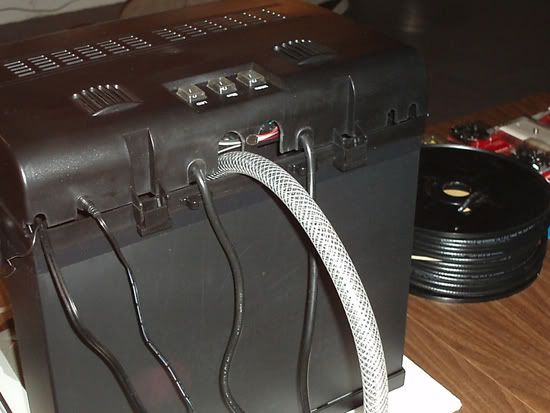
I like the idea of better water flow so the maxijet 900 was a great upgrade ( I don't consider this a mod cause nothing was actually drilled or broken in the process ) just take the included pump and use it for your water change tank instead. In addition to this I made the locline ( that is the bendable Y connector that you received in the box ) shorter leaving only one extender on each side and then the end piece ( this is the piece that looks like a vacuum cleaner attachment ).
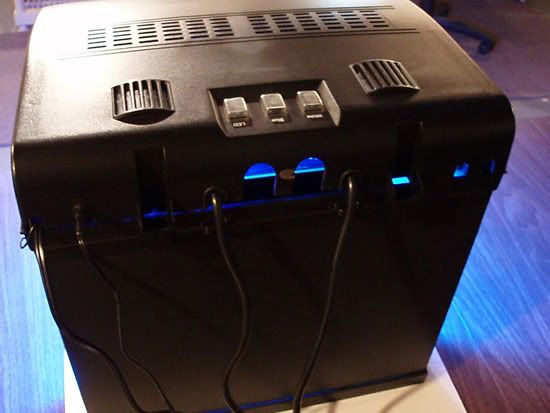
In the new units if you have a white or transparent sticker on the inside of the tank on the reflector inside the hood your tank and hood are not in the recall even though the model number is 7050. If you do not see a white or transparent sticker with the serial number on it, I would suggest contacting current-usa or taking it back to your LFS ( Local Fish Store )
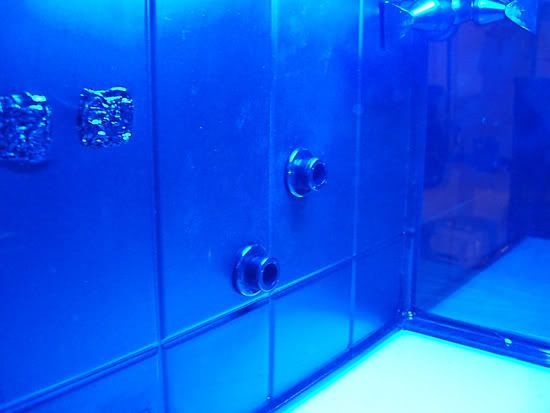
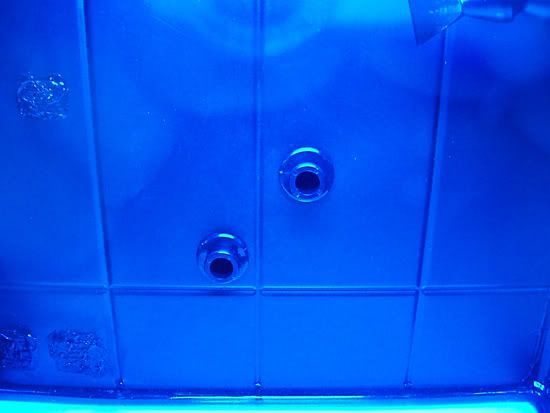
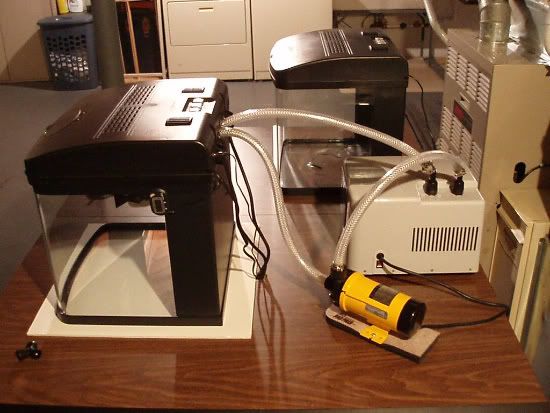
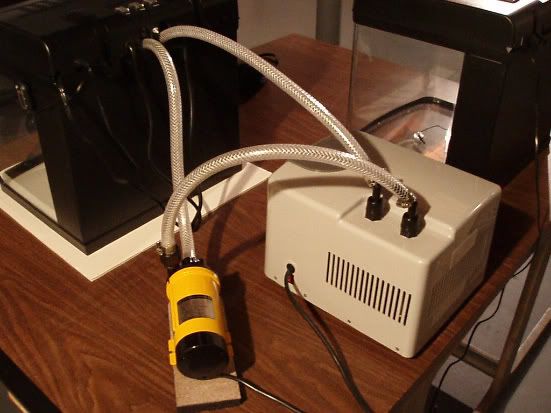
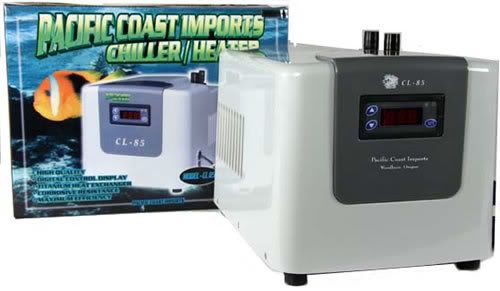
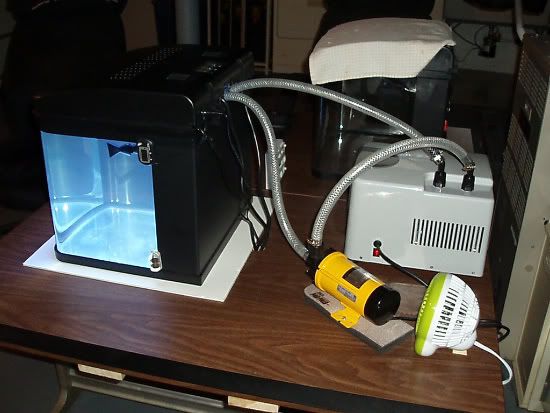
Checking out the 4 chambers in the back on the new models the first chamber ( starting on the left ) does extend all the way to the bottom of the tank and the water then passes through a slit about 2 inches up from the bottom into chamber 2 which when full passes over the divider into chamber 3 ( both of these chambers are a little higher then the bottom of the tank ) which then escapes into chamber 4 about 2 niches from the bottom of the tank ( chamber 4 does go all the way to the bottom of the tank again ) However, there is a dead area under chamber 2 and 3 where the accumulation of garbage can occur. I WILL BE CLOSING OFF THAT AREA ( first mod ). In addition to this I will be drilling a hole into chamber 3 where the plastic was molded ( this hole is clear as day when you see it ) The Hole I am drilling is so that I can put a rubber grommet in there and run a 1/2 ID hose from the cl-150 thermo electric chiller into the tank. The pump ( a blueline 20-hd ) will be placed outside the tank and pull water from chamber 3 and feed the chiller. So, hose from chamber 3 feeds pulls water to pump, then pushes it through the chiller and the returns line runs back into chamber 2 and into tank.
The reason I am doing the chiller is because I want the tank to remain a constant temperature ( period, end of story ) dealing with a heater and changes in season are just a PIA ( pain in the you know what ). Chiller ( no additional heater ) and that is all.
Chamber 1 will be filled with poly-filter in 3 levels and the bottom portion of the tanks vents into chamber 1 as well as the next intakes up will be covered with black all-glass silicone ( 3 ounce tube is plenty ) There is more then enough silicone to plexiglass the dead area closed in chamber 4 as well. With that completed I will then consider ( NOT DOING THIS YET ) changing the lighting to the AquaPod 70w. ( the 150 has too many trade offs to use on this size tank ) yes there are more bulbs, but it also is too long to fit on the tank, it is 20" and the 70w is 16.5" and yes I am interested in aesthetics. The 70 also requires less top off ( not interested in a top off unit, they are ugly and just more things to plug in and connect ) and in this amount of water depth the only thing you are really doing other then potentially having a HQI system in the event you decide to upgrade, you are creating more heat. Using a chiller who cares, but I do care about top off and dealing with how much water evaporation will occur over a period of time. This will be covered in this diary. So will prices, models and where items were purchased.
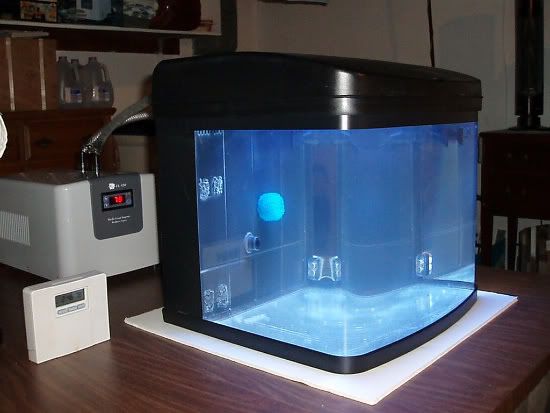
While I contemplate my next move and continue on with my story I am going to post a picture of the first and foremost thing you should have done once you received your tank and after checking for cracks and being sure you have all the items you are suppose too.
Filling the tank ( regular water ) and checking for leaks, while I let the tank burn in for 14 hours. Temperature of the room is 65 degrees, water temperature was 47 degrees when I added it to the tank 5 hours ago. The heater is OFF and I am running all lights on with the maxijet 900 running through the locline. Current temperature after 5 hours is 60.2 degrees. We will see what it is when I wake up in about 6 hours. Current time is 1:35am
I am not going to check for errors tonight, but I will edit and check tomorrow") If you want to send me comments please PM me, otherwise I am asking that people do not reply to this thread. If you do, well then I guess you did not read this far. LMAO
If you want to send me comments please PM me, otherwise I am asking that people do not reply to this thread. If you do, well then I guess you did not read this far. LMAO
Burn-in tank for 14 hours to check for leaks and other items listed above:
I figured I would start this here and see if it gets moved or not, but this seemed the place to start this. I am gong to do a complete diary of start to finish Aquapod and all mods including the addition of corals to my AquaPod 12. If you are interested in costs, time and the addressing of issues as they arise for the AP12 you might want to take a look back here from time to time.
I guess I will start off with the purchase of it from Dr. Foster and Smith. Ordered it on a Monday and received it on a Thursday. Very nice if I may say so myself. The tank lighting did not seem correct so I contacted them and guess what. They sent me another tank. So now I have two for the time being. It was a great opportunity to check things out and do a comparison.
If you purchase a AP12 and turn on the lights it is a common mistake to think that the leds are not working if you have not plugged in the additional adapter for them. Along with that I strongly suggest that you remove everything that is in the tank including the sponge and consider some changes right from the very start.
I like the idea of better water flow so the maxijet 900 was a great upgrade ( I don't consider this a mod cause nothing was actually drilled or broken in the process ) just take the included pump and use it for your water change tank instead. In addition to this I made the locline ( that is the bendable Y connector that you received in the box ) shorter leaving only one extender on each side and then the end piece ( this is the piece that looks like a vacuum cleaner attachment ).
In the new units if you have a white or transparent sticker on the inside of the tank on the reflector inside the hood your tank and hood are not in the recall even though the model number is 7050. If you do not see a white or transparent sticker with the serial number on it, I would suggest contacting current-usa or taking it back to your LFS ( Local Fish Store )
Checking out the 4 chambers in the back on the new models the first chamber ( starting on the left ) does extend all the way to the bottom of the tank and the water then passes through a slit about 2 inches up from the bottom into chamber 2 which when full passes over the divider into chamber 3 ( both of these chambers are a little higher then the bottom of the tank ) which then escapes into chamber 4 about 2 niches from the bottom of the tank ( chamber 4 does go all the way to the bottom of the tank again ) However, there is a dead area under chamber 2 and 3 where the accumulation of garbage can occur. I WILL BE CLOSING OFF THAT AREA ( first mod ). In addition to this I will be drilling a hole into chamber 3 where the plastic was molded ( this hole is clear as day when you see it ) The Hole I am drilling is so that I can put a rubber grommet in there and run a 1/2 ID hose from the cl-150 thermo electric chiller into the tank. The pump ( a blueline 20-hd ) will be placed outside the tank and pull water from chamber 3 and feed the chiller. So, hose from chamber 3 feeds pulls water to pump, then pushes it through the chiller and the returns line runs back into chamber 2 and into tank.
The reason I am doing the chiller is because I want the tank to remain a constant temperature ( period, end of story ) dealing with a heater and changes in season are just a PIA ( pain in the you know what ). Chiller ( no additional heater ) and that is all.
Chamber 1 will be filled with poly-filter in 3 levels and the bottom portion of the tanks vents into chamber 1 as well as the next intakes up will be covered with black all-glass silicone ( 3 ounce tube is plenty ) There is more then enough silicone to plexiglass the dead area closed in chamber 4 as well. With that completed I will then consider ( NOT DOING THIS YET ) changing the lighting to the AquaPod 70w. ( the 150 has too many trade offs to use on this size tank ) yes there are more bulbs, but it also is too long to fit on the tank, it is 20" and the 70w is 16.5" and yes I am interested in aesthetics. The 70 also requires less top off ( not interested in a top off unit, they are ugly and just more things to plug in and connect ) and in this amount of water depth the only thing you are really doing other then potentially having a HQI system in the event you decide to upgrade, you are creating more heat. Using a chiller who cares, but I do care about top off and dealing with how much water evaporation will occur over a period of time. This will be covered in this diary. So will prices, models and where items were purchased.
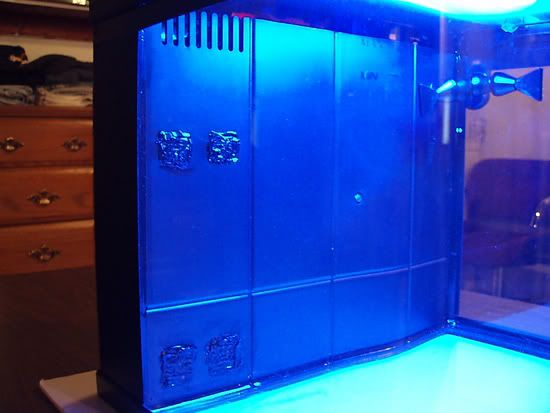
While I contemplate my next move and continue on with my story I am going to post a picture of the first and foremost thing you should have done once you received your tank and after checking for cracks and being sure you have all the items you are suppose too.
Filling the tank ( regular water ) and checking for leaks, while I let the tank burn in for 14 hours. Temperature of the room is 65 degrees, water temperature was 47 degrees when I added it to the tank 5 hours ago. The heater is OFF and I am running all lights on with the maxijet 900 running through the locline. Current temperature after 5 hours is 60.2 degrees. We will see what it is when I wake up in about 6 hours. Current time is 1:35am
I am not going to check for errors tonight, but I will edit and check tomorrow
If you want to send me comments please PM me, otherwise I am asking that people do not reply to this thread. If you do, well then I guess you did not read this far. LMAO Burn-in tank for 14 hours to check for leaks and other items listed above: