• Folks, if you've recently upgraded or renewed your annual club membership but it's still not active, please reach out to the BOD or a moderator. The PayPal system has a slight bug which it doesn't allow it to activate the account on it's own.

Our DIY sump and DIY stand

Hi everyone,

Since I'm in the infant stages of putting together our future setup, I thought I'd share what I/we've done so far.

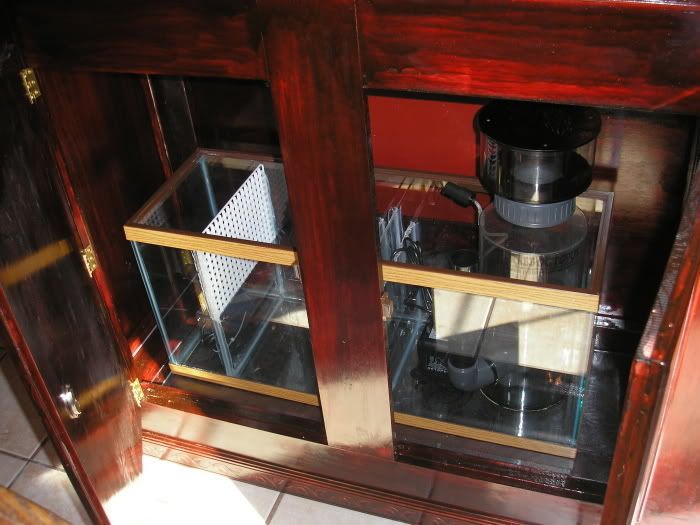
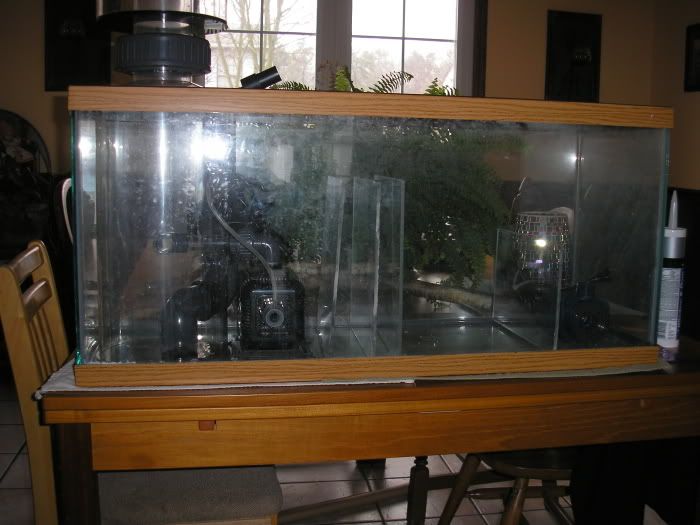
First I had to convert the 30 AGA into a sump.

1. Layout
SumpLayout.jpg


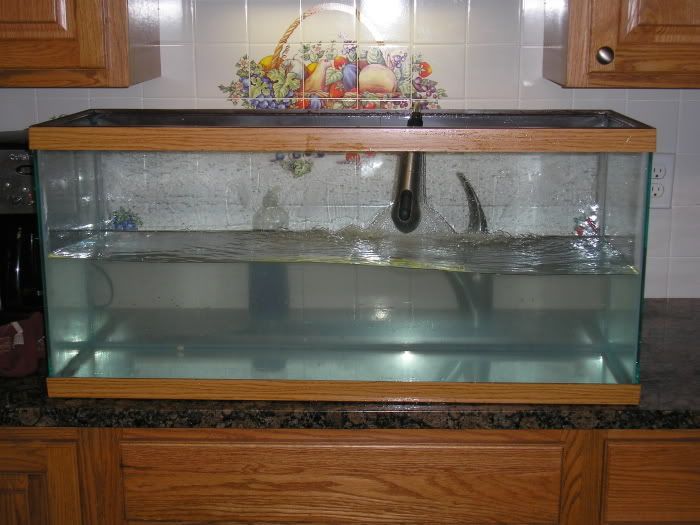
2. Leak-testing and cleaning
Cleanandleaktest.jpg


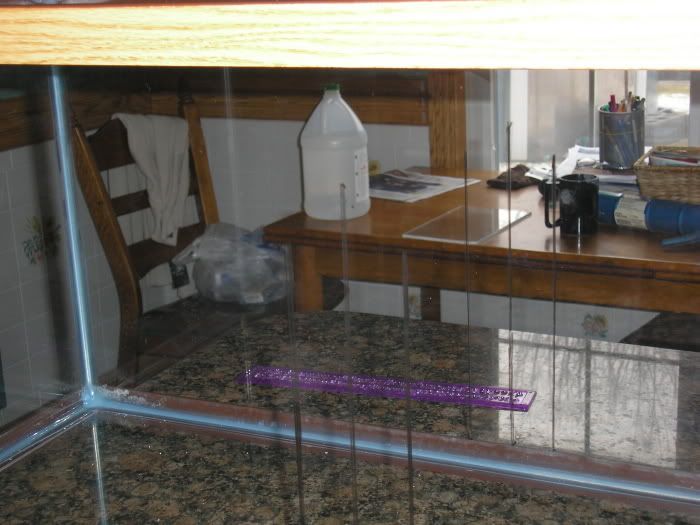
3. Drawing the lines for the baffles:
Drawoutwherebafflesgo.jpg


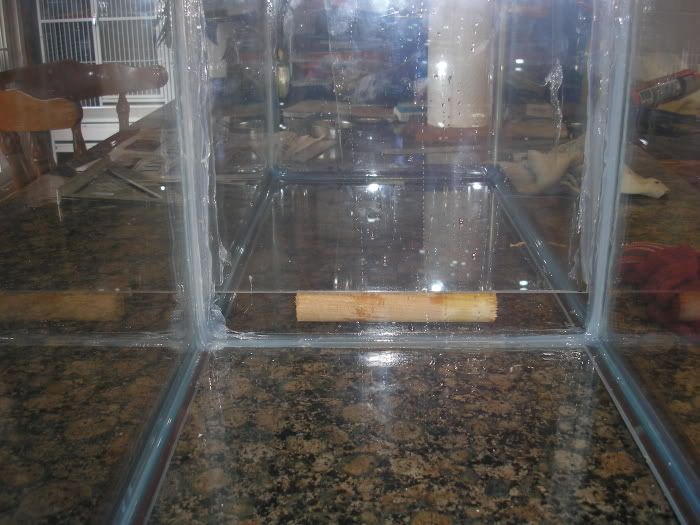
4. Installing the baffles. I used an old perch to make sure the second baffle was exactly 1" from the bottom
1inchguidefor2ndbaffle.jpg


5. Completed
Sumpfinished.jpg


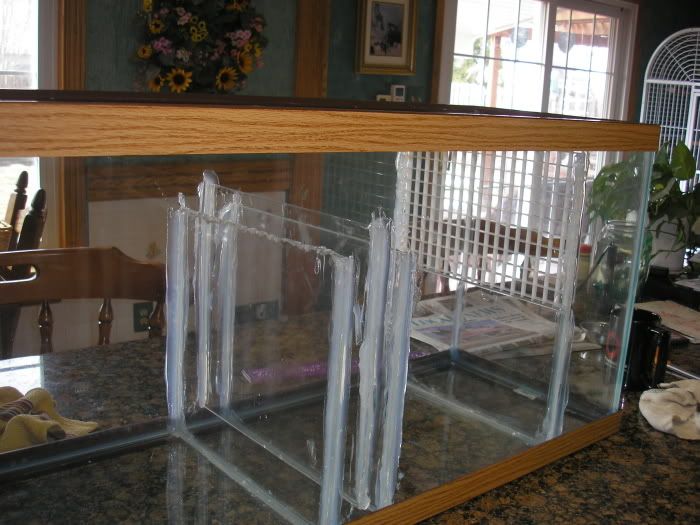
I learned the hard way how messy silicone can be. Should have used tape. Luckily it's not a beauty contest, as long as it works efficiently. :)
 
Stand

Next up is the construction of the stand. It is not finished yet, so please bear with me. :)

1. Putting together the frame
Standframing2.jpg


2. Heavy-duty reinforcement
StandProgress3-2-07.jpg


3. More reinforcing and putting on the front and sides
StandProgress3-2-07-1.jpg


4. One of the doors with molding attached
StandProgress3-3-07-1.jpg


5. Fine-tuning, sanding, reinforcing, more sanding, and more molding
StandProgress3-4-07-1.jpg

StandProgress3-4-07-2.jpg


6. First coat of stain/polyurethane
StandProgress3-4-07.jpg


That's it - that's how far we got. I'll update once it's done.

Thank you for looking. :)

---
Wendy
 

JohnS_323

Officer Emeritus
Officer Emeritus
Looks great, Wendy. Glad you found your way over here! Just holler of you have any questions or need any help.
 
Thank you, John. :)

Right now I'm honestly cursing my dogs because while I was applying the second coat of stain/poly to the doors, I tried to make extra sure not to get any hair on there, and failed miserably. :-[ When I finally managed to get it off (with a damp paper towel) and go over it again since it was still wet, a bristle from the paint brush came off and landed on it. :'( WHAAAA!

It happened again on the 4th door. By the time I got it off, my hands were literally covered in the stuff, especially under my nails. Oh well - I'm not going to complain, I just live with the fact that part of my dogs will be permanently embedded in the stand.

Oh, and despite the frigid temperatures and the wind I had no choice but to crack 2 windows because the smell of the stain/poly was making me light-headed.

---
Wendy
 

Brian

Officer Emeritus
Officer Emeritus
Too Funny Rich!

Looks great Wendy! I can totally relate to the dog hair getting on everything! I did my stand in the garage, where the dogs NEVER are...and still managed to pull off a hair or two!
 
Looks Great! I looks like you are using the same plans that I am for my sump almost exactly. Let me know if you use it and there is something that you do not like.
 
Thank you all very, very much. :)

Last night we carried the stand into the dining room, so that I can start staining it today. Would have been nice if I could have done it in the garage, but even with 2 space heaters it isn't getting warm enough in there, and I'm afraid the cold will have an affect on the drying process.

@ Edwin: I've been researching and reading since January, and found countless articles and DIY sump designs. I opted for this one because many people did theirs the exact same way and are happy with it.

Once it's all up and running, which will be several months from now since there's still so much to purchase and so much to do, I can hopefully let you all know how it works. The sad thing, however, since this will be the first time I'm using a sump, I'm not sure whether I'll even know if it's working properly. :-[

---
Wendy
 
Nevertheless,

it still looks great. Sometimes the thing that seems to look the worst, works the best. I'm sure your sump will be perfect. I started reading a lot of articles on sumps/refugiums. And as soon as I can get up to Paterson and pick up my other tanks, I'll start on mines. I'll just take my time, my w/d will do just fine, has been for years. Please keep posting pics, will love to see the finished products

ihs

edwin
 
Just a tiny update: :)

The doors are finished, other than still having to add hardware and look like this: (If you look really close you can see the bristle from the brush that decided to give me a hard time :mad:)
StandProgress3-6-07-1.jpg


Here's the stand with the first coat of stain:
StandProgress3-6-07.jpg


Tomorrow I'll "steel wool" it, dust it thoroughly, and give it the second coat.

---
Wendy
 
Did you think about painting the inside rather than stain? If the fuge is going to be in there a nice white would reflect the light a bit more and may hold up to water better than a poly coat.
 
Thank you Moderatus Maximus. ;D

And yes, I originally wanted to paint the inside with Kilz, but at the last moment decided to just go ahead and stain it. I have this stuff (forgot the name of it) that'll go inside all the nooks and crevices, which will make it water-proof, and additionally the inside will get an extra coat of polyurethane, plus there'll be a rubber mat on the bottom of it.

Of course I'll be getting a light for the fuge. If I find it's not working, I will probably have to redo the inside white.

---
Wendy
 
Top