

-
Folks, if you've recently upgraded or renewed your annual club membership but it's still not active, please reach out to the BOD or a moderator. The PayPal system has a slight bug which it doesn't allow it to activate the account on it's own.
You are using an out of date browser. It may not display this or other websites correctly.
You should upgrade or use an alternative browser.
You should upgrade or use an alternative browser.
DIY Nano Cube Canopy
- Thread starter redfishbluefish
- Start date
Fantastic job from start to finish Paul!
Jason, Mike, George and Austyn, thank you for the kind words.
…..and Mike, some people are never satisfied. I’ll have to come down and whip you with a wet noodle, because next you’ll be asking me to start with sand and cast my own glass!

…..and Mike, some people are never satisfied. I’ll have to come down and whip you with a wet noodle, because next you’ll be asking me to start with sand and cast my own glass!
I ordered a full spectrum dimmable 120 W “Chinese” fixture off ebay. Although unbranded, I think it’s an Evergrow D120…..comes with 90 degree optics. While I waited for the fixture to arrive, I temporarily hung a 120W TauTronics fixture in the canopy.
Since it wasn’t dimmable, and feeling 120W of LED’s was too much for a JBJ 28, I ran white only or blues only…..never both at the same time.
What I noticed over the next couple weeks was that my water evaporation rate went through the roof. With the conventional JBJ hood, I was consuming maybe 1 to 2 cups per day. With the new canopy and temporary lights, I was now up to 2 to 3 quarts per day. I believe this excess amount of evaporation was coming from two things……..The open top of the canopy and the fan action coming from the lights being within the canopy.
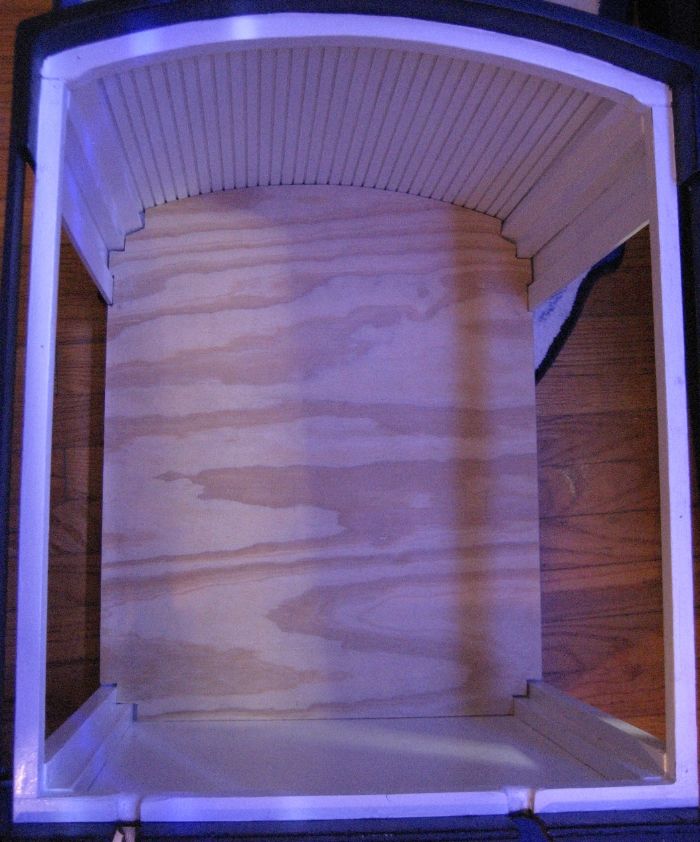
To cut down on evaporation, I decided to close up the canopy and move the lights outside the canopy….the fans and exhaust anyway. A half inch piece of plywood was cut to fit the top. Here is the canopy upside down with the plywood top lying inside.
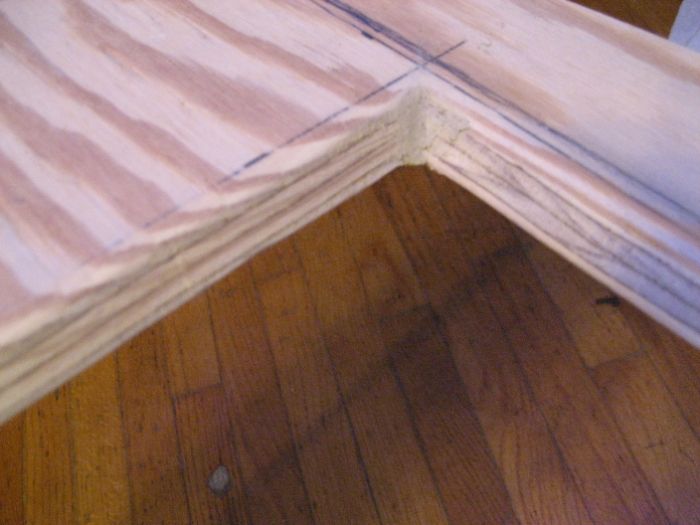
A hole was cut into this top, slightly smaller than the dimension of the light fixture.

Now this cut was actually done at a 45 degree angle (from the top side), so that the bevel on the light fixture would rest in this hole:
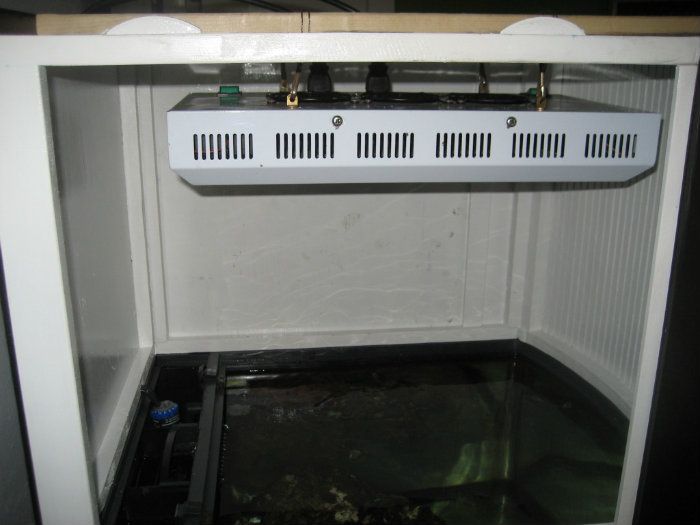
The new fixture arrived and I’ve temporarily hung that in the canopy to acclimate the livestock in the tank. It just so happens to be that it is the same size and design of the TauTronics, so here is that fixture resting in the canopy top, so you can get the idea of what I’m talking about. No hanging stuff needed….the light will simply rest on the top of the canopy, fitting in the beveled cut-out.
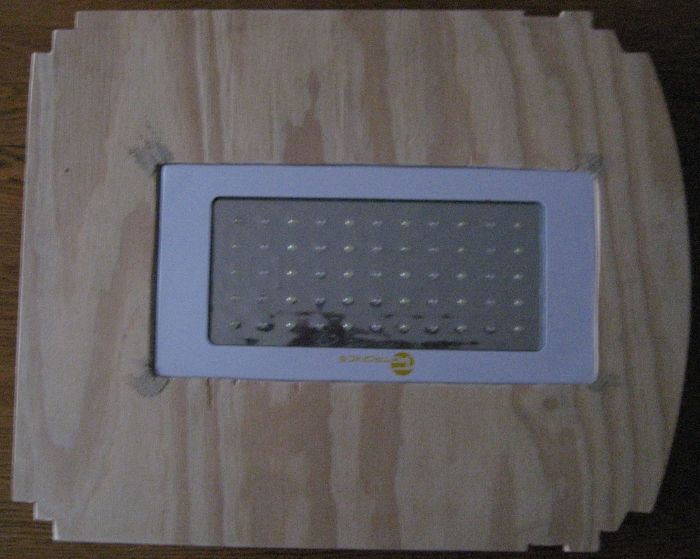
View From The Top:

View From the Bottom:
Now to paint this up and install it….with screws, just in case I want to take it out.
Since it wasn’t dimmable, and feeling 120W of LED’s was too much for a JBJ 28, I ran white only or blues only…..never both at the same time.
What I noticed over the next couple weeks was that my water evaporation rate went through the roof. With the conventional JBJ hood, I was consuming maybe 1 to 2 cups per day. With the new canopy and temporary lights, I was now up to 2 to 3 quarts per day. I believe this excess amount of evaporation was coming from two things……..The open top of the canopy and the fan action coming from the lights being within the canopy.
To cut down on evaporation, I decided to close up the canopy and move the lights outside the canopy….the fans and exhaust anyway. A half inch piece of plywood was cut to fit the top. Here is the canopy upside down with the plywood top lying inside.
A hole was cut into this top, slightly smaller than the dimension of the light fixture.
Now this cut was actually done at a 45 degree angle (from the top side), so that the bevel on the light fixture would rest in this hole:
The new fixture arrived and I’ve temporarily hung that in the canopy to acclimate the livestock in the tank. It just so happens to be that it is the same size and design of the TauTronics, so here is that fixture resting in the canopy top, so you can get the idea of what I’m talking about. No hanging stuff needed….the light will simply rest on the top of the canopy, fitting in the beveled cut-out.
View From The Top:
View From the Bottom:
Now to paint this up and install it….with screws, just in case I want to take it out.
Last edited:
Looking good cant wait to see this all done!! You are a pioneer in the DIY market!!!
Looks good Paul. The top piece fit great and you got lucky that the cases were the same size. Did you have a backup plan if it was smaller than the hole you made?
That fixture looks like one of those that just use a foil type heat dissipator instead of an actual heatsink. If so, just be sure to keep the fans maintained and cleaned to help keep them cool. Also, since it's dimmable, I'd suggest keeping them at or under 75% or so just to help prolong the life of the LEDs.
That fixture looks like one of those that just use a foil type heat dissipator instead of an actual heatsink. If so, just be sure to keep the fans maintained and cleaned to help keep them cool. Also, since it's dimmable, I'd suggest keeping them at or under 75% or so just to help prolong the life of the LEDs.
Mike, thanks for the compliment.
Another piece of plywood.
George, maybe I wasn’t clear enough….the new fixture is temporarily hanging in the canopy….acclimating:

The old fixture (TauTronics) was used to only take the pictures in post 46, just so you could get the idea of what I was talking about.
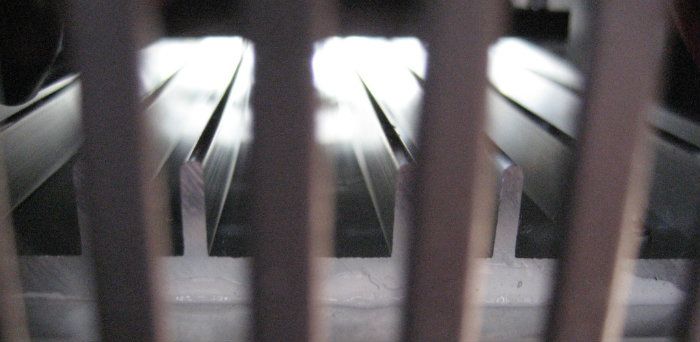
And as far as cooling aluminum, this new fixture has more aluminum than the Apollo’s I have. Take a peek through the slits in the side:
And Pete, thanks for the heads-up. I’ll keep an eye on condensation, but I’m thinking the slight amount of heat coming off the LED’s will eliminate the chances of condensation on the unit. We’ll just have to see what happens.
Looks good Paul. The top piece fit great and you got lucky that the cases were the same size. Did you have a backup plan if it was smaller than the hole you made?
Another piece of plywood.
That fixture looks like one of those that just use a foil type heat dissipator instead of an actual heatsink. If so, just be sure to keep the fans maintained and cleaned to help keep them cool. Also, since it's dimmable, I'd suggest keeping them at or under 75% or so just to help prolong the life of the LEDs.
George, maybe I wasn’t clear enough….the new fixture is temporarily hanging in the canopy….acclimating:
The old fixture (TauTronics) was used to only take the pictures in post 46, just so you could get the idea of what I was talking about.
And as far as cooling aluminum, this new fixture has more aluminum than the Apollo’s I have. Take a peek through the slits in the side:
And Pete, thanks for the heads-up. I’ll keep an eye on condensation, but I’m thinking the slight amount of heat coming off the LED’s will eliminate the chances of condensation on the unit. We’ll just have to see what happens.
Paul, I thought that last photo of post #46 was the new unit that you were describing "just arrived" just above that. I guess I didn't pay close enough attention.
The heatsink looks good, so disregard my previous concerns.
The new fixture most likely came with it's own plexiglass over the LED's, so I wouldn't worry about condensation.
The heatsink looks good, so disregard my previous concerns.
The new fixture most likely came with it's own plexiglass over the LED's, so I wouldn't worry about condensation.
Any quality fixture case should be powder coated to protect the metal from corrosion.
Did he mention Chinese
Hey Zippy, not sure what you meant by that…..having worked with China for medical grade plastics, I take that “Chinese” comment as meaning it will contain heavy metals (cadmium, lead, and others). Now realize that most of these metals have much lower levels of oxidation capacity (rust), when compared to steel. So maybe I’ll make out OK with those heavy metals in the paint!
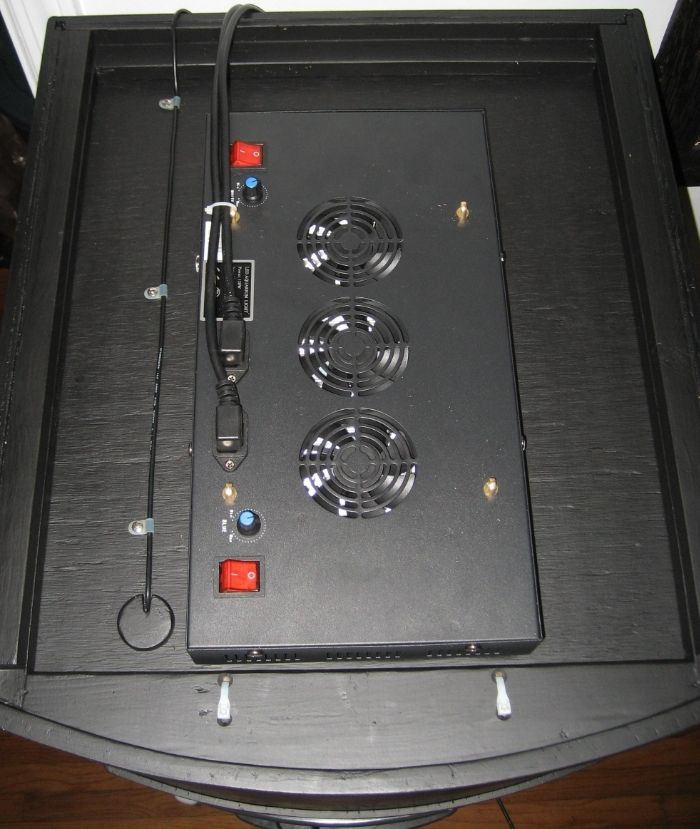
Anyway, here’s hopefully the final build part of this canopy….the new top cover, lights and moonlights. The moonlight (EBay – ca $10), was hardwired and therefore I had to drill a big hole into the top to slide the light in (7/8 inch hole). I made a plug to cover this hole. You can see this plug in photos below.
View From the Inside (actually I have the canopy off the tank and upside down.):

View From the Top:
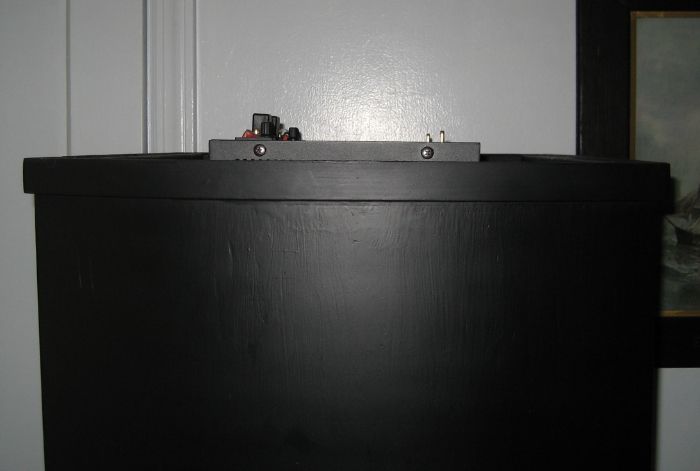
View Form the Front (with camera lens level to the top):
I’m so happy with the way this build turned out, I’m now thinking of the design of a new stand…..about four or five inches higher than the current stand, and it will have the bellied front, just like the canopy. Stay tuned! Dance
Last edited:
Paul, first off it looks FANTASTIC !!!!! I, in stage three REM could only dream of having your methodical precise carpentry skills. I did the same thing on my 55 gal tank albeit more crude. The point I am trying to make is the black metal trim that is visualized from the underside of the hood will have quite a bit of condensation on it each and every morning. The tank water is 75-78 degrees and the room temp is I am guessing at least 10+ degrees cooler. So at night the lights are off and warm moist tank air will condense all over the inside. I know there is a powder coating in the sheet metal making up the housing....but we are not talking the same degree you have in a car and over time you will see rust spots appear. It did on mine after about a month. So, all I am suggesting is to place a piece of plexi/ glass on the inside to isolate the inner chamber from any part of the light fixture. That is all I mean
Pete, thanks for the compliment.
I know exactly what you are talking about. I will keep an eye on that over the next few days. I could easily add a ¼” piece of plexi to cover the hole.
Here’s what I just noticed now in regard to condensation. I’ve had the blues on for a few hours and just went to turn on all lights. The doors had a slight bit of moisture on them….not drop size, but still wet. No wetness noted on the top, probably because of the slight heat up there. So I’ll keep an eye on this, especially after lights have been out overnight.
Thanks again for the heads up Pete.
Any hardware store sells them...Hey quick question. Where do you find those cord mgmt things (don't know a better way to describe them)? They are the little plastic things screwed down holding the cords? Thanks