

-
Folks, if you've recently upgraded or renewed your annual club membership but it's still not active, please reach out to the BOD or a moderator. The PayPal system has a slight bug which it doesn't allow it to activate the account on it's own.
You are using an out of date browser. It may not display this or other websites correctly.
You should upgrade or use an alternative browser.
You should upgrade or use an alternative browser.
Inherited 90
- Thread starter redfishbluefish
- Start date
Paul, I took notes on your angle stock to mount the LED's in the canopy. That's kind of what I was thinking of doing for mine. How did you attach the angle to the fixture? Did you take any pics of that?
Also, I'll be on the lookout for your canopy design. I need to build one very soon and it's always nice to compare what others are doing... especially when you will be mounting the same type of lights as me.
As for your acclimation, these LED's are comparable to 400w MH's. You will definitely need to acclimate since you had T-5's before (same as me, except I only had 4 bulbs). Starting high is your best bet, but you don't want to be too high after acclimation. Here's a quote from Apollo's FAQ page:
I plan to have mine at around 12" above the waterline when I mount mine in the canopy.... but I'll have dimmable units so I can compensate with intensity and/or time length on instead of height. Also, keep in mine that the higher you go, the wider the light spread will be. As you get the lights closer to the water, the color temp will change and the shadows may become less.
Anyway, they look great so far. Good luck with them!
Also, I'll be on the lookout for your canopy design. I need to build one very soon and it's always nice to compare what others are doing... especially when you will be mounting the same type of lights as me.
As for your acclimation, these LED's are comparable to 400w MH's. You will definitely need to acclimate since you had T-5's before (same as me, except I only had 4 bulbs). Starting high is your best bet, but you don't want to be too high after acclimation. Here's a quote from Apollo's FAQ page:
How high off the water do you recommend the light be mounted?Our testing has all been done with the light 8″ off the water surface. You can raise the light higher to fit your needs. Our new hanging kits extend to 39″ to reach the ceilings in most homes though hanging your light more than 14″ is not recommended
I plan to have mine at around 12" above the waterline when I mount mine in the canopy.... but I'll have dimmable units so I can compensate with intensity and/or time length on instead of height. Also, keep in mine that the higher you go, the wider the light spread will be. As you get the lights closer to the water, the color temp will change and the shadows may become less.
Anyway, they look great so far. Good luck with them!
How did you attach the angle to the fixture?
George, I have, for the sake of giving it a name, the First Generation Apollo box. It is steel, has fixed cords, push-button switches, and has a very simple cable hanging system. The top of the fixture has four small, machined eyebolts that would clip to a four-point cable. Again, very simple. I know the Second Generation Apollo (now controllable), comes with an aluminum box, removable cords, waterproof rocker switches, and a fancy bolt type cable system, that are adjustable. Here’s what my cables look like, with the clips on the four ends that would fit on the eyebolts.
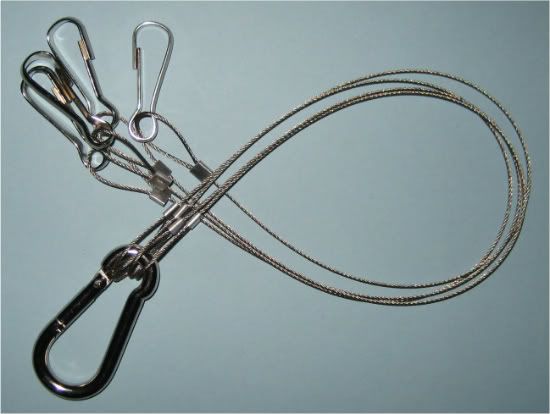
Note that you cannot adjust the height of the fixture with these cables.
So I had to work with these small eyebolts on the top of the fixture, while you have stud ends. What I did was use 8 – ½ inch machine bolts that fit through the eyebolts. I drilled a hole in the offset aluminum angle (3/4 x ½ x 1/16) (FYI, A four foot piece at HD is six bucks and change. On a side note, I didn’t go to HD looking for offset, just wanted a regular symmetrical piece of aluminum angle. But my local HD had their aluminum section very poorly stocked. The only four foot angle was this one offset piece.) Now each side of the fixture has a one foot length of aluminum angle that is attached by two bolts through the eyebolts. I did have to file slots around the fixed cable points, since they were slightly in the way of the angle. Looking at the top of your fixture, it would appear that the switches would get in the way a piece of angle, from one bolt to the next. Anyway, here’s a picture of the bolt point of the eyebolt to the angle:
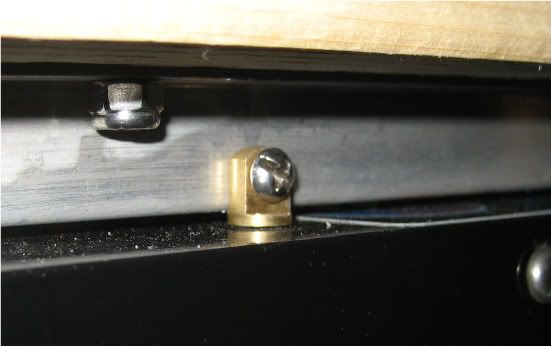
I then drilled holes in the opposing side of the angle, and attached this to a wood frame using machine bolts. You can see the nut end in the above picture.
Honestly you really shouldnt have to start from that far up at all. Unless everything in the tank is low light and you are seeing immediate bleaching and ill effects, something like 20" and eventually down to like 12 would be fine
Thanks Xavier for your input. This acclimations stuff is a real head-scratcher! I first simply put my fixtures on the top of my canopy (about 13 ½ inches above the waterline) and then sat back thinking I was done. However, in reading RC and other sources, pretty much all of them talked about bleaching out corals when switching over. Mark54321 over on RC (and I think he has some type of involvement with Apollo design and development), commented that his switch from T5’s to Apollo, starting at 24 inches high, and slowly bringing them down, still resulted in two of his corals bleaching out.
Now to counter that, with no names mentioned, I had a fellow reefer over yesterday who switched from PC’s to an Apollo back in August. He has a 29 gallon tank and put the fixture inches above the waterline from day one. No acclimation, no change in photoperiod…and this is a small 29 gallon tank. He saw no ill effects of doing this. Again, small tank, switch from PC’s, inches above the waterline…..no acclimation!
That’s why I’m scratching my head.
Since I can’t find anything definitive, I’m going to do this the way all things should be done in this hobby………slow and slower.

Do you have something to cover the tank while the canopy is off?
Mike, you’re killing me. I hadn’t planned on doing anything, but once you’ve brought it up………made this little cover this morning.
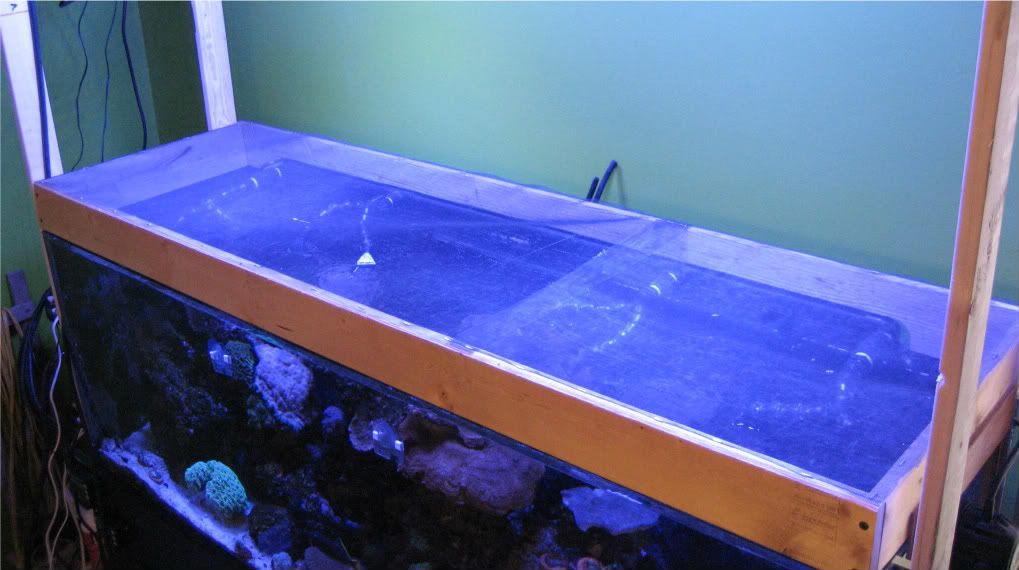
NOTE TO SELF: Pick up screen at HD. For some reason, the screen in our back door is missing.
Gotcha Paul. I thought that maybe you just attached the angle to the case by drilling your own holes or something.
I just took mine apart again to take a closer look at the hanger studs on the top. They're just held on by a small nut on the inside of the top panel. I could probably just remove them altogether and then fasten a "U" channel or something with new nuts/bolts in lieu of the hanger studs. Then I could just fasten the top of the U channel to the frame of my canopy to attach the fixtures.
I'm now thinking that any way I do it, the rocker switches won't be able to protrude thru an opening in the top of the canopy if I tried. They will be too far away. Mine will probably just be set to "on" forever anyway since it will on be on a controller... so not a biggy. I was just hoping to have the option to manually turn them off if needed. Who knows, maybe if I cut the hole big enough I can still push them.
The other issue I will now have is that the fans won't be flush with the top of the canopy, meaning I'll have to come up with a plenum of sorts to make sure the fresh air is pulled only from outside the canopy. I don't want the fans to draw air from inside the canopy because it will be slightly warmer than outside.
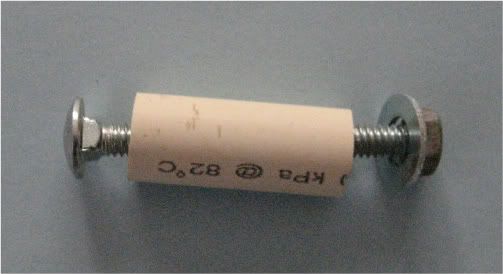
George, the other way I was considering hanging the fixture, was putting a long bolt or threaded rod in the holes, and then using a spacer. Here is an example of a carriage bolt (I would not use a carriage bolt), with a piece of 1/2 “ cpvc as the spacer. I’m pretty sure the bolts currently in your fixture are 6 mm. If you buy ¼ inch bolts, that is a hair larger than 6mm. They might fit or only need a light punching out with a quarter inch bit.
So I have two frag racks in my DT so that my Mexican Turbos have something to play with at night. Having two Mexicans, I can’t keep a frag in the racks. I’ll place new frags in the rack, and the following morning the rack is empty, with the frags being thrown into the mushroom field below. The mushrooms are so thick, the frags would disappear into the mushroom field.
With my tank no longer having a sealed canopy, I’m able to get into it very easily. So today I started an expedition into the mushroom fields. I pulled out a bunch of dead “sticks,” and some frag plugs that had nothing on them except mushrooms?? I placed the dead “sticks” back into the frag rack for the Mexicans to play with something tonight.
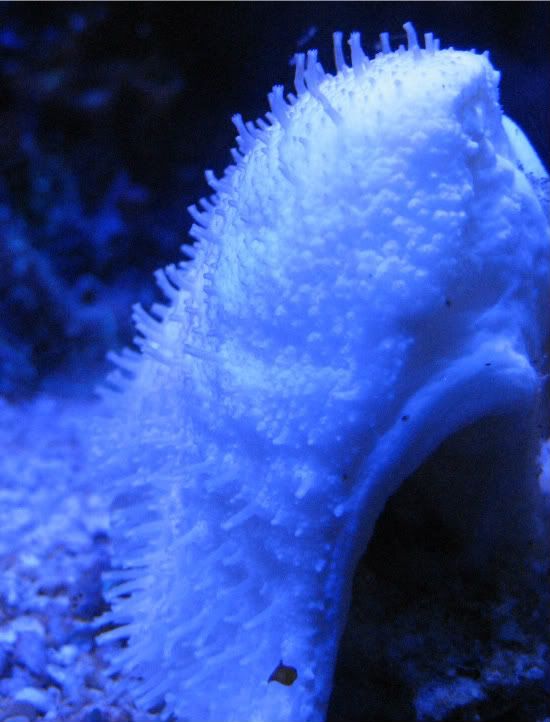
Interesting, one of the frags I pulled out was a leather frag that disappeared about a month ago. It was totally white, but still look alive (supple tissue). I placed it in the sand at the front of the tank and sure enough, it put out polyps….but they were white as well. It looks like an albino leather:
Having two Mexicans, I can’t keep a frag in the racks. I’ll place new frags in the rack, and the following morning the rack is empty, with the frags being thrown into the mushroom field below. The mushrooms are so thick, the frags would disappear into the mushroom field.With my tank no longer having a sealed canopy, I’m able to get into it very easily. So today I started an expedition into the mushroom fields. I pulled out a bunch of dead “sticks,” and some frag plugs that had nothing on them except mushrooms?? I placed the dead “sticks” back into the frag rack for the Mexicans to play with something tonight.
Interesting, one of the frags I pulled out was a leather frag that disappeared about a month ago. It was totally white, but still look alive (supple tissue). I placed it in the sand at the front of the tank and sure enough, it put out polyps….but they were white as well. It looks like an albino leather:
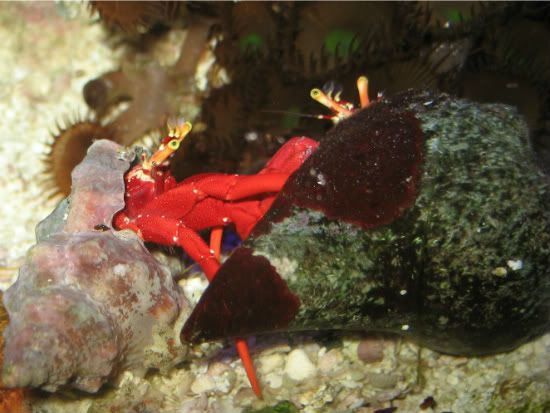
Here are two of my Red Leg Hermits playing footsy. I think they are also giving each other the eye. 
Stuck Cucumber
Hadn’t seen my cucumber in a week or so, and just figured it was motoring around the caves and back area of the tank. I’m cleaning my glass, and come over to the side of my tank, were my frag rack is stuck to the side of the tank. In the rack is my cucumber, and looked like it was half its normal length. My first thought, with an MP40 immediately over the rack, is that he got sucked into the PH and sliced in half. Upon further inspection, his head was stuck in one of the square parts of the rack.
I pulled the rack off and laid it in the sand bed hoping he would pull his head out. I tried nudging him, and no dice. Actually there was no movement at all. Here’s his picture with the rack on its side, in the sand-bed.
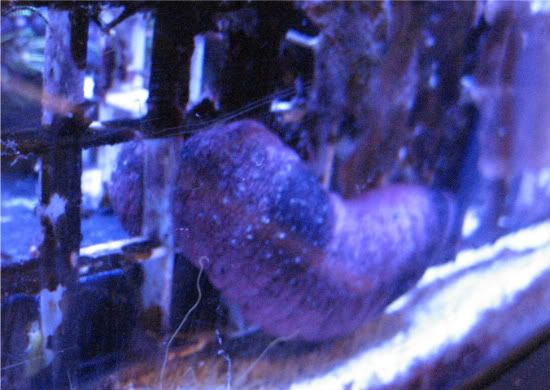
I eventually had to take out the wire cutters and cut the rack up to extract the little guy. Placed him in the sand bed, and in about ten minutes he started to move, and motored into a cave.
Hadn’t seen my cucumber in a week or so, and just figured it was motoring around the caves and back area of the tank. I’m cleaning my glass, and come over to the side of my tank, were my frag rack is stuck to the side of the tank. In the rack is my cucumber, and looked like it was half its normal length. My first thought, with an MP40 immediately over the rack, is that he got sucked into the PH and sliced in half. Upon further inspection, his head was stuck in one of the square parts of the rack.
I pulled the rack off and laid it in the sand bed hoping he would pull his head out. I tried nudging him, and no dice. Actually there was no movement at all. Here’s his picture with the rack on its side, in the sand-bed.
I eventually had to take out the wire cutters and cut the rack up to extract the little guy. Placed him in the sand bed, and in about ten minutes he started to move, and motored into a cave.
Sounds of Silence
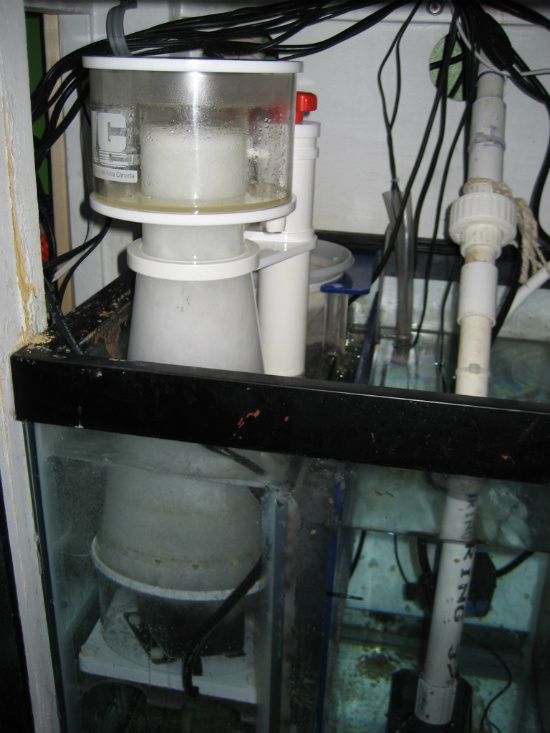
Switched out the old MRC 3 skimmer with a MAG 24, for an SWC 160 Xtreme Cone. The driving force behind the switch was energy consumption. The MAG 24 pulled a whopping 265 watts, while the SWC only pulls a measly 27 watts. I’m just hoping the SWC pulls the gunk like the MRC….that thing made skimmate that was as thick as toothpaste!
So now I sit in the fish room in silence. The other issue with becketted skimmers is that they sound like a jet airplane. This new fangled cone is quiet! I’m now hearing for the first time the trickle of water as it returns to the DT. I can hear the ReefKeeper for the first time as it clicks when the heaters come on. And now that’s another point….between switching my lighting, and now skimmer, to save energy, I’m probably going to end up robbing Peter to pay Paul. That is, the savings in LED lights and an energy efficient skimmer will probably go right into the extra $$ the 600 watts of heaters have to be on to now keep temperature. I know when my lights were on the tank was always around 79….and I’ve got to believe the MAG 24 kicked in a good bit of heat.
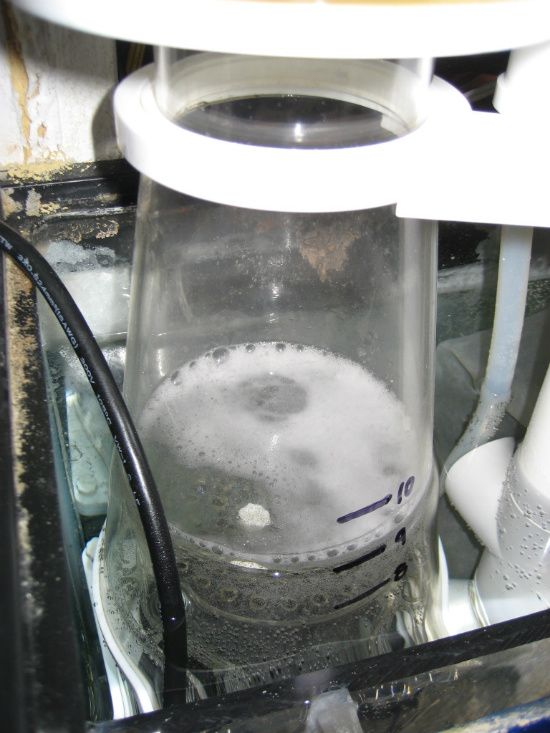
So I’ve got this thing running and just have to wait to see what it starts to pull:
Switched out the old MRC 3 skimmer with a MAG 24, for an SWC 160 Xtreme Cone. The driving force behind the switch was energy consumption. The MAG 24 pulled a whopping 265 watts, while the SWC only pulls a measly 27 watts. I’m just hoping the SWC pulls the gunk like the MRC….that thing made skimmate that was as thick as toothpaste!
So now I sit in the fish room in silence. The other issue with becketted skimmers is that they sound like a jet airplane. This new fangled cone is quiet! I’m now hearing for the first time the trickle of water as it returns to the DT. I can hear the ReefKeeper for the first time as it clicks when the heaters come on. And now that’s another point….between switching my lighting, and now skimmer, to save energy, I’m probably going to end up robbing Peter to pay Paul. That is, the savings in LED lights and an energy efficient skimmer will probably go right into the extra $$ the 600 watts of heaters have to be on to now keep temperature. I know when my lights were on the tank was always around 79….and I’ve got to believe the MAG 24 kicked in a good bit of heat.
So I’ve got this thing running and just have to wait to see what it starts to pull:
Quiet is good! I'm sure you'll love the skimmate production too. ")
By the way Paul, I think I found a good solution for connecting my led mounting studs to a cross beam in the canopy.
I found these at Home Depot... 1/4" - 20 couplings. They aren't the exact same threading (actual on the studs is 1/4"-28 or M6-1.0) but they do screw on about half way with a good grip. That's just tight enough to where it doesn't start stripping the threads.
http://www.homedepot.com/h_d1/N-5yc...lay?catalogId=10053&langId=-1&keyword=1/4"-20
Then, I plan on screwing these into the couplings:
http://www.ebay.com/itm/8020-T-Slot...197?pt=LH_DefaultDomain_0&hash=item56448e0b7d
And then getting 2 of these T-Slots and sliding the BHSCS screw heads into the slots... then mount these across the top of my canopy frame:
http://www.ebay.com/itm/8020-T-Slot...509234&po=LVI&ps=63&clkid=6361701048694005161
Done deal. Now I just need to make my box frame with the front/back hinged panels, order these items above, and get it all together so I can hook up the controller.
Watcha think?
I think I might have been snookered!
The SWC I just bought is used, and was sold with two extra pumps. One pump flat out doesn’t work. One impeller has a broken ceramic shaft. A second pump “worked” for a couple hours and then the bubble column collapsed….no skimmate produced. Something is still going on with this one, but not enough to make bubbles….wondering if it’s an impeller problem. And I now have the last pump in the skimmer, making bubbles (but don’t know if they are right), with virtually no skimmate production…..a very wet, clear tea look.
I’m bummed!
That's not good. Did you buy it as "used" or did they say it was new? Where did you find it, on RC?
That's not good. Did you buy it as "used" or did they say it was new? Where did you find it, on RC?
It was on RC:
SWC 160 Cone Skimmer
Question about settings on the SWC: I was born and bred on becketted skimmers, and I could never figure out why they put a valve on the air intake….you just always ran that full open. Is that the same case with the SWC? I’ve got the air pick-up wide open???
I don't have enough posts on RC to see the classified sections.
Assuming the SWC operates like my NAC7, you need to adjust the air based on the top of the bubbles level in the cone. Ideally, you want to set it so the bubbles are around a half-inch or so from the top right at startup. As it breaks in, you may need to watch it and adjust it slightly to get it to perform the way you want.
I'll take a quick vid tonight of mine in operation, and how I adjust it.... then post it here for you.
Spent the day out and about and came home to this:
Just like yesterday, a few hours after setting up the skimmer, the bubble column was collapsed, but something was still going on. With the reading I’ve done over the past day, I tried blowing into the air feed line, and nothing happened. I also tried unplugging and plugging the pump in, and still no change.
As I mentioned above, I found posts that talked about putting a washer on the magnet side of the impeller, and this setup I had had that nylon washer there.
Further reading, I now find a post that talks about a washer on the mesh wheel side.
So I once again pulled the skimmer/pump out of the sump and now put a washer on the impeller side. This took less than five minutes, and when I plugged it back in…. voilà, the skimmer was once again producing the bubble column. I’m hoping this is it, because I’m about ready to pull this thing out and toss it.
Finally, I still have no real skimmate. My MRC would have already been so darkened by skimmate that you could not see through the riser column. I’ve got my fingers crossed!
... I’m about ready to pull this thing out and toss it.
But think of all the energy you're saving! LOL
What did the seller say when you told him about the broken pumps?
Paul, I took a nice 4+ minute vid of my skimmer in action. Unfortunately, I have nowhere to upload the file because it's over 1GB, lol.
We have a cloud drive at my work that our IT guy was supposed to be setting up. I'll try to copy it there tomorrow and try to link to it there. I'm not sure if it's accessible from the internet yet, but if so I'll post it tomorrow.
Sorry to hear about your issues with yours. Looks to me like you have a bad pump or at least bad impellers. I'm just using the stock mesh wheel and it works like a dream.
But think of all the energy you're saving! LOL
What did the seller say when you told him about the broken pumps?
I’m saving a ton of electricity now. Just checked on the skimmer, and the bubble column has collapsed yet again. I tried all iterations of impellers and pumps, and I’ve got nothing. So right now I’m not running a skimmer.
First thing tomorrow morning I’m cleaning up the MRC and putting that back in. This stinks!
And I have not contacted the scumbag seller yet….I need to cool down and collect myself first.