• Folks, if you've recently upgraded or renewed your annual club membership but it's still not active, please reach out to the BOD or a moderator. The PayPal system has a slight bug which it doesn't allow it to activate the account on it's own.

Merv's new 40 gallon build

Edwardw771

NJRC Member
Great to see you back in the Game Merv. How long will it be till the upgrade. I vote 6 months. Anyone want to take the bet?
 
Edwardw771 said:
Great to see you back in the Game Merv. How long will it be till the upgrade. I vote 6 months. Anyone want to take the bet?


I still have the other tank Ed, I just don't see it everyday :)
 
I felt very productive today!!!


-Installed the light hangers
-Built the door and installed it
-Trimmed the light reflector
-Completed 99.8% of the plumbing
-Mounted the external pump

all in about 6 hours (off today and it was raining outside so I was stuck inside)


Here are the light hanger bars being installed. This is the base of the tank in the rear. I installed a piece of wood for it to sit on and then added another piece of wood to go in between to chock them together.


Drilling the conduit for a pilot hole


P3150295.jpg


Now the screw-


P3150296.jpg


The installed bar-


P3150297.jpg
 
Plumbing-


Finished off the 'dirty water' return:

P3150299.jpg


and completed the plumbing underneath the tank. I had to make a few changes around the original design by adding an extra valve and re-routed the location of some PVC pipes so the stand wasn't too cluttered looking.


P3150301.jpg


and some minor plumbing for the chiller feed and return-


P3150309.jpg


The parts I needed to frankenstein together for the chiller feed:

P3150310.jpg


Here's that same one being installed after cementing the other side:

P3150311.jpg
 
The semi-completed plumbing schematic


P3150314.jpg


Here's the messload of PVC hopefully creating a leak free (knocks on wood) system


P3150317.jpg


and a shot from the rear after completing the main return


P3150318.jpg


Here's my "custom" pump vibration dampener system (rubber stoppers)

P3150305.jpg


mounted to a small piece of plywood-

P3150306.jpg


and then installed in the tank as one piece-


P3150307.jpg
 
and then I shortened the length of the light bracket for the reflector since I want to create a housing for the whole thing. It was throwing me off dimensions wise, so I cut it. I'm only using 250 watters anyways, and the bulbs are relatively short-


P3150320.jpg


here's the whole fixture with the shortened butt-

P3150321.jpg


and with that, the door was put on and a full tank shot was taken!


I'm beat, gotta work tomorrow at 8am- off to bed after watching BBCA Topgear!


P3150322.jpg


P3150323.jpg


P3150325.jpg
 
looks awesome! clean!!!!!!! i'm almost done with mine as well. your putting me to shame man. i think i should quit. ahaha.

yo merv, where do you live i definitely want to end up seeing your build if you don't mind people stopping by. i feel adventurous this summer. ROAD TRIPS.
 
saltwater4life said:
Looking good,
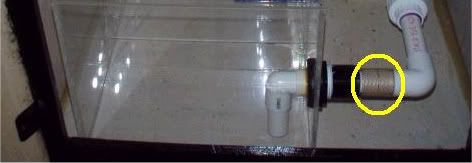
That plumbing looks really clean.


Thanks nick- OCD :D


evoIX said:
looks awesome! clean!!!!!!! i'm almost done with mine as well. your putting me to shame man. i think i should quit. ahaha.

yo merv, where do you live i definitely want to end up seeing your build if you don't mind people stopping by. i feel adventurous this summer. ROAD TRIPS.


I'm in a town called Manayunk near Center city Philadelphia- Nah, I don't mind, if you don't mind the mess the other room mates may have lying around. You shoulda stopped by my other place near AC when you coulda. When it's time to trim that tank again, you should make a trip for that one too.


Well, with the weather being nice today, I dragged the stand outside, screwed on the top and added a 2nd and 3rd lyer of gloss black paint. I also painted the arms to prevent future rust. I needed to do some minor sanding and then threw on the paint-


Three shots, during painting when the sun was in my eyes around 5:30PM, and one shot around 6:30 when the sun was ready to go down. It's a good thing the paint was semi tacky by then, cuz it got COLD real quick!


P3170327.jpg


P3170328.jpg


as the sun set, it got cold!

Last and final coat!!!!


P3170330.jpg
 
Built the housing today for the lumenarc mini. Pieces of ply left over from the build were used to make the fixture which measured 17 X 17 X 8h. The reflector fit right in, but I had to make a little notch to allow the rear of the Mogul socket through.


P3190060.jpg


P3190061.jpg


P3190062.jpg


P3190063.jpg


Next day off is going to be spent venting the hood (I might install a computer fan or two since I have them lying around), painting the hood and finally wiring it in.
 
I cleaned up my sump and wet tested it all day. I then went ahead and drilled the sump to finally get the pump all plumbed in. After everything settles, I'm gonna build me an updated sump, the one with the fuge, but for now this'll do. Pump/plumbing/Water testing next week.....


here's the sump being drilled:


Pilot hole first-


P3190066.jpg


Then the hole saw


P3190068.jpg


P3190069.jpg


all done


P3190070.jpg


For ease of breakdown and to get a little flex between the sump, pump, pipes and bulkhead, I opted to use a small piece of flex hose and two pvc sections. (Gearheads in the house think Turbo pipes and silicone tube couplers)- I have to run and get 2 sections of hose clamps.


P3190071.jpg


The flex hose holds 2 pieces of PVC together. If I ever need to replace the sump (which I eventually will), then it's simply a matter of switching out the sump, and I can reuse the bulkhead. They aren't cheap!


P3190073.jpg
 

redfishbluefish

Officer Emeritus
Officer Emeritus
Merv, fantastic Tale of the Tank. Love all these pictures…shows some real quality work being done. Great job.

I’m going external with the pump and I have a question about your pump setup. Oh, I will be using rubber stoppers for vibrations…great idea. What is that first piece you have after the bulkhead?

Mervspump.jpg


Is that some sort of vibration-reducing connector? Also, inside the sump, it appears as if the elbow and pipe goes very close to the bottom of the tank. Won’t that vacuum sand/detritus into the pump, shorting the life of the pump? Wouldn’t you be better off either going straight out of even slightly up?


Keep those pictures coming!
 
Yes, jim, I finally covered my bottom. It's starting to schafe already :D


thanks Paul, as long as what I post is being used as a help tool/resource, I will continue. Sometimes though, I feel like I'm posting pics to log it for myself....no one ever posts here anymore?!?


So, the little section you circled would be the "coupler" which is used to join the bulkhead to the main plumbing. It allows ease of sump removal or exchange as well as a flex reducer (if longer) in case the pump does not align properly with the sump.


here it is pulled out a little bit


P3200342.jpg


and pulled out and detached from both the pump and bulkhead


P3200343.jpg


another angle

P3200345.jpg


I hope that clarifies it a bit.


The sections will be kept watertight with a pair of hose clamps from the hardware store.
 
Tighten em up good. I would personally use a barbed bulkhead and a 90 degree threaded to slip fitting on the pump side. Install a barb on the thread end of the 90. You can always cut the barbs a bit shorter. I just don't trust standard pipe with hose over it. Excellent build tho, very neat
 
When the pump is shut off the sump will fill with water. What keeps the water from running out of the bulkhead when you disconnect the pipe to the pump?

You might need to add another valve or have a stopper to insert in the pipe handy.
 
Top