• Folks, if you've recently upgraded or renewed your annual club membership but it's still not active, please reach out to the BOD or a moderator. The PayPal system has a slight bug which it doesn't allow it to activate the account on it's own.

The SHELLY tank

Initial water was in a few days ago. Some of the live rock was placed in the tank to get exposed to the bacteria and/or to bring in bacteria or some organics. I tried the skimmer in the tank, but it bubbled too profusely.
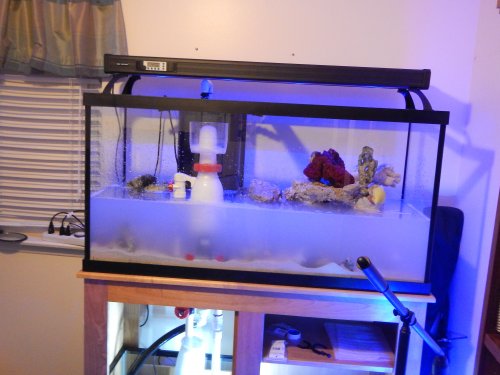
Initial water in 2.JPG

Water is in, with a little help from Ultimate corals when I ran out. The rock work is next, along with the wiring. I keep disturbing the sand to accelerate cloudiness removal.
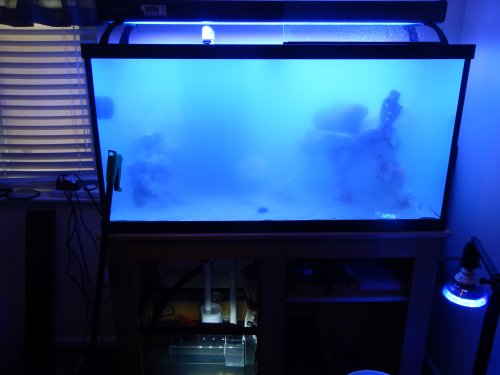
DSCN5490.JPG
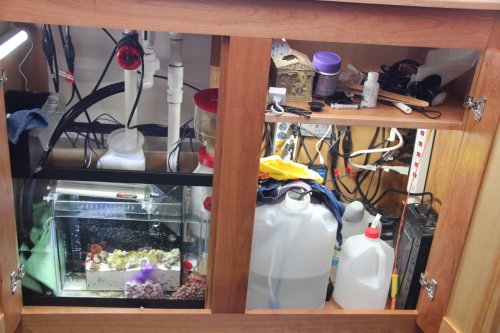
The sump water level is set with safety checks. I had my first power outage just hours afterwards, so it is good that I checked first. It took a little old tank water to get the skimmer running right. (Not overflowing).
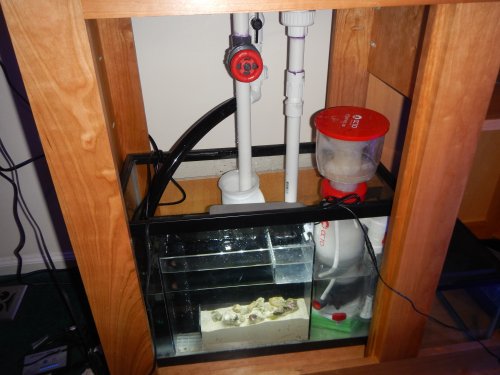
Sump level set.JPG
The gait valve has been adjusted so that the skimmer water level is just below the emergency drain. I will find out how hard it will be to keep it adjusted on a 2 drain system. p.s. There has been lots of online arguments about whether the emergency drain should be dry. I think it should if at all possible, just like I think there should be an emergency drain. I want to put a inlet cover over the emergency drain, but the locline is in the way.
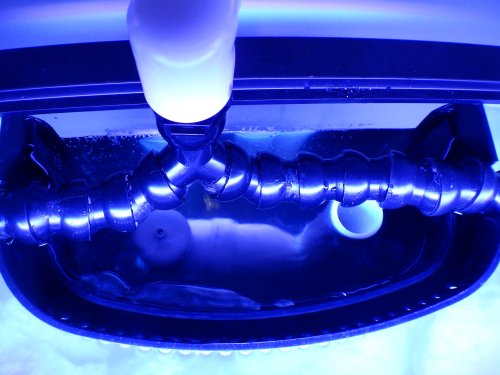
Overflow set.JPG
 
I finally moved over some of my live rock with a few of the corals, sponges, and rock anemones. This did limit me somewhat as far as positioning them so the rockwork is not as airy as I would have liked.
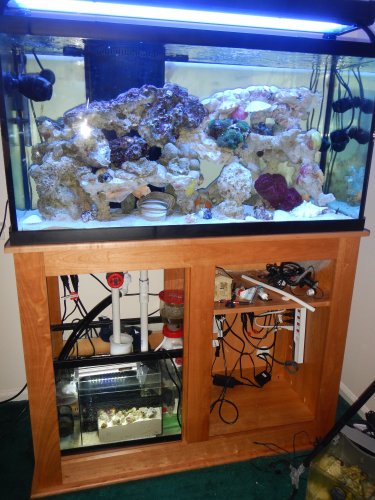
Here is the tank running on the stand with some live rock added from my old tank.
DSCN5522.JPG
Hopefully I will have the doors on within the next 2 weeks. I hope to move the fish and remaining corals before the new year.

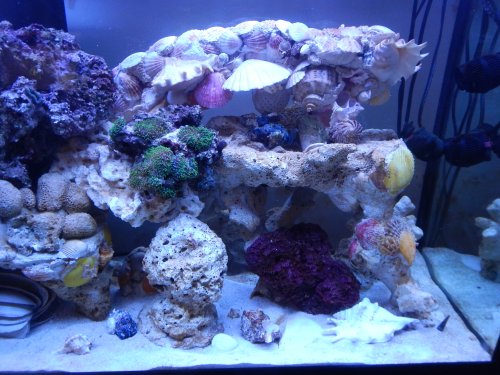
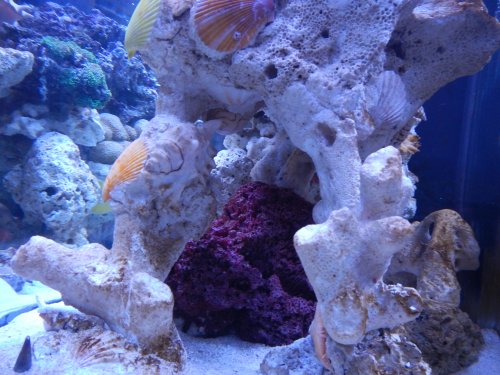
Here is the new rock side. It may not look like it in the picture, but there are a lot of swim-throughs here from front to back. The top piece made with shells reminds me of an amphipod. I expect it to be covered by coralline fairly quickly. A few colored shells give it some initial color interest.
DSCN5526.JPG
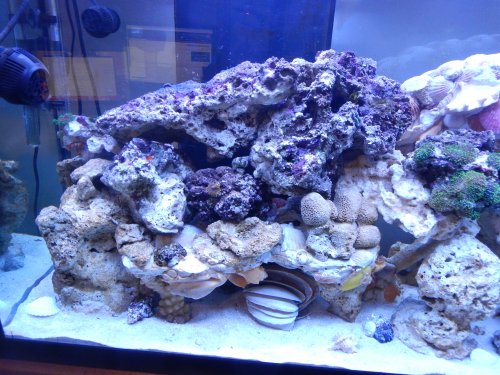
Here is the left side. The purple rock is the rock I moved over. It is more closely packed to keep it stable with existing corals facing out. Even so, there is lots of swimming room under, behind and through the rock work, even thou the dark overflow box hides it..
DSCN5528.JPG
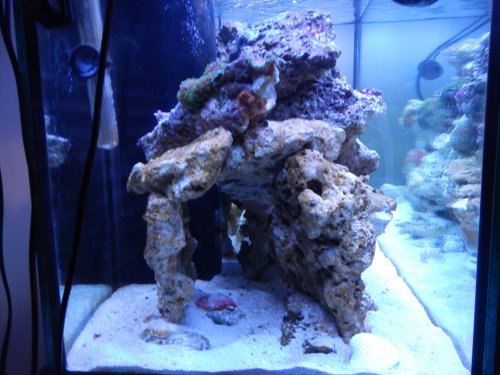
From the left side, you can see some of the openings not visible from the front.
DSCN5529.JPG
From the right you can see swimming room as well.
DSCN5534.JPG
 
Is that just miracle mud in your sump?
It is oolite, Bahamas oolite Arag-live from Carib sea. It is essentially very small calcium carbonate. When I used the refugium as a hang on refugium, I always ended up with red cyanobacteria there as it had no flow. I found out that area was meant to be a fine sand bed. I plan on keeping dragon's breath there, a few small stones, and place loose mushrooms in there to get them to anchor. There is one strand of dragon's breath in there that I hope takes root. Plus a few zoanthids.
 
I finally have fish in the tank. It took me seven hours to equalize the PH and salinity in the 2 tanks by moving water from the new tank to the old one (bucket acclimation), remove live rock while keeping the crabs, snails and corals, and to catch and move the fish. Part of this was because I was adding cold new saltwater and fresh RODI water to the new tank and wanted to give the tank time to adjust and heat back up. The hard part was catching the fish. I used an old refugium as a hiding place that I could catch the fish without a net. I caught the diamond goby in a picture. I still haven't caught the yellow wrasse. In fact, he is buried in the sand today. As Mark from Ultimate corals told me, I found a few mushrooms that had previously detached.
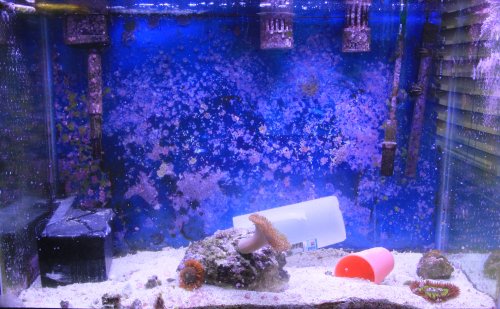
Here is my old tank today. The yellow wrasse is under the sand somewhere. A starfish is hidden as well. I have to figure out how to get the toadstool and rock anemones out as well. I will use this tank as a quarantine tank for new fish before I break it down.
new 6_edited.jpg
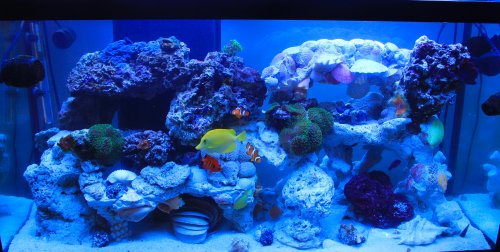
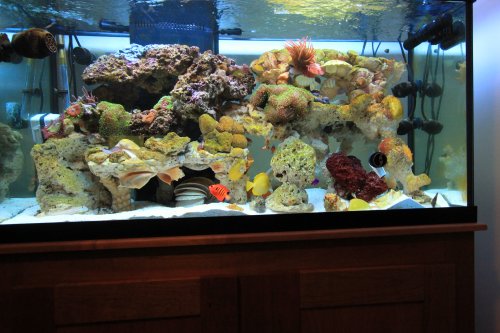
Here is the new tank full tank shot. The fish are 2 clownfish, an orchid dottyback, a diamond goby, a yellow tank, and a flame angel. The fish seem to enjoy all levels, even the clownfish. It feels like the fish have 4 times the swimming space, but not the close hiding spaces. It is only 1 foot longer, but with 2 levels of open rock work (compared to my last coral wall), it seems longer.
new 3_edited.jpg
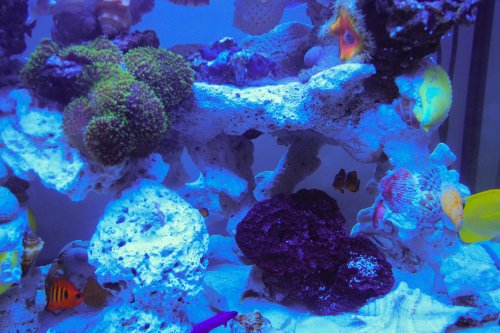
Here is a close up of 1 side. I am trying to get the orange and yellow rock anemone off the dark rock by placing it in the flow. It has moved a few inches lower. When it is off, that rock will come out. It is funny how different lighting really changed to look of a coral.
new2_edited.jpg
 
It is definitely an adventure. I learned a lot by doing it myself. First and foremost is research before you do. It is hard to adjust some things. In my case, by using a center support, I couldn't get a 30" or longer sump underneath. So everything is cramped and any add on will have to be outside the sump.
But it is a very slow process. I can see why systems like Red Sea or Waterbox are getting popular. You just ad a pump, lights, rock and after a while fish and you are done. I still have a lot left to do.
I do appreciate the tank. I was leery of Waterbox as they only have a 1 year warrantee on their tanks and I never received any answers when I asked questions. At least I could see Red Sea tanks at ACC or Tropiquarium (when it was open) to see if I liked them.
Also looking back, I might have gone with something from someone getting out of the hobby (or in this case with an extra tank). I think that would be reasonable for a beginner or intermediate reefer. You need to learn without breaking the bank.

p.s. Thank to Trio, Mark C. and Horseplay for used items (refugium, RODI, pump), rock or the tank that helped make this aquarium possible. Now I have to save up for some fish and bubble tip anemones (strictly for the enjoyment of the clownfish). Ultimate Corals helped when I ran out of water. ACC was good for advice and emergency parts. Being able to see Mark Cs and Edwin's plumbing at club meeting helped also.
 
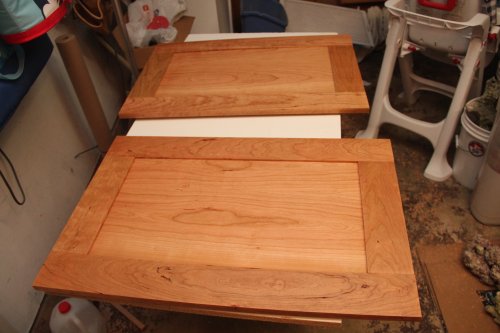
The stand is almost finished. I cut the framing and panel for the doors, glued them, and the applied tung oil and polyurethane.
IMG_8232.JPG
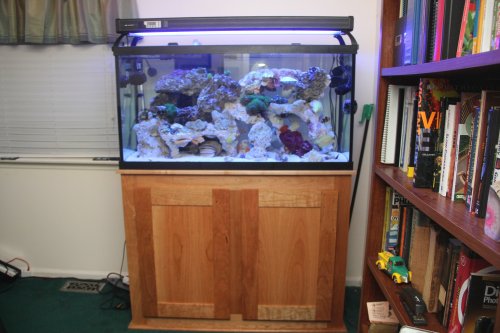
I attached the doors to the stand when dry.
IMG_8298.JPG
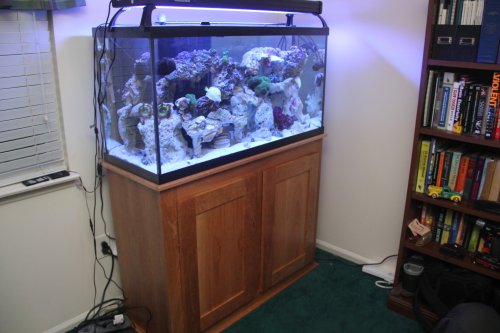
I still have a little electrical work to do. The heater will also go in the sump.
IMG_8302.JPG
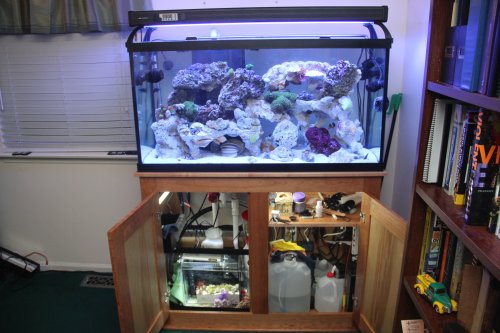
I added some magnetic mount rechargeable LED lights to the cabinet. They charge by USB which my power strip has. In an emergency, my wife knows where to find lights. Speaking of which, I survived my first power outage of a few hours.
IMG_8305.JPG
The Battery Backup is on the left. I hope to install a fan on the right to create airflow that moves air from the electric side past the sump and out the back.
IMG_8309.JPG
I still need to attach door knobs and latches as well as adjust the soft close.
 

deepblue68

POTM Winner
I like your rock work. how did you like working with the tung oil I like the shade .I have a sta d and cap to stain and I really like the way your stand came out. what brand?

Sent from my SM-G930V using Tapatalk
 
I like your rock work. how did you like working with the tung oil I like the shade .I have a sta d and cap to stain and I really like the way your stand came out. what brand?

Sent from my SM-G930V using Tapatalk
The stand is cherry, I built it myself with 1x4 Cherry and cherry plywood, The tank is Aqueon. I love Tung oil. It sinks into the wood. You basically wipe it on and it sinks in, leaving the wood with a wet look. It takes about a day per coat. You sand with 200 grit slightly between coats to remove wood fibers that swell up and stick out. I use Formsby's or something like that. With black walnut, I like to sand the first coat wet as if fills in the pores, but I didn't do it with the cherry as it is less porous. I did not use any stain. That is the color of plain new cherry which will darken with age. I topped it with polyurethane for a better surface hardness. The urethane will also darken/yellow with age. I used cherry as it is also somewhat moisture resistant. Walnut was my fist choice, but it was too expensive. Plus cherry screws well for a hardwood. I got the cherry at Boards and Beams.
 

deepblue68

POTM Winner
my stand is oak so I quess it would stay it's natural color if not stained using tung Oil?

Sent from my SM-G930V using Tapatalk
 
my stand is oak so I quess it would stay it's natural color if not stained using tung Oil?

Sent from my SM-G930V using Tapatalk
Correct, the tung oil is not a stain. I gives a harder, hand rubbed appearance, like if you coated wood with wax or wet the wood. Once the oil seeps into the grain, it hardens, making it water resistant. Think of it more as a water repellant that gives a little luster.
 
Here is the 1 month update. The tank feels like an older tank, probably because 5 of the rocks came over from the last tank and much of the rest had been curing. Plus with the same fish and many of the same corals, it doesn't feel like a beginner tank; all of the rock has some color.
IMG_8767.JPG
But there are some new aspects, besides the incorporation of shells to the container. I added a gyre for flow improvements. Hopefully it will allow me to remove some power heads for a clearer appearance. It stil needs adjustment as I do have a bare spot on the sand.
I do have one issue, the alarm in the ATO goes off because I have it in the pump chamber, and I did not make it big enough. I should be able to mitigate this by reducing the flow rate.

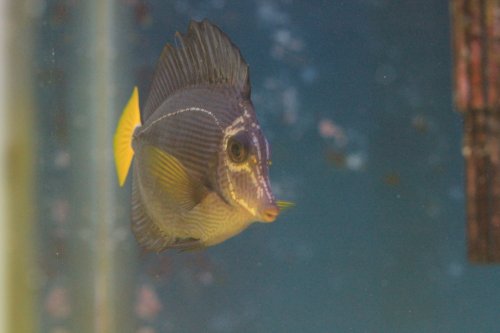
I hope to add a yellow tang that is recovering from HLLE in my old tank. Here he is when I added him tp the old tank.
IMG_8528.JPG
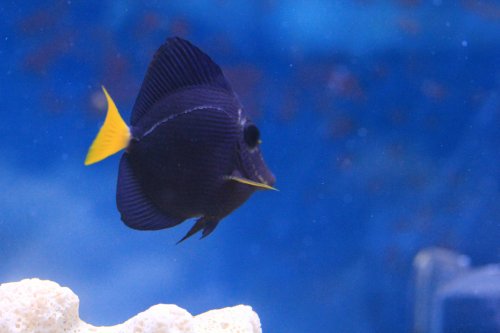
Here he is now. He still has a way to go, but is out and eating well..
IMG_8753.JPG
I also added a few bubble tip anemones. My clowns haven't found one yet. I hope to add one or two other types/colors. I hope to make them the primary focus of the tank.
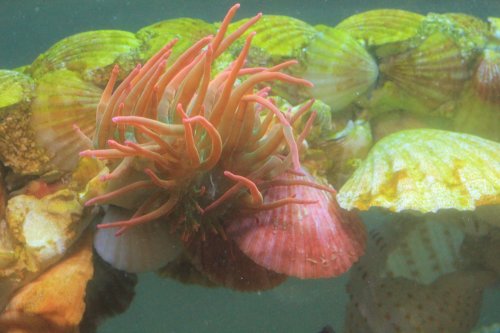
This one if from a fellow NJRC member. Its foot is inside a shell opening. It is hanging upside down.
IMG_8663.JPG
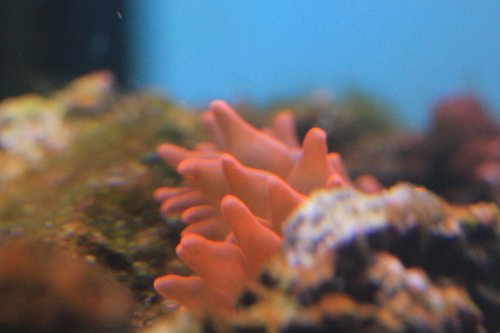
A Rose moved a few inches and is mostly out of might sight.
IMG_8553.JPG
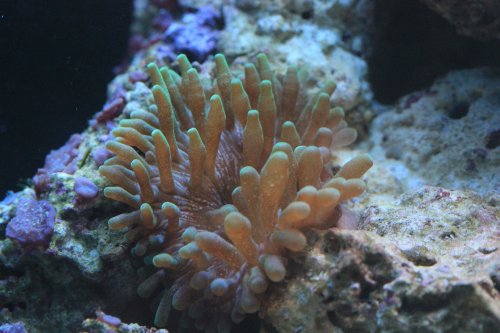
This Green one has lots a white spots.
IMG_8723.JPG
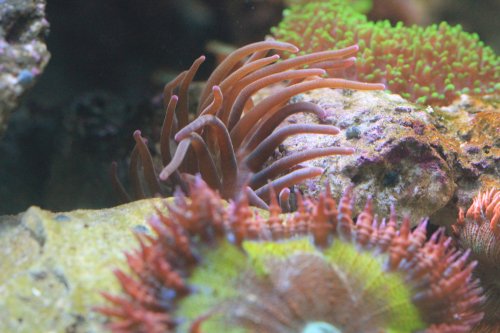
And a maroon one also from a fellow NJRC member..
IMG_8724.JPG
 
Last edited:

eholceker

NJRC Member
Awesome job with the Purple. I have no doubt it's going to recover 100% I forgot to tell you to mix in zoe, zoecon, or selcon with the food. Will do wonders for the healing process.
 
Top